
Executing the G7 Calibration
By executing the G7 calibration, you can apply the correction to the controller for enhanced color reproduction accuracy.
On the [Calibration Manager] screen, click [Start G7 Calibration] under [3. G7 Calibration].
The [Start G7 Calibration] screen is displayed.
Click [Print].
Print the color chart that is to be measured using the instrument.
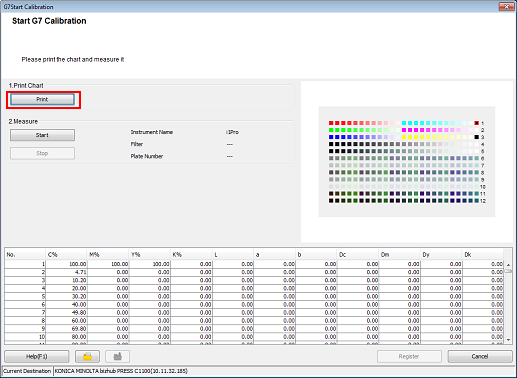
A test chart is printed.
Click [Start].
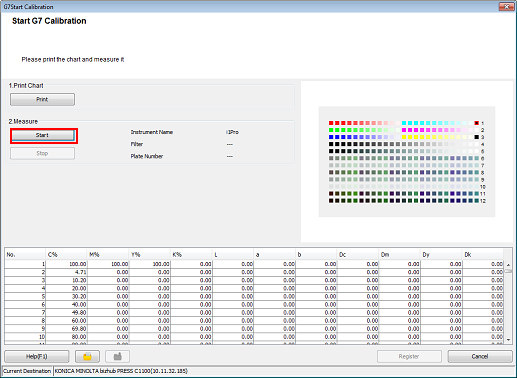
Measure the chart using the instrument. After you finish the chart measurement, click [Register].
Example: Measurement is performed using i1Pro.

By registering the acquired calibration data in the image controller, this data can be applied when printing.
Click [OK] on the [Information] screen.
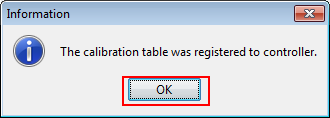
The calibration table is registered in the image controller.
On the [Calibration Manager] screen, click [Accuracy Measurement] under [3. G7 Calibration].
The [Accuracy Measurement of G7Calibration] screen is displayed.
Click [Print].
Print the color chart that is to be measured using the instrument.
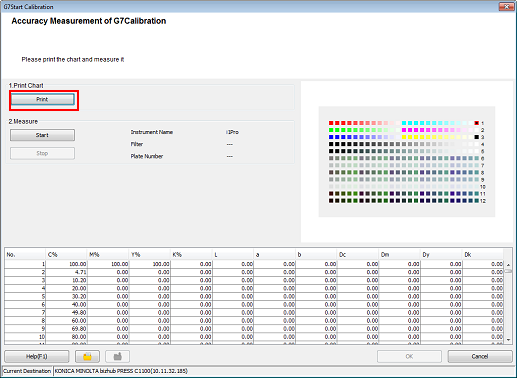
A test chart is printed.
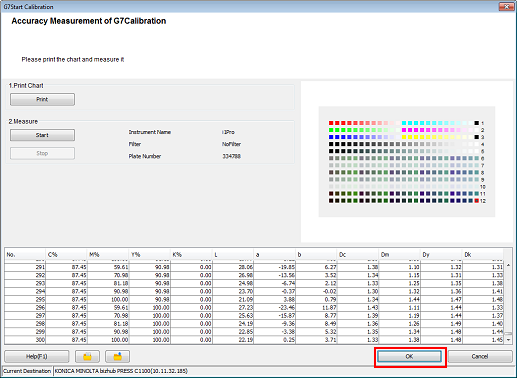
Click [Start].
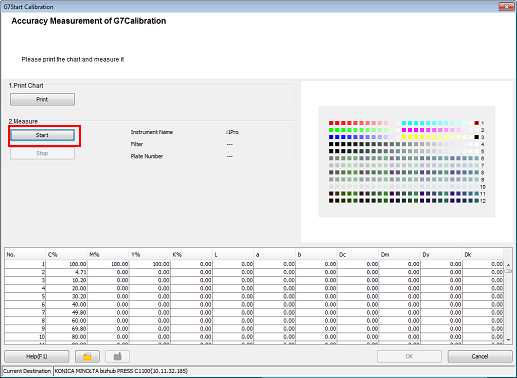
Measure the chart using the instrument. After you finish the chart measurement, click [OK].
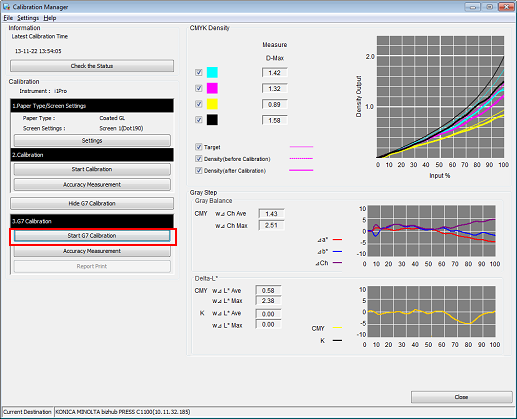
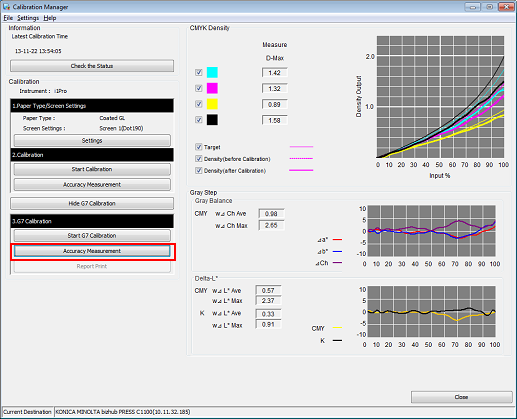
Check the measurement results (CMYK density and Gray Step) on the [Calibration Manager] screen.
When the calibration accuracy measurement is completed, the measurement results for CMYK density and Gray Step (gray balance) are displayed.
 [CMYK Density]:
Check whether the [D-Max] (maximum density) under [Measure] is in its appropriate range. Check whether the [Target] and [Density (after Calibration)] in the graph are close. [Gray Step]:
Based on the [Gray Balance], [Delta-L*], [Δa*], [Δb*], and [ΔCh] values, check the gray reproducibility.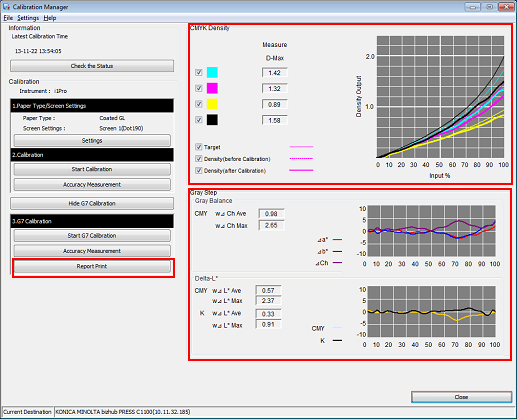
When [Report Print] is clicked, the measurement results for G7 calibration is printed.