
Both Sides Adjust: Adjusting the Horizontal/Vertical Magnification
If there is misalignment on the front/back side, or if the magnification is not as desired, you can specify your desired print magnification.
As an example, how to adjust an unwanted 1% vertical extension (in the X-Y direction) of the print image on the back side is explained below.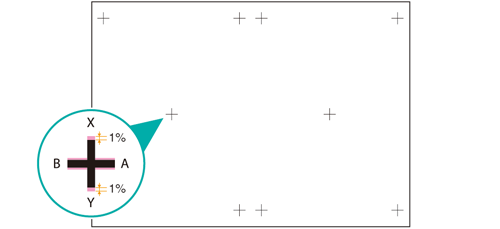
• Meaning and Purpose of Horizontal/Vertical Magnification Adjustment
When the print position on the front/back side of a print is misaligned or when the magnification is not as desired, this function allows you to reduce or enlarge the whole print area by specifying the horizontal/vertical magnification.
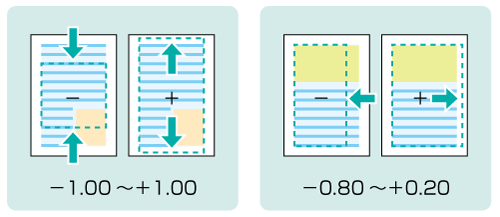
Adjustable range with this setting
• When to perform
When the front/back side printing magnification is not as desired
When the print position on the front/back side of a print cannot be adjusted as desired using the Image Shift adjustment (Both Sides Adjust: Adjusting the Image Shift)
• Intended Environment
Image Controller | Image Controller IC-602 |
* The sample screen may be different from the actual display depending on your system environment.
• Precautions
If the whole print area is shifted in any direction, make the Image Shift adjustments to adjust the print position.(Both Sides Adjust: Adjusting the Image Shift.)
Set the horizontal/vertical magnification for each paper type. It is recommended that the adjustment setting be saved as a paper profile. (Refer to Registering Paper Profile (Paper Catalog).)
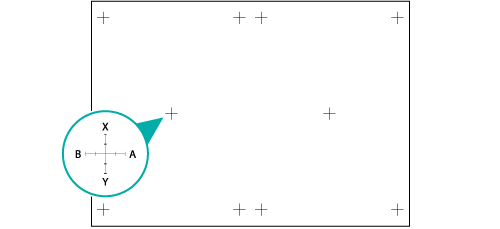
Print the original and measure the misalignment on the front and back sides using a scale magnifier.
Each page of the sample pdf document has register marks (+ marks) printed on the front and back sides.
As an example, how to adjust an unwanted 1% vertical extension (in the X-Y direction) of the print image on the back side is explained below.
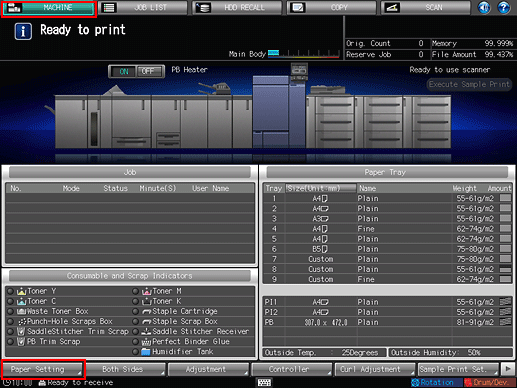
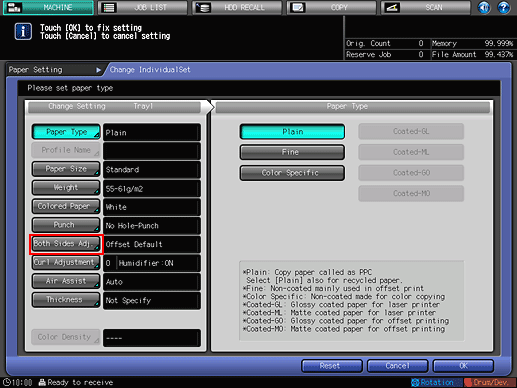
On the touch panel of the main body, press [Paper Setting] on the [MACHINE] screen.
You can also press [Paper Setting] on the [COPY] screen to display the same screen.
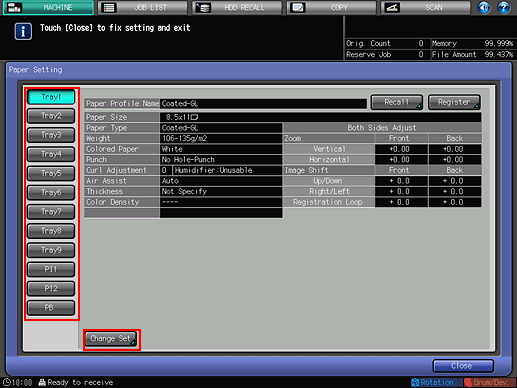
Select the tray in which the papers are loaded and press [Change Set].
Example: [Tray 1] is selected.
On the [Change IndividualSet] screen, press [Both Sides Adj.].
Select the side to adjust by pressing [Front] or [Back].
Example: Adjust the horizontal/vertical magnification for the [Back] side. To adjust the horizontal/vertical magnification of the front side, press [Front].
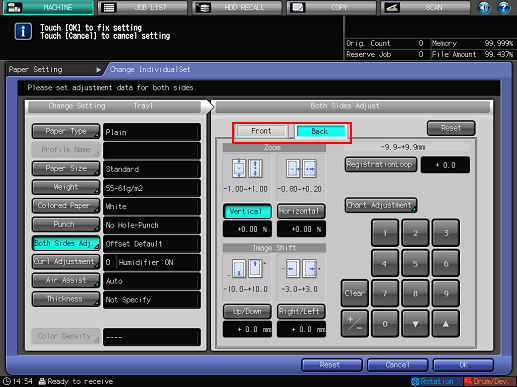
You can also press [Both Sides] on the [MACHINE] screen and select a tray on the left side.
Press [Vertical] and/or [Horizontal] under [Zoom]. Enter a value or values. When the adjustment is completed, press [OK].
Example: Adjust the vertical magnification from the [Vertical] option. To adjust the horizontal magnification, press [Horizontal].
Item
Setting
[Vertical]
1% reduction (-100)
Press [Vertical], [+/-], [1], [0], and [0] to enter [-1.00%]. This reduces the print image on the back side by 1%.
After adjusting the settings, press [OK].
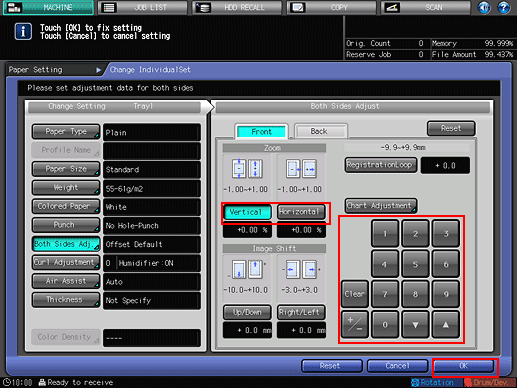
Press the keypad on the screen to set the value.
Use [+/-] to specify the value to be positive or negative.
The values are in 0.01% increments. (1 = 0.01%)
Press [
 ] to increment the value and [
 ] to decrement the value.
Print the original again and check the print position.
Repeat the above steps until the desired print positions on the front and back sides are obtained.

As a general rule, set the horizontal/vertical magnification for each paper type. It is recommended that frequently used paper settings be saved as a paper profile. (Refer to Registering Paper Profile (Paper Catalog).)