
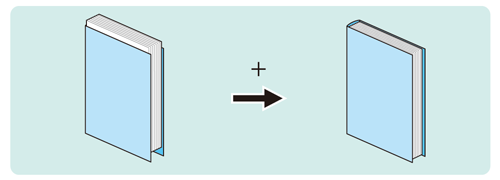
Perfect Binding: Adjusting the Cover Up/Down CD Width
If there is misalignment of the body sets and cover paper in the cross paper-feed direction, adjust the width to reduce the misalignment and curve.
The sizes referred to in this section are those of body sets corresponding to cover sizes.
As an example, this section explains how to adjust an unwanted 1 mm protrusion of the body sets from the top of the cover paper.
• Meaning and Purpose of Cover Up/Down CD Width Adjustment
When making perfect-bound books, if there is misalignment of the body sets and cover paper in the cross paper-feed direction, this function allows you to adjust the width to reduce the misalignment and curve by specifying the desired value.
Negative values reduce the curve.
Positive values reduce the misalignment.
• When to perform
When the body sets and the cover paper for perfect binding are misaligned in cross paper-feed direction
• Intended Environment
Image Controller | Image Controller IC-602 |
Mounted finisher | Perfect Binder PB-503 |
* The sample screen may be different from the actual display depending on your system environment.
Check for misalignment 'a' between the body sets and the cover paper in cross paper-feed direction.

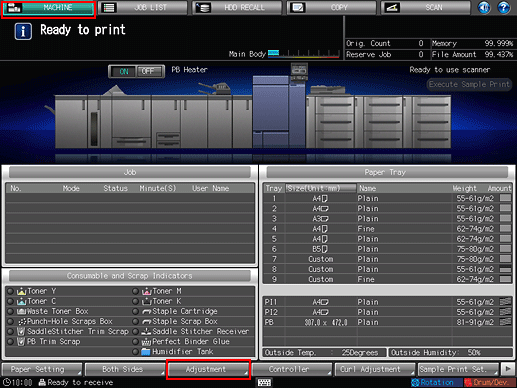
On the touch panel of the main body, press [Adjustment] on the [MACHINE] screen.
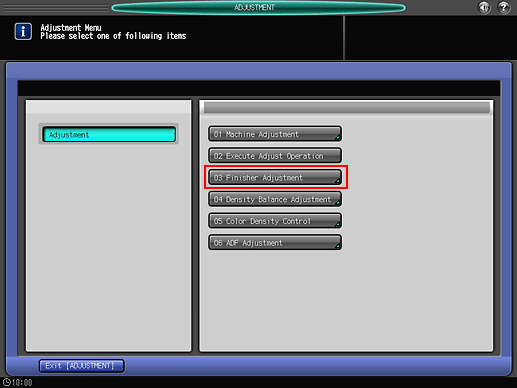
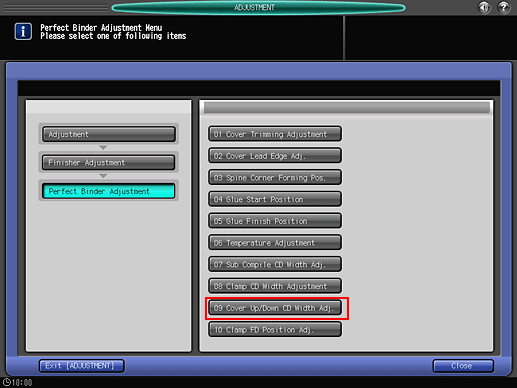
Press [Finisher Adjustment] on the [Adjustment Menu] screen.
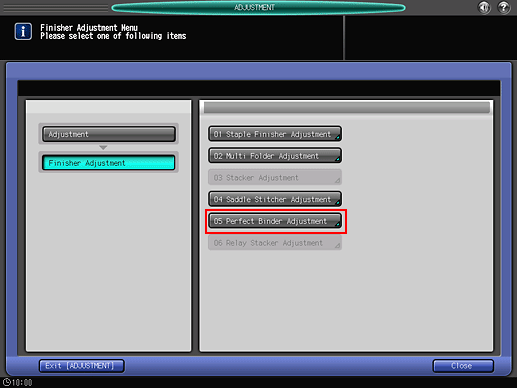
Press [Perfect Binder Adjustment] on the [Finisher Adjustment] menu.
Press [Cover Up/Down CD Width Adj.] on the [Perfect Binder Adjustment] menu.
Press [Perfect Binder Tray]. Enter the adjustment value and press [Set].
Here in this example, the cover papers are loaded in the [Perfect Binder Tray].
Example: Reduce a 1 mm misalignment for [A4].
Item
Setting
[Perfect Binder Tray]
Reducing the 1 mm misalignment (10)
Press [1], [0], and [Set] to enter the value [10]. This reduces the misalignment by 1 mm.
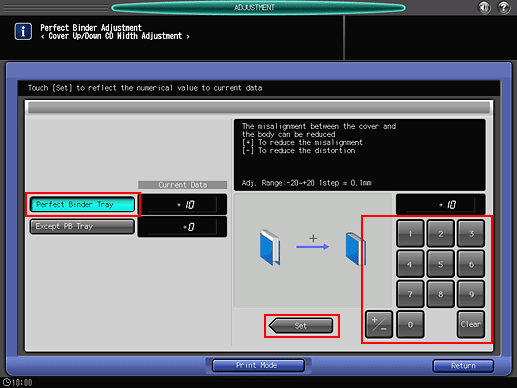
Press the keypad on the screen to set the value.
Use [+/-] to specify the value to be positive or negative. Set a positive value to reduce misalignment. Set a negative value to reduce curve.
The values are in 0.1 mm increments. (1 = 0.1 mm)
Press [Except PB Tray] if the cover papers are loaded in a tray other than the perfect binder tray.
Pressing [Print Mode] switches the mode to print mode, which allows you to print the original.
Print the original again in perfect binding and check the alignment between the body sets and the cover paper.
Repeat the above steps until there is no misalignment between the body sets and the cover paper.