Perfect Binding: Adjusting the Spine Corner Forming Position
You can adjust the cover paper of a perfect-bound book so that the spine is flat.
As an example, this section explains how to adjust the spine when it is 2 mm dented on the forward side.
• Meaning and Purpose of Spine Corner Forming Position Adjustment
When the spine of a perfect-bound book is not even in the scanning direction or is rounded or dented, this function allows you to adjust the spine so that it is flat, by specifying the desired value. Select the forward side of the spine ([Up/Down Forward Adj.]) or rear side of the spine ([Up/Down Rear Adj.]) for adjustment.
Negative values make the spine straighter.
Positive values make the spine rounder.
An example of adjusting the forward side of the spine ([Up/Down Forward Adj.]) is covered below.
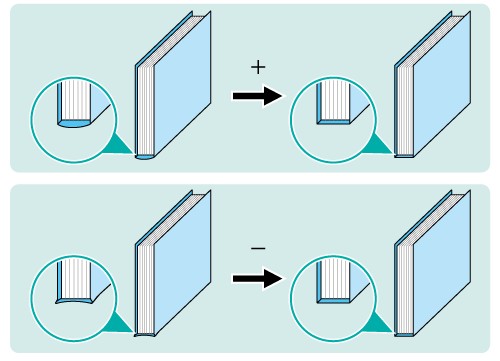
• When to perform
When the spine of a perfect-bound book is not even in the scanning direction or is rounded or dented
• Intended Environment
Image Controller | Image Controller IC-602 |
Mounted finisher | Perfect Binder PB-503 |
* The sample screen may be different from the actual display depending on your system environment.
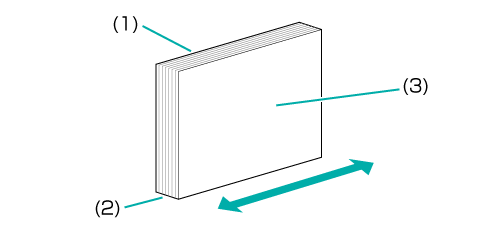
Check the spine forming (straightness/roundness) of the spine (2) of the perfect-bound book.
Check whether the forward side of the spine (2) is rounded or dented in the direction of the arrow shown in the figure below (horizontal scanning direction).
(1) Left cover / (2) Spine / (3) Right cover
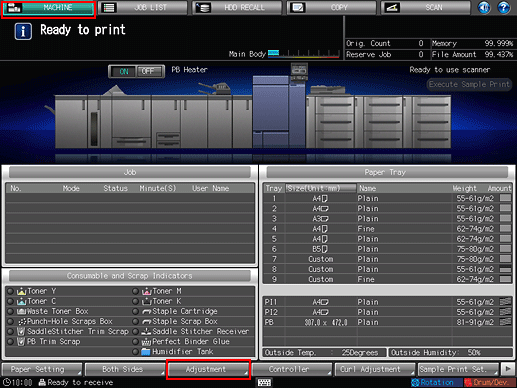
On the touch panel of the main body, press [Adjustment] on the [MACHINE] screen.
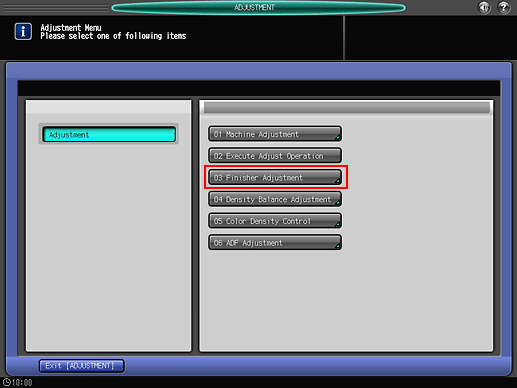
Press [Finisher Adjustment] on the [Adjustment Menu] screen.
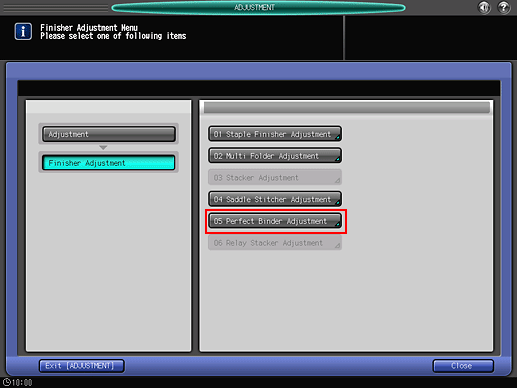
Press [Perfect Binder Adjustment] on the [Finisher Adjustment] menu.
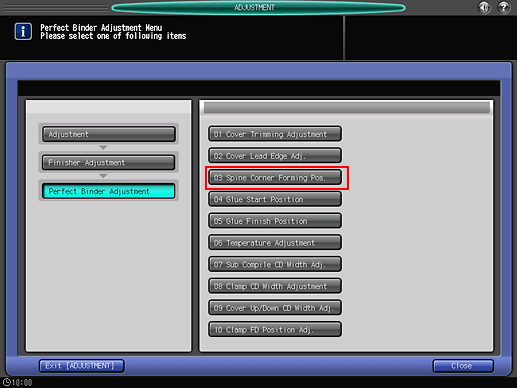
Press [Spine Corner Forming Pos.] on the [Perfect Binder Adjustment] menu.
Press [Up/Down Forward Adj.]. Enter the adjustment value and press [Set].
Example: The forward side of the spine is extended (rounded) by 2 mm.
Item
Setting
[Up/Down Forward Adj.]
Rounding the forward side of the spine by extending it 2 mm (-20)
Press [+/-], [2], [0], and [Set] to enter the value [-20]. This extends the forward side of the spine by 2 mm, straightening the dent.
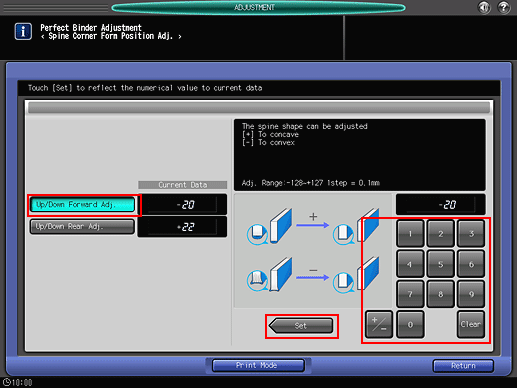
Press the keypad on the screen to set the value.
Use [+/-] to specify the value to be positive or negative. Positive values make the spine straighter, while negative values make the spine rounder.
The values are in 0.1 mm increments. (1 = 0.1 mm)
To adjust the rear side of the spine, select [Up/Down Rear Adj.] and enter a value.
Pressing [Print Mode] switches the mode to print mode, which allows you to print the original.
Print the original again in perfect binding and check the spine (2) forming.
Repeat the above steps until the spine (2) is flat.

