Measuring the Calibration Accuracy and Checking the Results
After executing controller calibration, measure the calibration accuracy.
After measurement, check the CMYK density, gray balance, and other results to determine whether advanced controller calibration is necessary.
Execute the controller calibration with Color Centro.
For details about controller calibration operation, refer to Image Quality: Executing the Controller Calibration.
If you are using registered calibration data or current calibration data without executing calibration, start from Step 2.
On the [Calibration Manager] screen, click [Accuracy Measurement] under [2. Calibration].
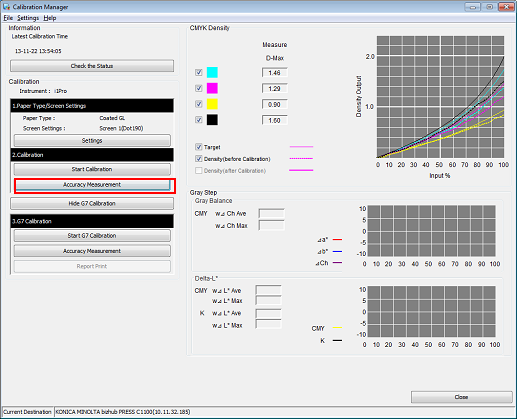
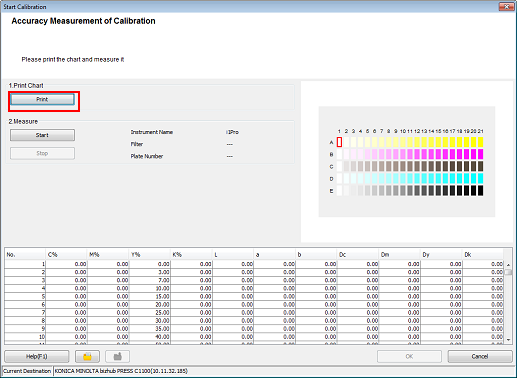
The [Accuracy Measurement of Calibration] screen is displayed.
Click [Print].
Print the color chart that is to be measured using the instrument.
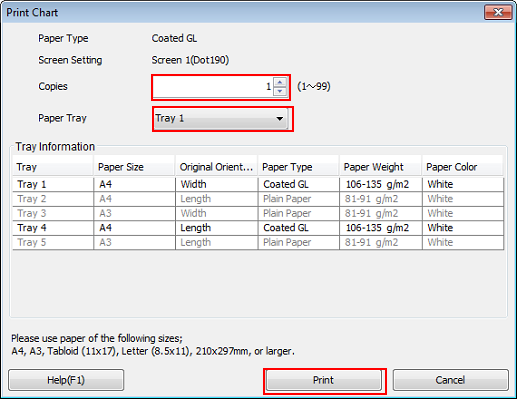
On the [Print Chart] screen, set the [Copies] and [Paper Tray]. After setting, click [Print].
Example:
Item
Setting
[Copies]
1
[Paper Tray]
Tray 1
A test chart is printed. On the chart, Print Date, Output Number of Sets, and No. are printed.
Connect the instrument to the computer and click [Start].
Example: The i1Pro is connected.
The device driver for the instrument must be installed on your computer beforehand. For details, refer to the instrument's manual.
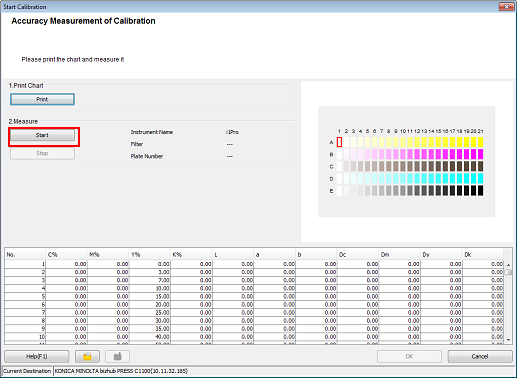
Calibration accuracy measurement starts.
Measure the chart using the instrument.
For details about the chart measurement operation, refer to Image Quality: Executing the Controller Calibration.
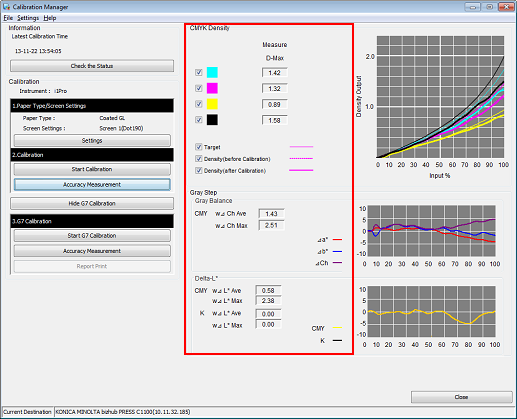
Check the measurement results (CMYK density and Gray Step) on the [Calibration Manager] screen.
[CMYK Density]:
Check whether the [D-Max] (maximum density) under [Measure] is in its appropriate range. Check whether the [Target] and [Density (after Calibration)] in the graph are close.
[Gray Step]:
Based on the [Gray Balance], [Delta-L*], [Δa*], [Δb*], and [ΔCh] values, check the gray reproducibility.
Check the measurement results, and if necessary, proceed to advanced controller calibration (Executing the G7 Calibration).
