Editing Spot Color Information with Color Centro
Start Color Centro, and edit a spot color.
Start Color Centro and log in to the machine. ( Refer to Start Color Centro.)
The Color Centro launcher screen is displayed.
Click [Spot Color] on the launcher screen.
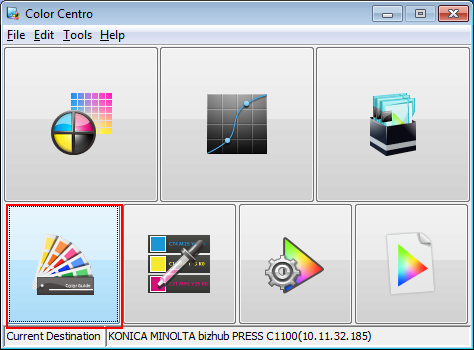
The [Spot Color] screen is displayed.
Click [Table].
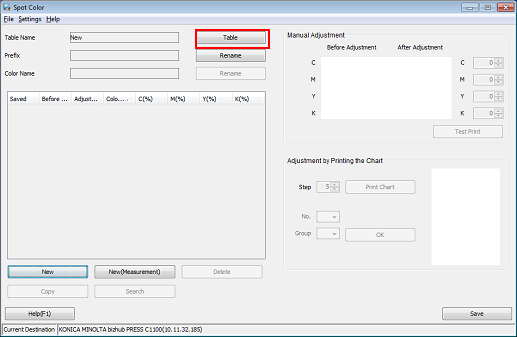
The [Spot Color Table Management] screen is displayed.
Select [Controller] from the tree on the left side of the screen. From the right side of the screen, select the spot color table that you want to edit, and click [Open].
Example: [Controller] is selected to open the color table [PANTONE].
The default spot color table has an asterisk (*) at the end of its name.

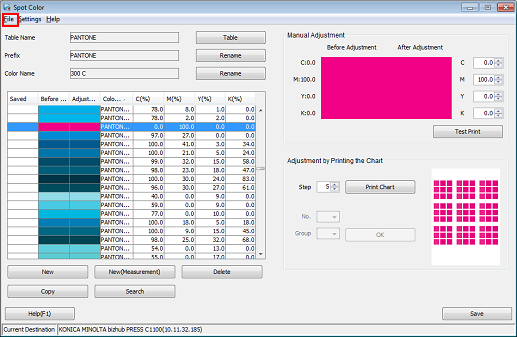
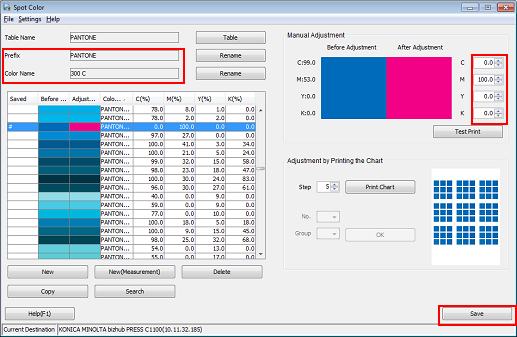
The spot colors in the spot color table are listed on the [Spot Color] screen.
From the list, select the spot color that you want to edit.
Example: "PANTONE 300C" is selected.
The selected spot color name is displayed on the [Spot Color] screen.
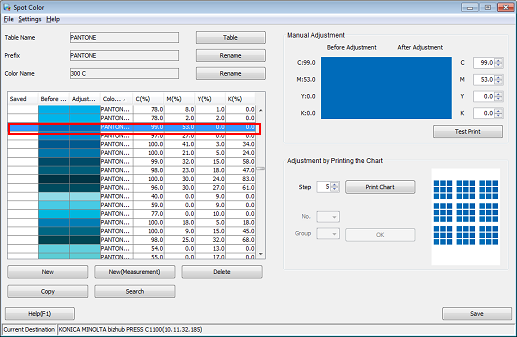
Set the spot color's CMYK value. Check the [Prefix] and [Color Name], and click [Save].
The colors being adjusted are displayed in the [After Adjustment] column.
Example: The spot color's CMYK value is set to "M100%."
Item
Setting
[C][Y][K]
[0.0]
[M]
[100]

When printing, the spot color name is presented as [Prefix] + [Color Name], for example, like "PANTONE 300C" displayed in [Color Name] on the spot color list. For this reason, you need to match the color name to be specified on the application side with the machine's "Prefix + Color Name." If the two names are not the same, the specified spot color cannot be used.
The [Table Name] can be different from the [Prefix].
The same [Prefix] can be used for multiple spot color tables. If the same color name existed among multiple spot color tables, the spot color table that is listed higher on the [Spot Color Table Management] screen (Step 4) is prioritized.
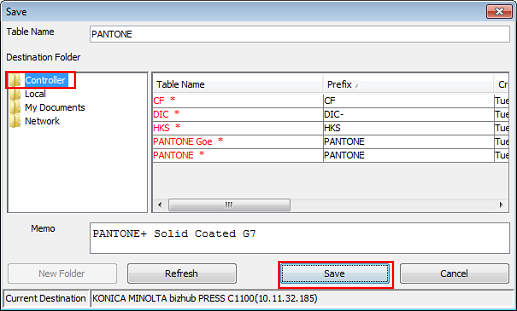
The Spot Color Table [Save] screen is displayed.
After checking the spot color table name, select a [Destination Folder] and click [Save].
To use the edited spot color, save the spot color table to [Controller]. Selecting [Controller] saves the spot color to the image controller.
Example: The name of the spot color table is "PANTONE" (unchanged).
If you edit and save the default spot color table, it is saved with a name without the asterisk.
You can save multiple spot color tables with the same name.
You can change the priority of tables on the [Spot Color Table Management] screen (Step 4). After selecting a table from the list, click
 /
/  under [Priority] at the bottom left.
After checking that the spot color is saved, close the screen by selecting [Close] from the [File] menu.