Installing Job Centro : Macintosh
Tips
Close all running applications before installation or uninstallation.
If nothing is displayed on the desktop when a CD-ROM is inserted in Mac OS, the mount setting may be disabled. Check with the Preferences of Finder if the mount setting is disabled.
Insert the installation CD-ROM into the CD-ROM drive of the computer.
supplementary explanationMake sure that the installer starts, and then go to Step 2.
supplementary explanationIf the installer does not start, double-click JobCentro2.0.pkg on the CD-ROM.
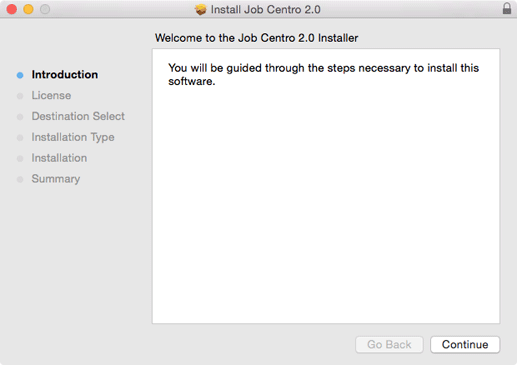
Click Continue.
The Software License Agreement screen is displayed.
Select a language.
Confirm the content. When you agree all the terms, click Continue.
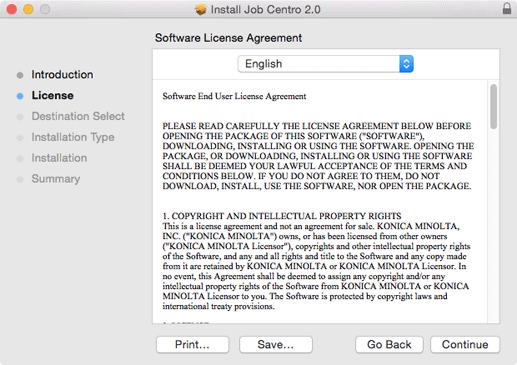
supplementary explanationIn the language display box, you can change the language used with the license agreement as required.
When the confirmation dialog box is displayed, click Agree.
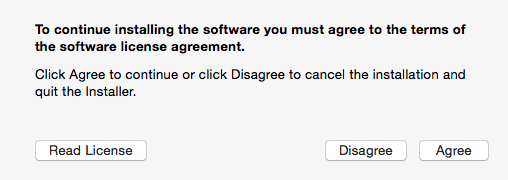
supplementary explanationIf you select Disagree, it causes an installation failure.
Select the destination to install Job Centro, then click Continue.
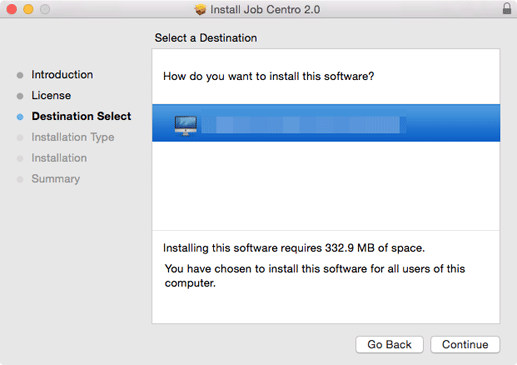
supplementary explanationBy default, Job Centro is installed to one of the following locations.
/Applications/MFP-Printer Utility/Job Centro2.0
supplementary explanationThis screen may not be displayed depending on the operating environment of the computer. In such a case, proceed to step 6.
Click Install.
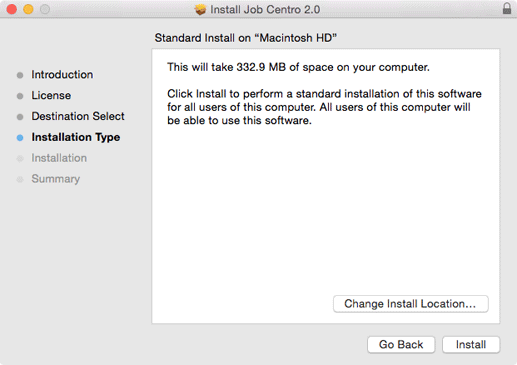
supplementary explanationTo change the install location, click Change Install Location. When the screen in step 5 is displayed, specify an install location and click Continue.
supplementary explanationIf the screen in step 5 is not displayed, you cannot change the install location. Press Install.
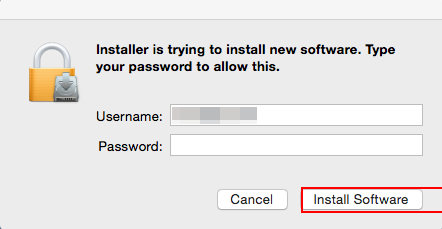
If you are prompted to enter the password, enter the password, and then click Install Software.
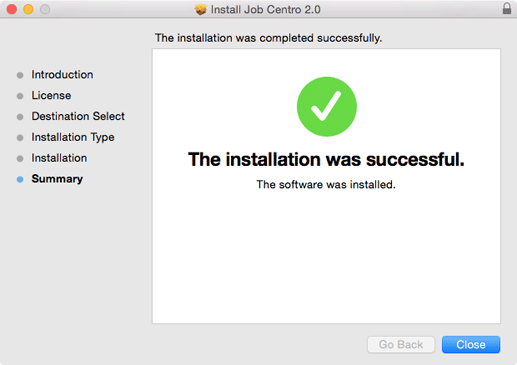
When the installation complete screen is displayed, click Close.