
Creating a Profile: Color Centro
Start Color Centro, and create and save a printer profile.
•Intended Environment
Operating system | Windows 7 |
Application | Color Centro 2.1 |
Printer driver | PS Plug-in Driver |
Image controller | Image Controller IC-604 |
Colorimeter | i1Pro |
Paper type and thickness | Coated GL 128 g/m2 / 33 lb Bond (A3, Loaded in Tray 1) |
* The sample screen may be different from the actual display depending on your system environment and application version/revision.
Start Color Centro and log in to the machine. (Refer to Start Color Centro.)
The Color Centro top screen is displayed.
Click Profile Management on the top screen.
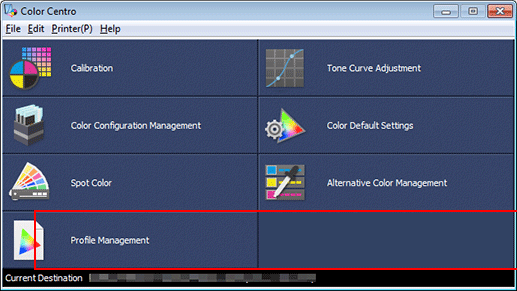
The Profile Management screen is displayed.
Click Printer Profile, and then click New.
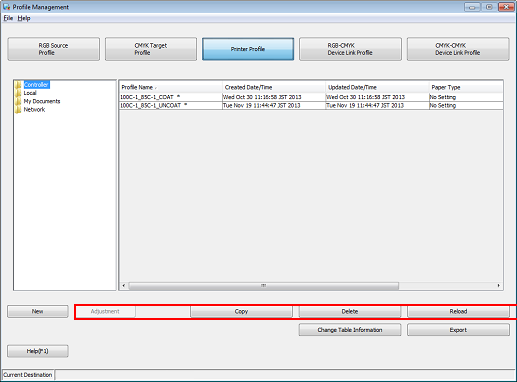
The Color Centro Profiler wizard starts and displays the Confirmation of procedure screen.
On the Confirmation of procedure screen, click Next.
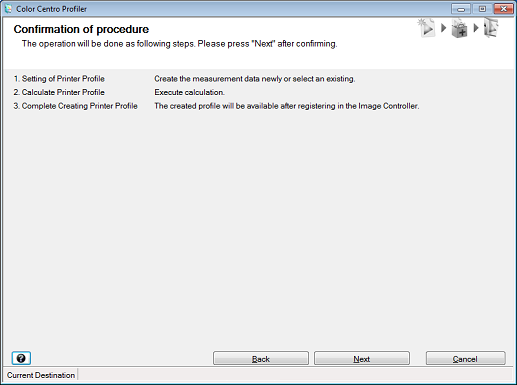
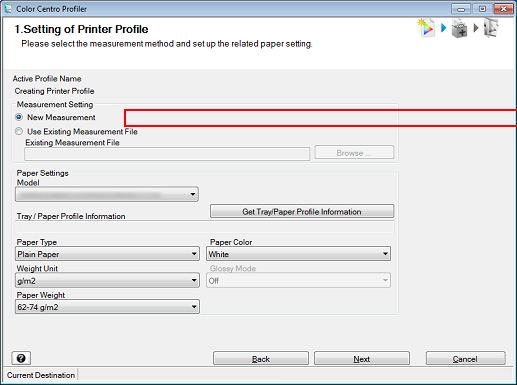
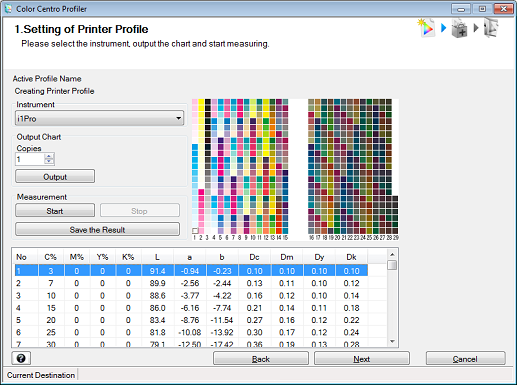
1. Setting of Printer Profile screen is displayed.
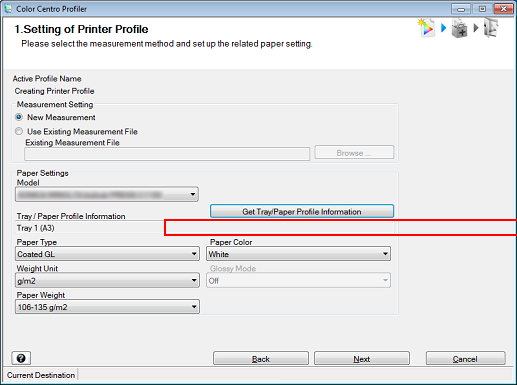
Select New Measurement under Measurement Setting and click Get Tray/Paper Profile Information.
supplementary explanationTo make a new measurement with the instrument, select New Measurement.
Example: Click Get Tray/Paper Profile Information to use the paper setting for Tray 1.
Select Get Tray Information on the Get Paper Information screen. After selecting the tray in which the papers are loaded, click OK.
Example: Tray 1 is selected.
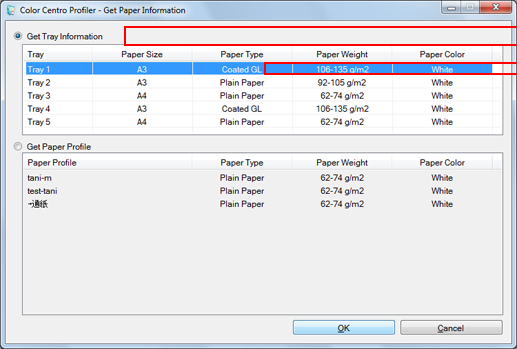
After checking that the selected tray is displayed under Tray/Paper Profile Information, click Next.
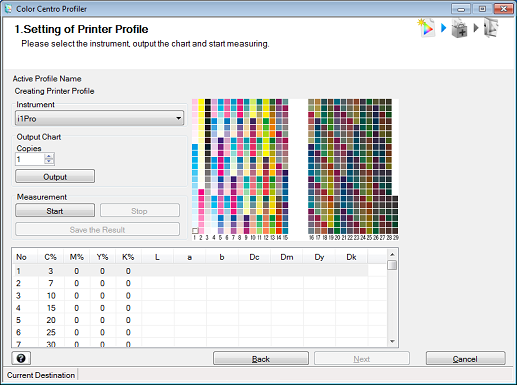
For Instrument, select the instrument to be used. Set Copies and click Output.
Print the color chart that is to be measured using the instrument.
Example: i1Pro is selected with 1 copy.
Item
Setting
Instrument
i1Pro
Copies
1
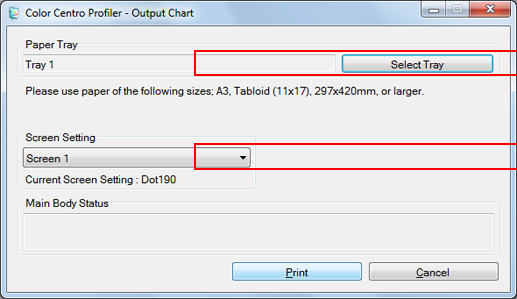
The Output Chart screen is displayed.
Set the following items on the Output Chart screen. After setting, click Print.
Item
Setting
Paper Tray
Tray 1
Click Select Tray and select a tray.
Screen Setting
Screen 1 (default)
A test chart is printed.
Connect the instrument to the computer.
supplementary explanationThe device driver for the instrument must be installed on your computer beforehand. For details, refer to the instrument's manual.
Stack 10 sheets of blank paper whose type is the same as that of the paper where chart has been printed, and place the printed chart on top of it.
supplementary explanationTo eliminate the influence of the color of the table, place 10 sheets of paper of the same type as the chart underneath the chart to be measured.
Click Start.

When the following message is displayed, click OK.
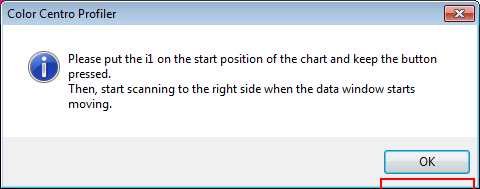
Press and hold the button on the instrument. When the bottom part of the screen starts scrolling, while holding the button, slide the instrument over the chart toward the right from the top left patch.
Measure the rest of the patch rows by sliding the instrument the same way.
After you finish the chart measurement, click Next on the 1. Setting of Printer Profile screen.
When the chart measurement is completed, the measurement result is displayed at the bottom of the 1. Setting of Printer Profile screen.
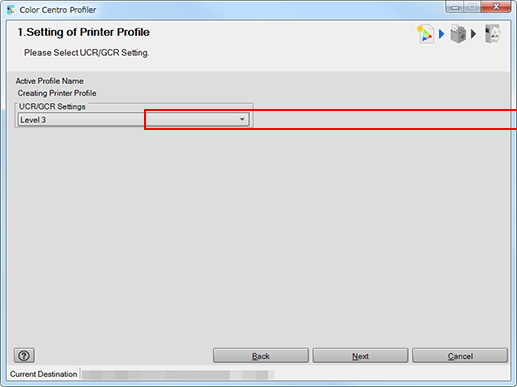
Check the UCR/GCR Settings and click Next.
Example: Level 3 remains set here.
supplementary explanationSelect a Level of UCR and GCR
Enter a profile name under Printer Profile Name. If necessary, specify the Destination Folder and click Next.
To specify the Destination Folder, click Browse and select a location to save the file.
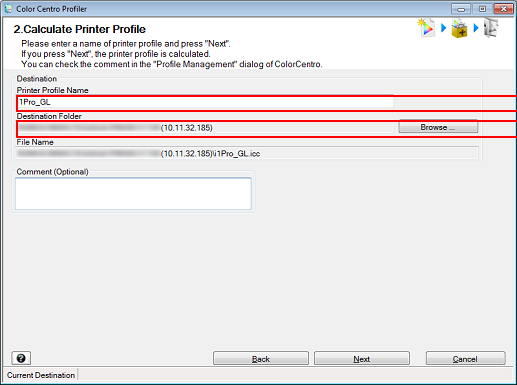
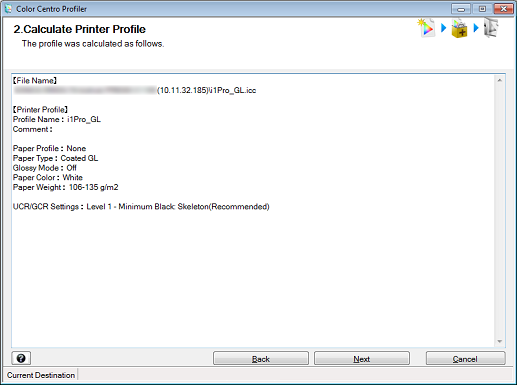
After the message, Calculating is displayed, the 2. Calculate Printer Profile screen is displayed.
Check the content and click Next.
The 3. Complete Creating Printer Profile screen is displayed.
Click Finish.
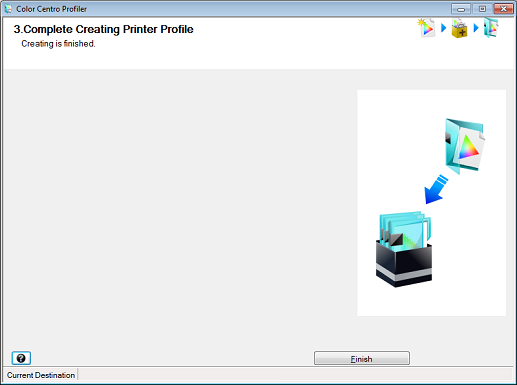
The created printer profile is saved.