What Is [Insert Sheet]?
Overview
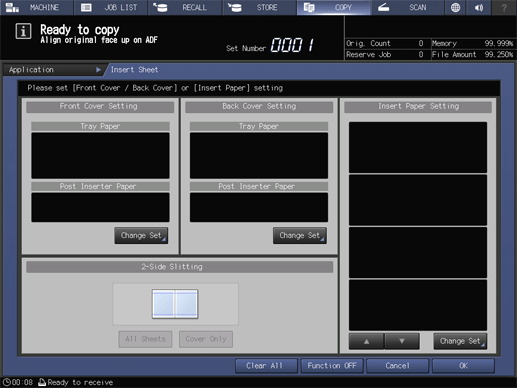
This function can print with a cover (front or back) and insertion paper attached when copying a multi-page original.
This function allows you to select whether or not to print on covers or insertion paper, or leave them blank. You can also use paper different from the text.
The paper used can also be fed from the Post inserter.

Setting Items
Screen access
Touch panel - [COPY] - [Application] - [Insert Sheet]
Setting item | Description |
|---|---|
[Front Cover Setting] | Set the cover (front or back side). For details, refer to [Front Cover Setting] / [Back Cover Setting]. |
[Back Cover Setting] | |
Select a paper tray for insertion paper, and configure the print setting. | |
[2-Side Slitting] | Set [2-Side Slitting] to slit both edges of paper. [All Sheets]: Trims both edges of all sheets. [Cover Only]: Trims both edges of only the cover. [2-Side Slitting] can be set when Saddle Stitcher SD-513 with Trimmer Unit TU-503 is mounted and also [2-Side Slit] is set in [Output Setting]. For details, refer to [2-Side Slit]. |
[Clear All] | Returns all the settings to the default. |
[Function OFF] | Turns the function off while maintaining the set information. |
Setting Procedure (Setting [Insert Sheet])
When using the Post inserter, load the paper into the tray of the Post inserter.
Set all the paper loaded here to the same size.
Before loading paper, be sure to check the paper information in each tray and use the paper set for each tray.

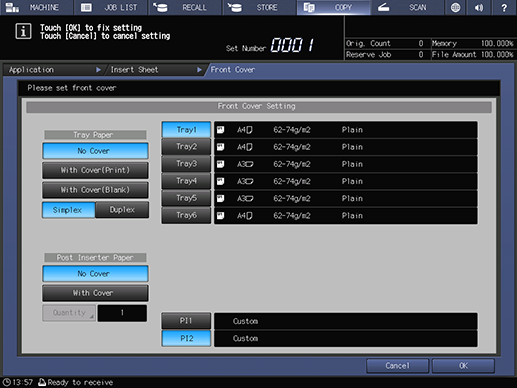
To attach the front cover, press [Change Set] in [Front Cover Setting]. To attach the back cover, press [Change Set] in [Back Cover Setting].


For details, refer to [Front Cover Setting] / [Back Cover Setting].


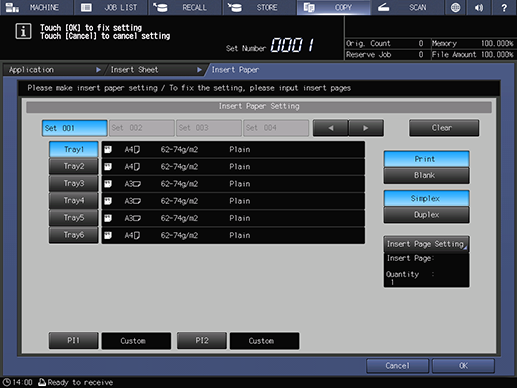
To attach insertion paper, press [Change Set] in [Insert Paper Setting].


For details, refer to [Insert Paper Setting].
To change to a new condition, select the tray and set whether to print the cover and the print side. Then, set the insertion page in [Insert Page Setting].

The insertion paper conditions are registered in a new setting key.
The insertion paper is set.
[Insert Sheet] is set.
 in the upper-right of a page, it turns into
  and is registered as a bookmark.