
TCP/IP Setting
Click [TCP/IP Setting] - [TCP/IP Setting] in the [Network] tab to display this screen.
The setting contents are the same as those accessed by selecting [Network Setting] - [NIC Setting] - [TCP/IP Setting] in Administrator Setting.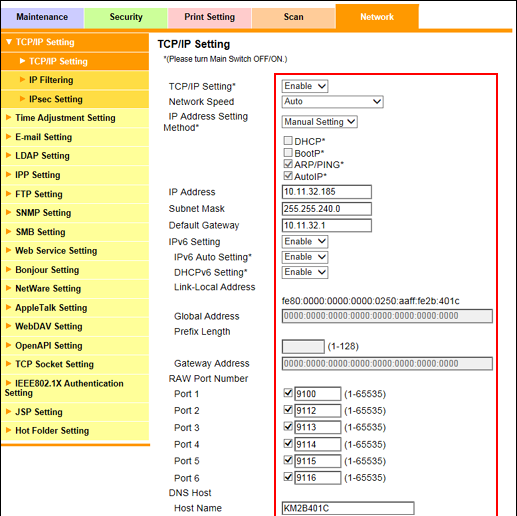
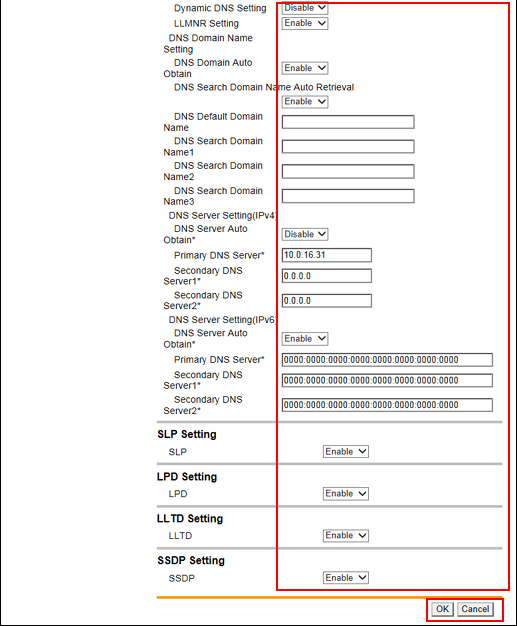
This screen allows you to make TCP/IP settings of the image controller NIC.
Select the desired option from the drop-down list provided for each setting item. To make an entry, click the text box to type in.
For details about each item, refer to Controller NIC Setting Menu: Configuring the Network Information of the Controller.
Click [OK]. Clicking [Cancel] cancels the setting.
Click [OK] on the setting complete screen.
If you have changed any setting with an asterisk (*), turn the machine power off then on.
If you have changed the IP address or IP Address Setting Method, the following screen is displayed.

Access the new IP address.