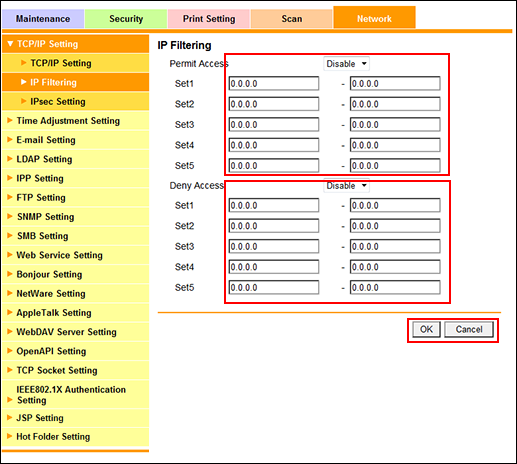
IP Filtering
Click [TCP/IP Setting] - [IP Filtering] in the [Network] tab to display this screen.
The setting contents are the same as those accessed by selecting [Network Setting] - [NIC Setting] - [TCP/IP Setting] in Administrator Setting.
This screen allows you to make the settings for IP filtering.
Select [Enable] from the [Permit Access] drop-down list to grant access permissions.
Enter a desired range of the address to be permitted into the [Set] text boxes. Up to 5 ranges can be specified.
Only one IP address, not a range, can also be specified in three ways.
Example: Giving permission to 192.168.11.22 only
192.168.11.22 - 0.0.0.0
0.0.0.0 - 192.168.11.22
192.168.11.22 - 192.168.11.22
To deny accesses, select [Enable] from the [Deny Access] drop-down list.
Enter a desired range of the address to be denied into the [Set] text boxes. Up to 5 ranges can be specified.
In the same ways as giving permission, only one IP address can also be denied.
Click [OK]. Clicking [Cancel] cancels the setting.
Click [OK] on the setting complete screen.
