
Settings on the Receiving End Computer
Required Environment
The following environment is required.
Connected to a network via TCP / IP.
You must have created a shared folder to serve as the scan data storage destination.
Creating a Shared Folder on the Windows Desktop
Create shared folders on a Windows Computer. Scan data from the system is sent to the shared folders and shared with the client computer.
Check the existing user accounts that will have access to the shared folder before setting up the folder, or create new accounts as necessary. User accounts can be either a "local user account" or a "domain user account". "Domain user accounts" can also be configured to allow the transmission of data, but this might not always work properly depending on the network environment being used.
Procedure
Example: Create a "Scan-SMB" folder on the Windows desktop.
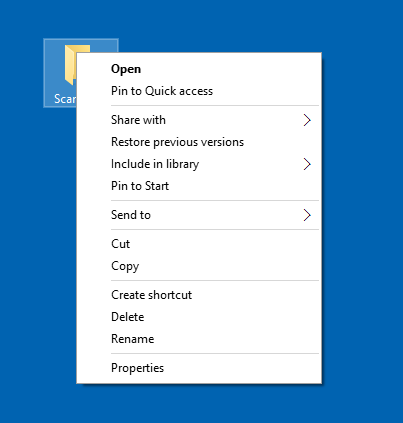

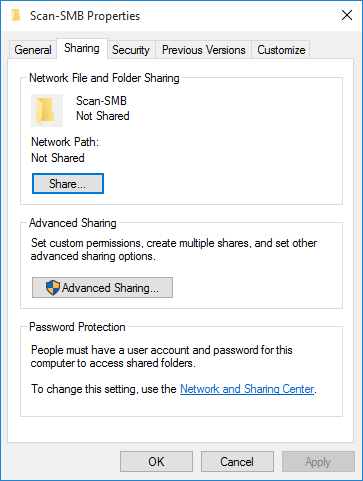

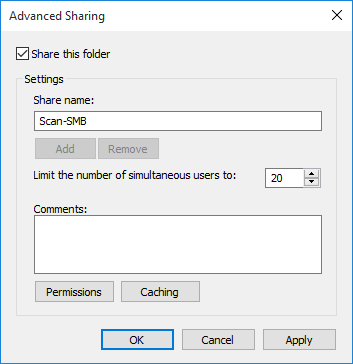
Set [Share neme] as necessary.

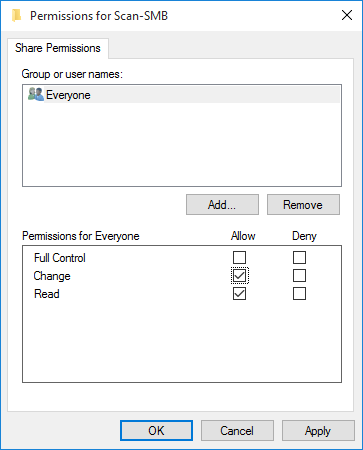
Select [Everyone] to allow access permission to all users.
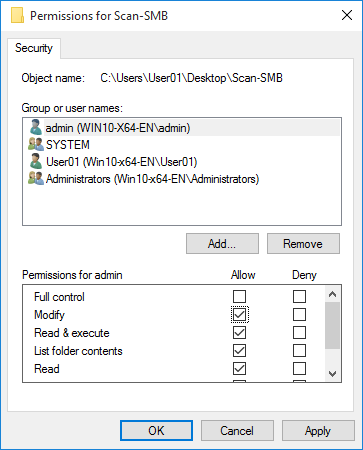
If the group or user you want to grant access to is not displayed, click [Add], and then add the user or group.

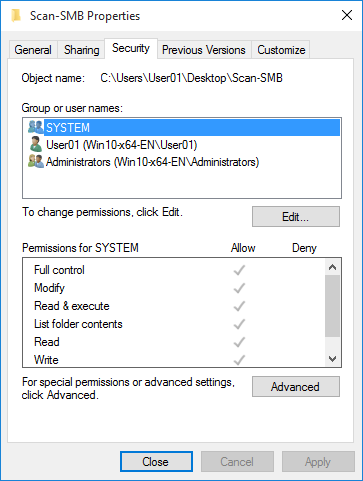
The security access permission screen is displayed.

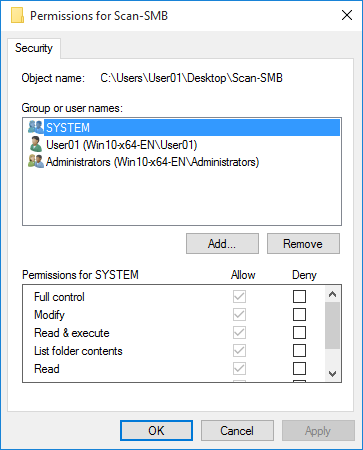

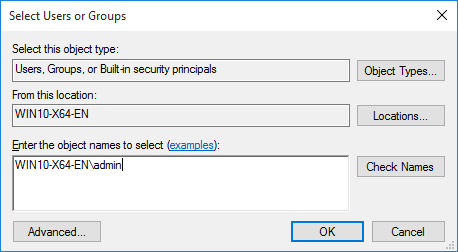
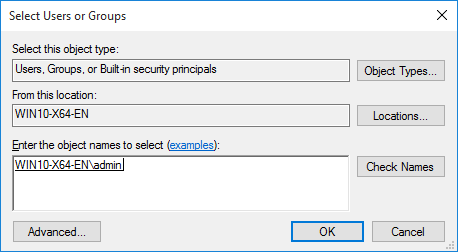
The computer name (or domain name) can be abbreviated when it is displayed in [From this location].
If you are not sure of the computer name (or domain name), check [Device name] on the [System] screen. Right-click [Start], and then select [System] to display the [System] screen.
If you are unsure of the user name, check it on the [Accounts] screen. Open the [Settings] screen from the [Start] menu, and then select [Accounts] to display the [Accounts] screen.
The names cannot be found if the information is entered incorrectly. Enter the correct computer name (or domain name) and user name.



Creating a Shared Folder on the Macintosh Desktop
Create shared folders on a Macintosh computer. Scan data from the system is sent to the shared folders and shared with the client computer.
Procedure
Example: Create a "Scan-SMB" folder on the Macintosh desktop (Mac OS X).
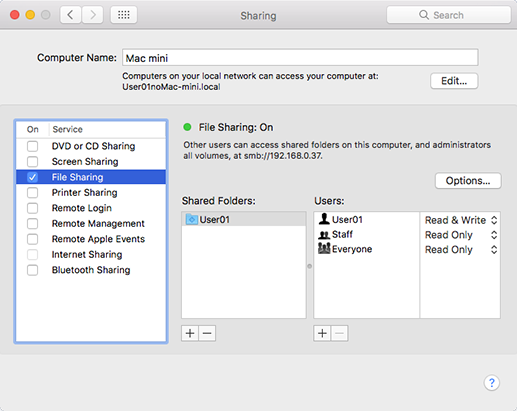

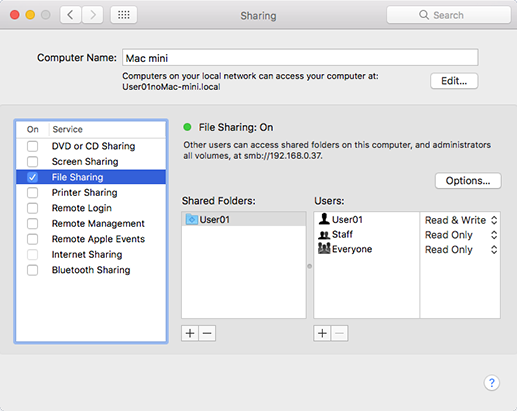
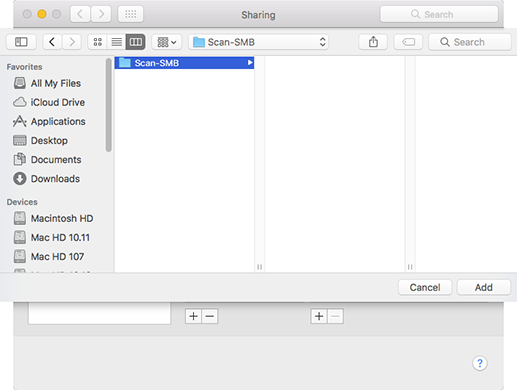


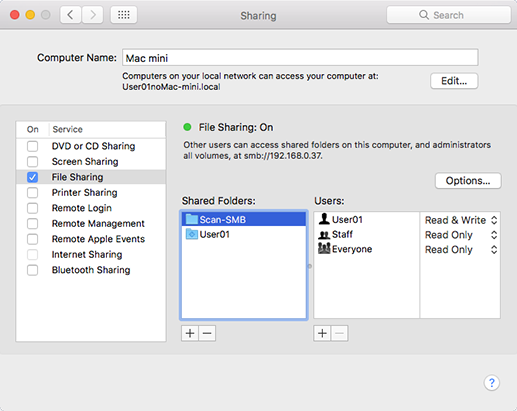
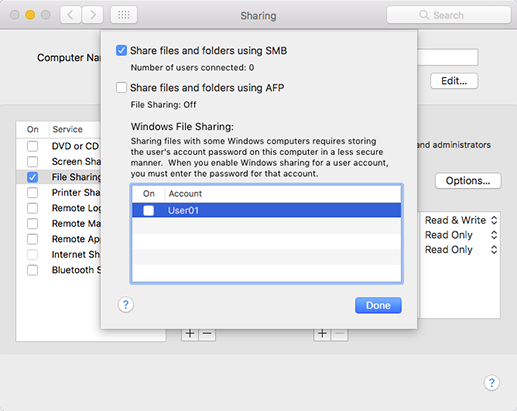


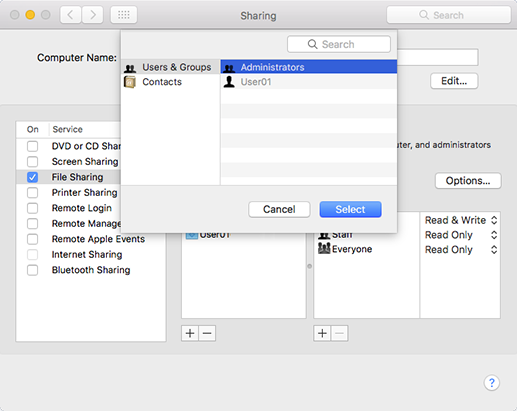
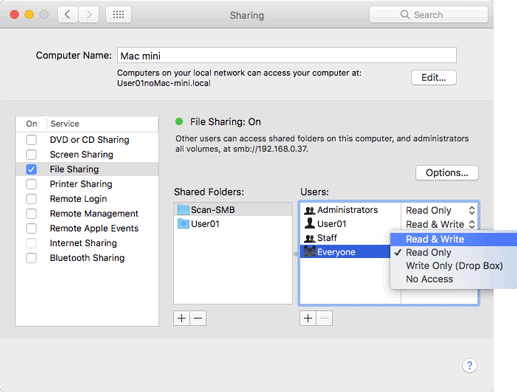
By default, users specified in your Macintosh's [Users & Groups] settings can connect to the Macintosh via a network.


 in the upper-right of a page, it turns into
  and is registered as a bookmark.