
Detailed Diagnosis
Press Adjustment on the MACHINE screen to display the Adjustment Menu screen.
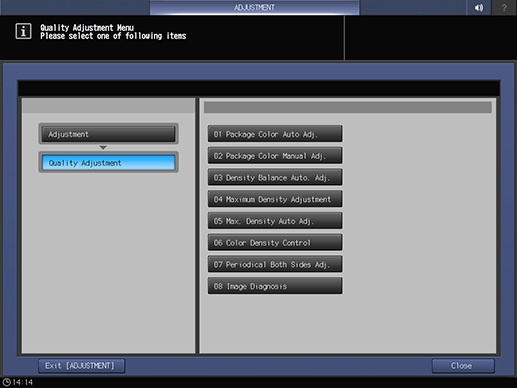
Press Quality Adjustment and Image Diagnosis in sequence.
Press Detailed Diagnosis.
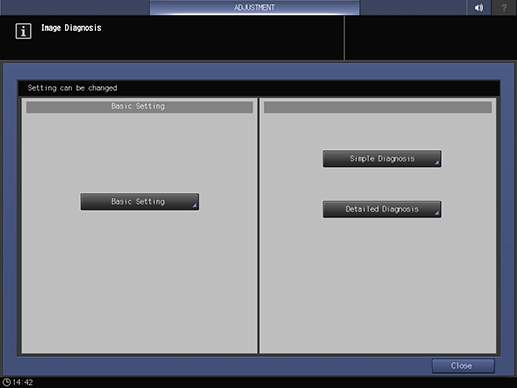
Select the item to be adjusted.

supplementary explanationSelect ON for the diagnosis item, and select one or more colors for Target Color.
supplementary explanationIf you select Default, ON and all the Target Color of each diagnosis item are selected.
Press Print Mode.

Select a paper size for the chart.

supplementary explanationLoad paper (lengthwise (X): 420.0 mm to 487.7 mm and widthwise (Y): 279.4 mm or more) into the tray, then select that tray key.
Press Start on the control panel.
The chart (below) of the diagnosis item you selected in step 4 is output, and the Detailed Diagnosis Result screen is displayed.
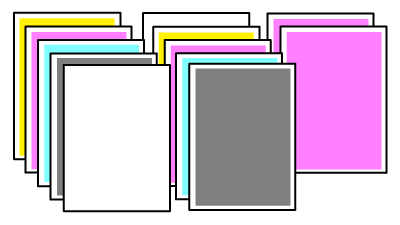
supplementary explanationFor the types of charts that are output, refer to Overview of Image Diagnosis.
supplementary explanationAutocorrection finish: Completed diagnosis item. Check the output paper.
supplementary explanationUndiagnosed: Diagnosis item that is not selected in step 4.
supplementary explanationWhen the image analysis and diagnosis are completed, diagnosis analysis data and diagnosis scan image data are generated. The generated diagnosis results are sent to the service representative as logs if permitted by the setting. For details about sending logs, contact Error Image Send Permission Setting or your service representative.
Press Close.
The display returns to the Detailed Diagnosis screen.
Press Close.
The display returns to the Image Diagnosis screen.
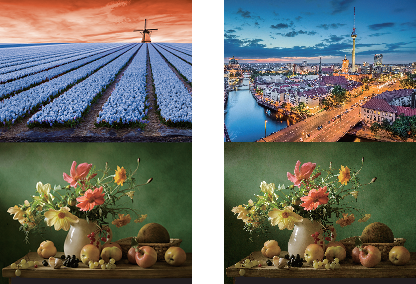
Output AQA Reference chart shown below, and check the image quality.
Tips
Output the AQA Reference chart using the printer driver.
For details about how to obtain the AQA Reference chart, contact your service representative.
Tips
If you press the Result button on the Detailed Diagnosis screen, the latest Detailed Diagnosis Result is displayed.