Editing Registered Account Track Data on Browser
Make the account track settings concerning the Administrator Setting on a Computer, instead of using the touch panel or the control panel.
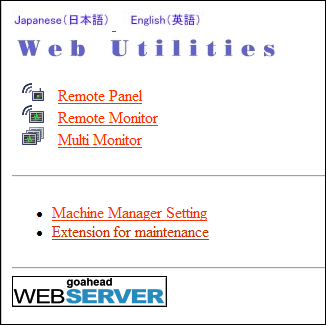
Display the Main page screen of Web Utilities.
Click on Machine Manager Setting.
The password entry dialog box is displayed.
Enter "admin" in the User Name text box, and the 8-character administrator password in the password text box, then click on OK.
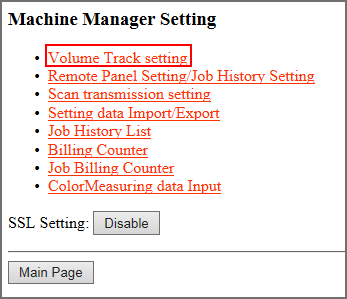
The Machine Manager Setting screen is displayed.
Click on Volume Track setting.
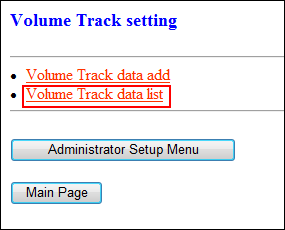
The Volume Track setting screen is displayed.
Click on Volume Track data list.
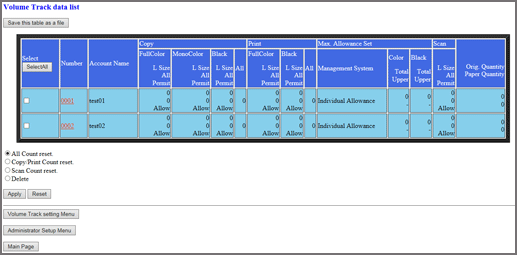
The Volume Track data list screen is displayed.
Change the Volume Track data.
supplementary explanationClick on the Number of the data to be edited on the Volume Track data list screen.

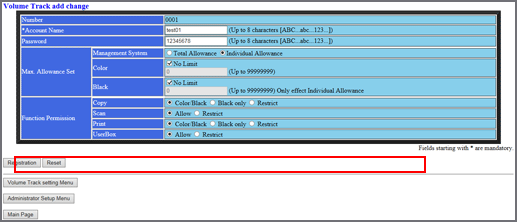
supplementary explanationThe Volume Track setting screen is displayed.
supplementary explanationChange Account Name, Password, Max. Allowance Set, and Function Permission. You can change these data in the same way as you register them. For details, refer to Registering a New Account Track Data on Browser.
supplementary explanationRegistration error:
- If the account track authentication system of the machine has been set to Account Name & Password, always register an account. If a duplicate account name exists, an error message is displayed to show unavailability.
- If the account track authentication system of the machine has been set to Password Only, always register a password. If a duplicate password exists, an error message is displayed to show unavailability.
- Any unavailable symbols are rejected with an error message displayed in the window.
- While the machine is in operation, you cannot complete the data entry and an error message is displayed to show unavailability. Click on Registration after the machine starts idling.
supplementary explanationClick on Reset to restore the previous data. To cancel the change and return to the previous page, click on Back of the web browser, or press Volume Track setting Menu in the screen.
supplementary explanationClick Register.
supplementary explanationThe Registered as follows screen is displayed. The edited data is registered to the machine immediately so that it is valid for the user operations.
supplementary explanationClick on Volume Track setting Menu. The screen returns to the Volume Track setting screen.
Reset the counter.
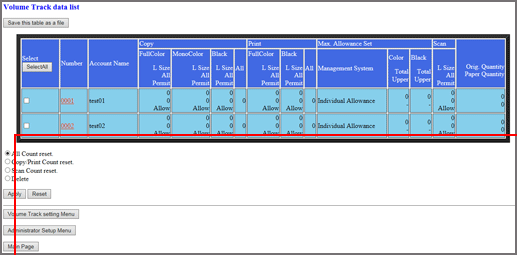
supplementary explanationClick on the check box(es) on the Volume Track data list screen to select the account track data of the counter to be cleared. Click on the radio button (a white circle) heading the desired reset mode.
supplementary explanationIf all counts are to be reset, click on Select All.
supplementary explanationClick on Apply.
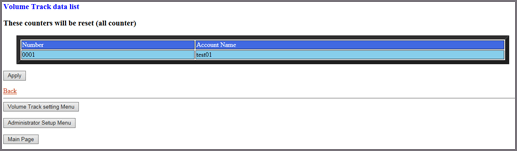
supplementary explanationThe These counters will be reset (all counter) is displayed.
supplementary explanationIf you do not want to reset the counter of the data that you selected, click on Back. The screen returns to the Volume Track data list screen.
supplementary explanationClick on Apply to immediately reset the counter of the data that you selected.
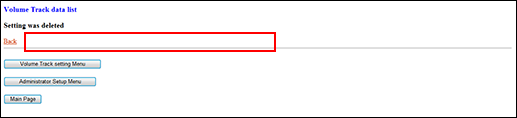
supplementary explanationThe Setting was changed is displayed. The counter for the data that you selected is immediately reset to zero.
supplementary explanationWhile the machine is in operation, you cannot reset the counter and an error message is displayed to show unavailability. Click on Apply after the machine starts idling.
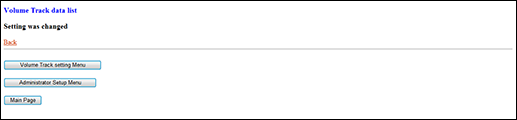
supplementary explanationClick on Back to return to the Volume Track data list screen.
Delete the account track data.
supplementary explanationClick on the check box(es) on the Volume Track data list screen to select the account track data to be deleted. Click on the Delete radio button.
supplementary explanationIf all the data items are to be cleared, click on Select All.
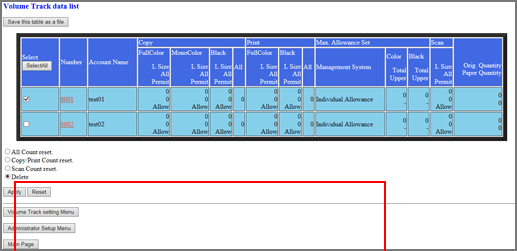
supplementary explanationClick on Apply.
supplementary explanationThe These entries will be deleted is displayed.
supplementary explanationIf you want to cancel the deletion of the data you selected, click on Back. The screen returns to the Volume Track data list screen.
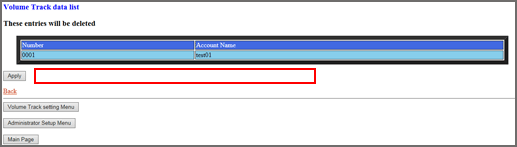
supplementary explanationClick on Apply. The selected data is deleted.
supplementary explanationClick on Back to return to the Volume Track data list screen.
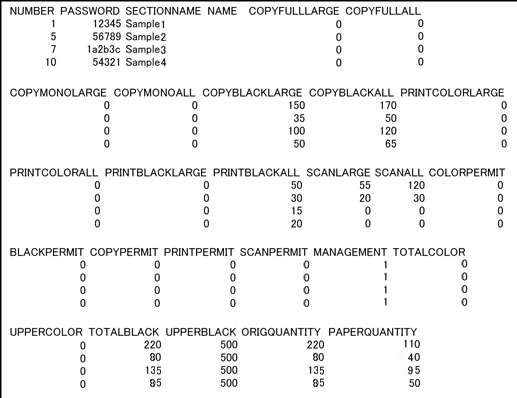
Save the Volume Track data list in a file.
supplementary explanationClick on Save this table as a file.
supplementary explanationClick Save.
If you need to specify the destination to save, follow the window instructions to specify the destination.
supplementary explanationThe Volume Track data list is saved in CSV format. The data cannot be saved while the machine is in operation. Save again after the main body starts idling. Click on Back in the browser window to return to the Volume Track data list screen to start over.
Example: Volume Track data list saved in a file