
Copying Files to Machine Hot Folders for Printing
Overview
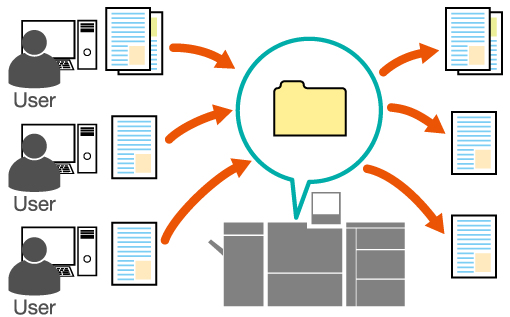
Creating a machine hot folder allows you to print files simply by copying (dragging and dropping) them to the folder.
Configure the settings in the order shown below to use this function.
1. Register user settings
2. Set the hot folder
3. Create hot folders
4. Print from the hot folder
The following is recommended
This function includes the following features.
No need to launch the application or use the printer driver.
You can create copies of hot folders for different job settings, and use them separately for specific types of tasks.
You can set user access permissions for each hot folder, allowing you to manage users and enhance security.
Multiple users can access the same hot folder over a network. Files copied to the same hot folder can be printed using the same job settings.
Administrators can centrally manage print settings, eliminating the need for non-administrators to set up print settings.
You can copy and print multiple files at once.
- The file formats that can be printed from machine hot folders are PS, PDF, TIFF, JPEG, PPML, PCL (including text) and EPS.
- If you access the hot holder immediately after configuring or changing the hot folder settings, an OS error screen may appear. After configuring or changing the hot folder settings, leave approximately 10 seconds before trying to access the folder.
- To use the hot folder function, set [Enhanced Security Mode] to [OFF]. For details, refer to [Enhanced Security Mode].
- Up to 1,000 print jobs (files) can be stored in a hot folder.
- Hot folder user settings information can be backed up and restored. For details, refer to [Hot Folder Backup].
Target Jobs
Print jobs
Assumed Operating Environment
Item Name | Contents |
|---|---|
OS | Windows 10 |
- The actual screen displayed may differ depending on the application version or revision, and the environment you are using.
Register User Settings
Register usernames and passwords for use when setting hot folder access authentications.
For details about how to access Print Manager, refer to Print Manager. For details about how to login, refer to Login Screen.
This function can only be operated from a computer. Operation from the system’s touch panel is not supported.
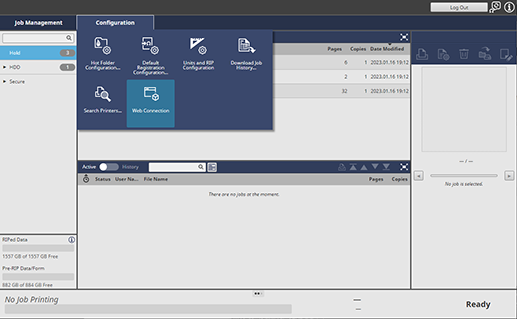
Web Connection starts.


For details about logging in, refer to Login Screen.
For details about the default administrator password, refer to [About the Administrator Password].


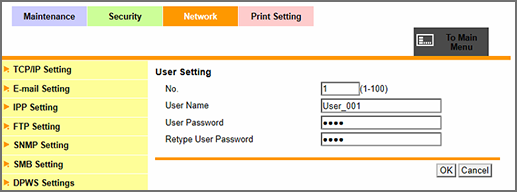
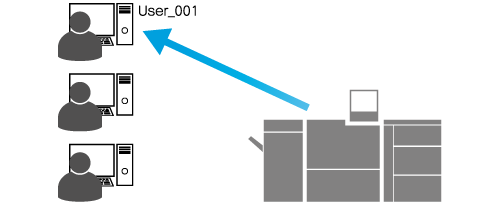
For details about the settings, refer to the setting details of [New Registration] (described after the procedure).


Setting details of [New Registration]
Item | Setting |
|---|---|
[No.] | Enter user registration numbers Setting range: 1 to 100 |
[User Name] | Enter usernames Example: User_001 |
[User Password] | Enter passwords |
[Retype User Password] | Enter the same password as in [User Password] |
Set the Hot Folder
Configure the operating conditions for the hot folder using Web Connection.
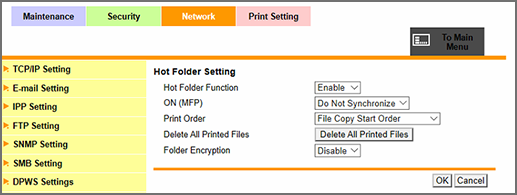
For details about the settings, refer to the setting details of [Hot Folder Setting] (described after the procedure).

This will complete the settings for the hot folder.
Setting details of [Hot Folder Setting]
Item | Setting |
|---|---|
[Hot Folder Function] | [Enable] |
[ON (MFP)] | [Synchronize] Link the hot folder function with system authentication. Can be configured when [ON (MFP)] is selected using [User Authentication]. However, [ON (MFP)] cannot be set for the hot folder if [Do Not Synchronize] is selected using [Synchronize User Authentication & Account Track]. For details about the authentication method, refer to What Is [User Authentication] and [Account Track]?. |
[Print Order] | [File Copy Start Order] |
[Delete All Printed Files] | [Delete All Printed Files] |
[Folder Encryption] | [Disable] |
For details about the setting for each item, refer to [Hot Folder Setting].
Creating Hot Folders
Create a hot folder with Print Manager, and configure the print conditions. This section describes an example of reducing the size of an A4-sized original, performing a 2-sided imposition, and then printing 10 copies using 2-sided printing onto A4 paper.
- The items that can be configured may differ depending on the printer model and options being used.
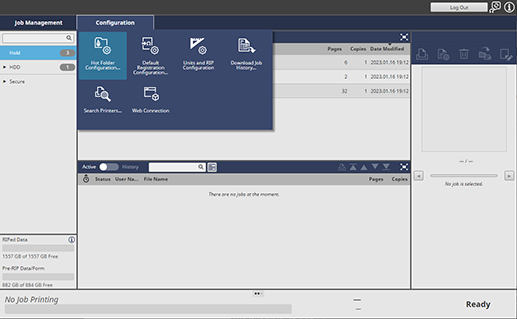

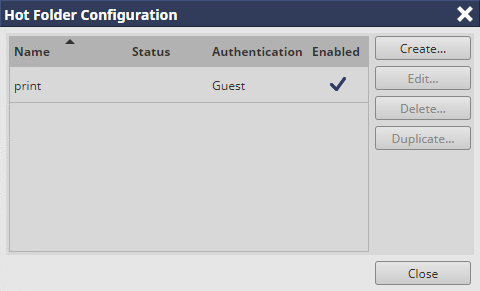

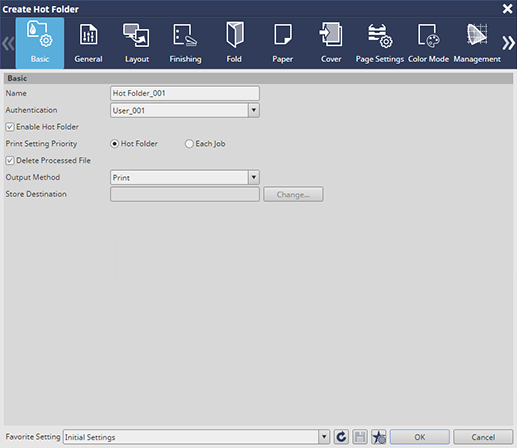
For details about the settings, refer to the setting details of [Basic] (described after the procedure).

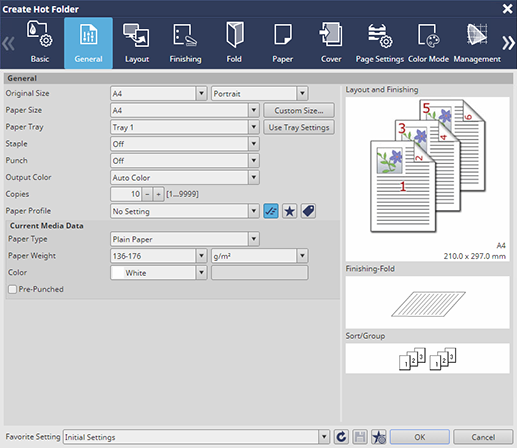
For details about the settings, refer to the setting details of [General] (described after the procedure).

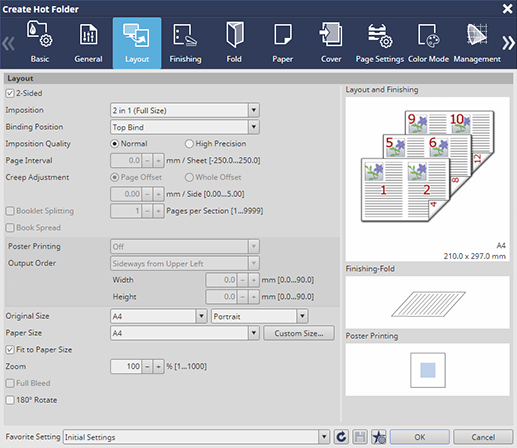
For details about the settings, refer to the setting details of [Layout] (described after the procedure).

Setting details of [Basic]
Item | Setting |
|---|---|
[Name] | Enter the name of the hot folder (Example: HotFolder_001) |
[Authentication] | Select User_001 |
[Enable Hot Folder] | Add check mark |
[Print Setting Priority] | [Hot Folder] |
[Delete Processed File] | Add check mark |
[Output Method] | [Print] |
Authentication settings assigned to a single hot folder are counted only as a single user setting.
The user name set on Register User Settings is displayed in [Authentication].
To allow anybody to access the hot folder without requiring access authentication, select [Guest].
Setting details of [General]
Item | Setting |
|---|---|
[Original Size] | [A4] / [Portrait] |
[Paper Size] | [A4] |
[Paper Tray] | Select the paper feed tray loaded with A4 paper |
[Copies] | 10 |
Setting details of [Layout]
Item | Setting |
|---|---|
[2-Sided] | Add check mark |
[Imposition] | [2 in 1 (Full Size)] |
[Binding Position] | [Top Bind] |
[Fit to Paper Size] | Add check mark |
Print From the Hot Folder
Open the [Start] menu on the computer, and click, in order, [Windows System] - [Control Panel] - [User Accounts] - [Manage Windows Credentials], and then [Add a Windows Credential]. Enter the system’s address, along with username and password, and click [OK].
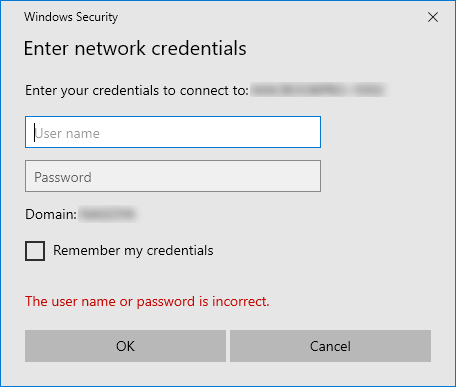
Click the hot folder you want to print from. When the [Windows Security] dialog is displayed, enter the [User name] and [Password] set for the hot folder, and click [OK].
If an access error message is displayed after selecting the hot folder, briefly log-off from the computer, log back in and then try clicking the hot folder you want to print from again.


If the IP address is 192.168.1.20, enter "\\192.168.1.20".
You can check the IP address at [TCP/IP Setting] in Web Connection. For details, refer to [TCP/IP Setting].

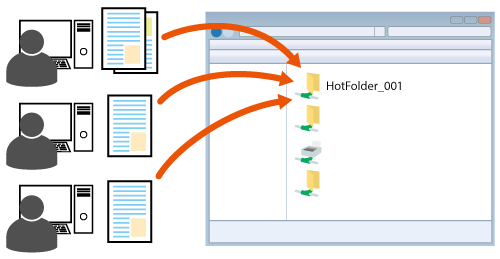
The print jobs stored in the hot folder, along with their respective send statuses are displayed in the Print Manager active job list.


 in the upper-right of a page, it turns into
  and is registered as a bookmark.