
Uploading Jobs to Hold Jobs, HDD Store Jobs, and Secure Jobs
Overview
Use Print Manager to upload files from a computer to the Image Controller HDD.
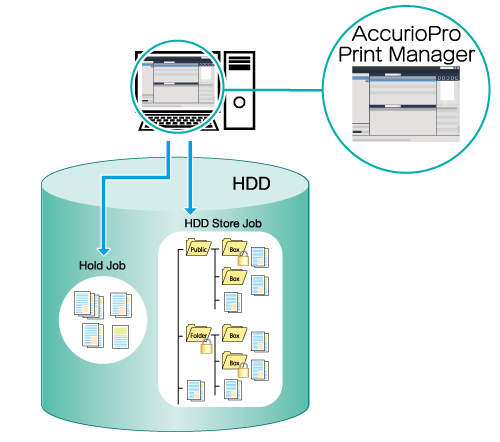
The following is recommended
This function includes the following features.
You can change the settings for uploaded files before printing.
You can store print jobs by dividing between folders and boxes. You can set the passwords for folders and boxes as necessary. (HDD store jobs)
Store secure jobs to password protected secure boxes. Output is suspended until the password is entered, preventing information leaks from output items. (Secure Jobs)
- This function can only be operated from a computer. These functions cannot be operated using the Touch panel of this system.
- Uploadable file formats: PS/PDF/TIFF/TIF/JPEG/JPG/ZIP (with PPML)/PPML
Target Jobs
Print jobs
Assumed Operating Environment
Item Name | Contents |
|---|---|
OS | Windows 10 |
- The actual screen displayed may differ depending on the application version or revision, and the environment you are using.
Holding Jobs and Storing on HDD
Access Print Manager.
For details about how to access Print Manager, refer to Print Manager.
For details about how to login, refer to Login Screen.
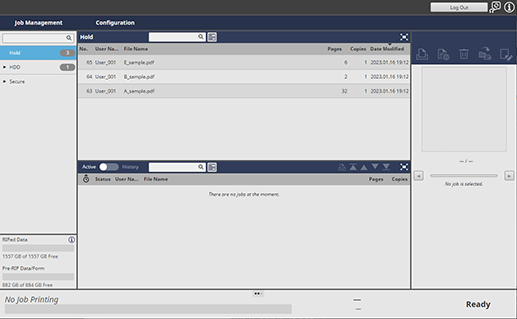
Select from [Hold] or [HDD] for the upload destination for the job.
If the folder or box in the storage destination is locked, click "
 " to display the unlock screen. To unlock, enter the password, and click [OK].
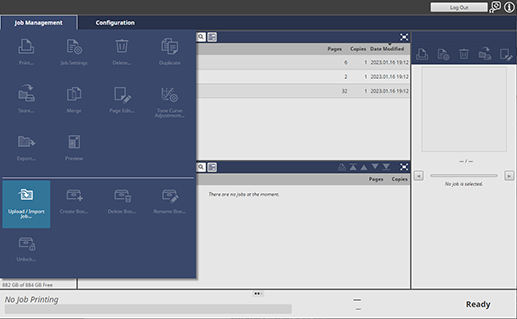
Click [Upload / Import Job...] in [Job Management].
If [HDD] is selected, click [Upload Job...].
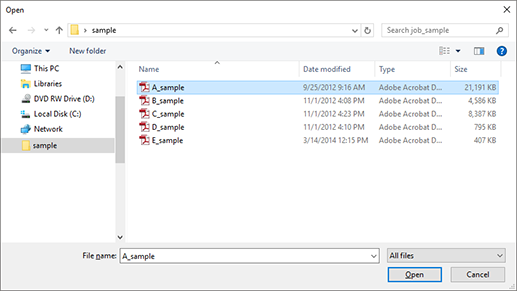
Select the file to upload, and click [Open].
Multiple files can be selected.
The job is uploaded and stored as a hold job or HDD store job in the location specified in Step 2.
Secure Holding of Jobs
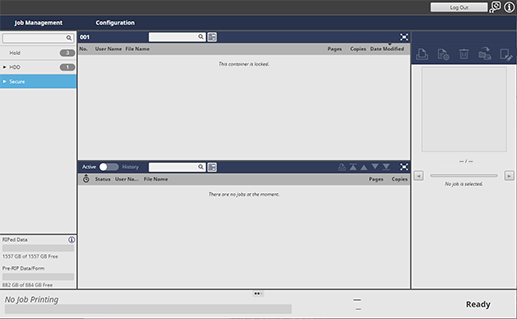
Click [Secure].
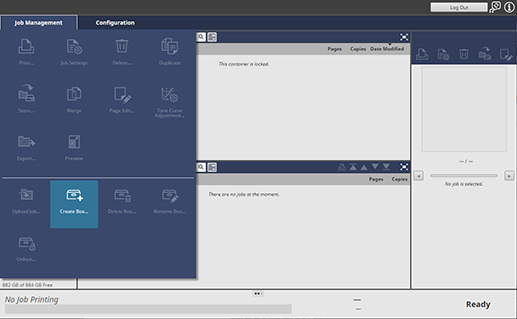
Click [Create Box...] in [Job Management].
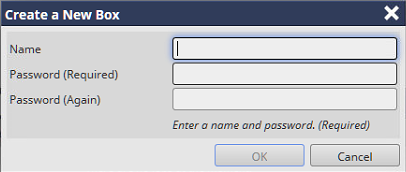
Enter the [Name] and [Password], and click [OK].
Up to 8 single-byte characters can be entered for the [Name] and [Password].
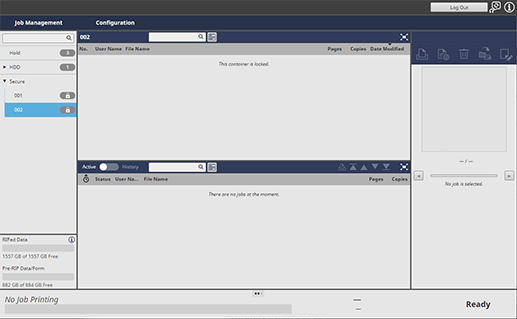
Click the " " icon for the created box. Enter the password to unlock it.
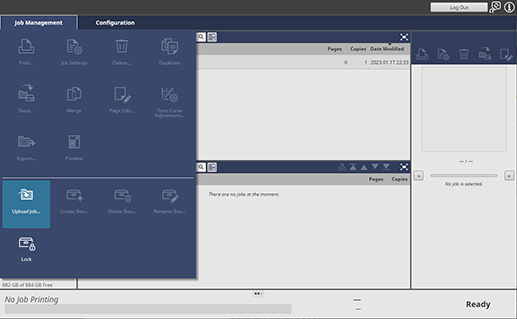
Click [Upload Job...] in [Job Management].

Select the file to upload, and click [Open].
Multiple files can be selected.
The job is uploaded, and stored as a secure job on the machine HDD.
For details about how to edit or print jobs stored on the HDD, refer to the information below.


 in the upper-right of a page, it turns into
  and is registered as a bookmark.