
Banner Printing
What Is Banner Printing?
Attaching an optional banner unit to the system allows you to print onto banner paper.
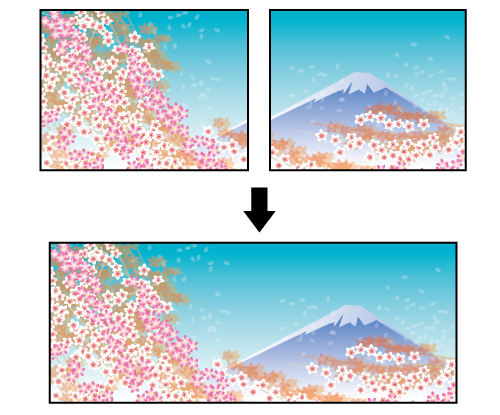
The following is recommended
Use banner printing in circumstances such as these.
When you want to print long or wide type curtains or banners
When you want to print hanging-type advertisements
- The size of the banner paper that can be printed differs depending on the mounted options.
- If the paper is longer than the paper size that can be printed on both sides in banner printing, the print item is output face-up.
- The resolutions available for printing are 600 dpi or 1,200 dpi.
- For details about the paper sizes that can be printed and the number of input and output sheets for each option, refer to [Specifications].
Target Jobs
Does not depend on the file format.
Target Tools
Touch panel (machine store jobs) | Printer Driver | Print Manager | Machine Hot Folder | Hot Folder |
|---|---|---|---|---|
- | . | . | . | . |
Assumed Operating Environment
Item Name | Contents |
|---|---|
OS | Windows 10 |
Application | Adobe Acrobat Reader DC |
Printer Driver | PS Plug-in Driver |
- The actual screen displayed may differ depending on the application version or revision, and the environment you are using.
- When setting up the printer driver, make sure you check that none of the previous settings are left in any of the item tabs. If any of the previous settings do remain, make sure you clear them.
Banner Option Settings
To print banners, mount unit options for banners onto the system as follows.
Type | Name | Connect to |
|---|---|---|
Paper feed options | Banner Paper Tray Unit MK-760 | Multi Bypass Tray MB-508 / Multi Bypass Tray MB-509 |
Large Capacity Unit LU-202XLm | Machine | |
Paper output options | Banner Output Tray Unit MK-761 | Output Tray OT-511 |
Relay Unit RU-518m | ||
Finisher FS-532 / Output Tray OT-512 |
Mounting Banner Tray Units and Loading Banner Paper
For details about how to mount banner tray units and how to load banner paper, refer to Loading Banner Paper.
Configuring Settings for Banner Paper
Press [Paper Setting] on the [MACHINE] screen.
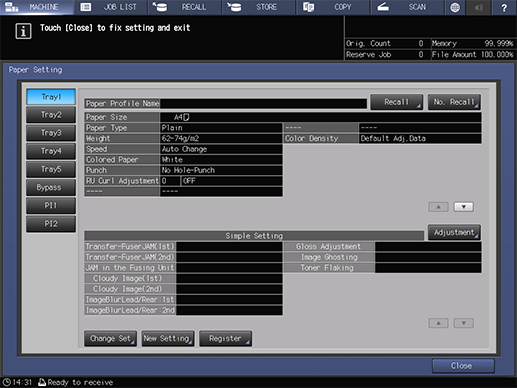
Select [Bypass] on the [Paper Setting] screen, and press [Change Set].
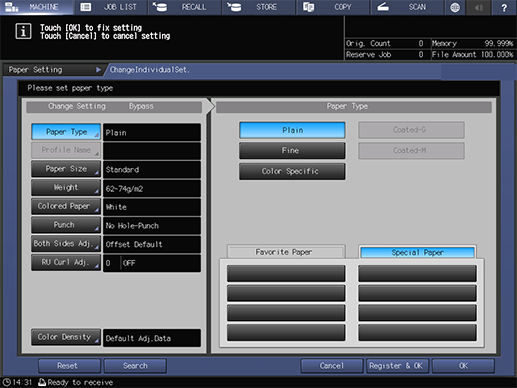
Set the [Paper Type].
If coated paper cannot be selected, set [Weight] to 81 g/m2 / 22 lb Bond or higher to select it.
The weight of coated paper that can be fed for banner printing is 128 g/m2 to 300 g/m2 / 34 lb Bond to 81 lb Bond.
Press [Paper Size].
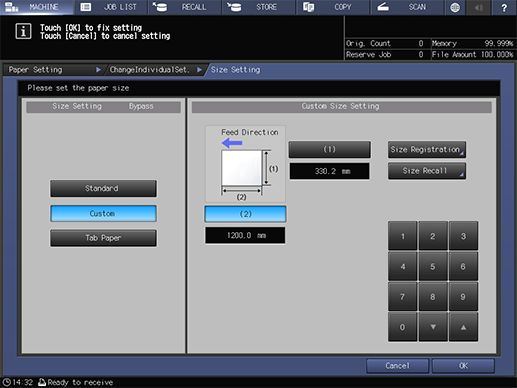
Select [Custom] and set the paper size ((Width) 330.2 mm e (Length) 1,200.0 mm / (Width) 13.0" e (Length) 47.24" is used here).
Select [(1)] (cross direction) or [(2)] (feed direction), and enter the values using the on-screen keypad or with the Keypad on the Control panel.
You can also change the values using [+] and [,].
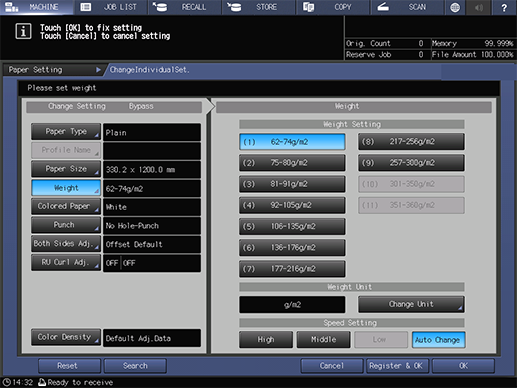
Set the [Weight].
Banner paper weight: 128 g/m2 to 300 g/m2 / 34 lb Bond to 81 lb Bond
Configure other items as necessary, and press [OK].
Press [Close] to return to the [MACHINE] screen.
Performing Banner Printing
This section describes the procedure for printing onto banner paper ((Width) 330.2 mm e (Length) 1,200.0 mm / (Width) 13.0" e (Length) 47.24") using the PS Plug-in Driver.
Open the original in the application, and click [Print] in the [File] menu.
Select the printer to use for printing, and click [Properties].
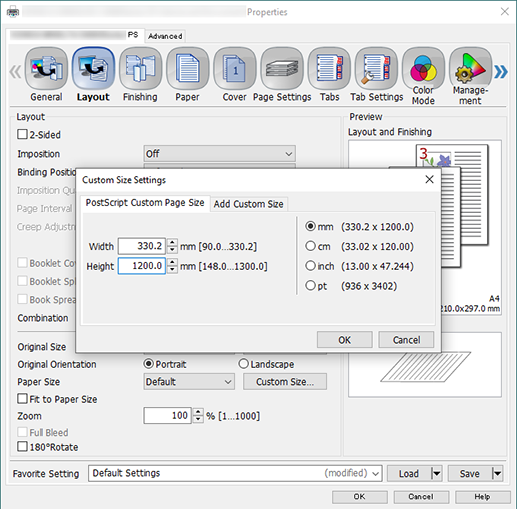
Select the [Layout] tab, and configure the items.
For details about the settings, refer to the [Layout] tab settings (described after the procedure).
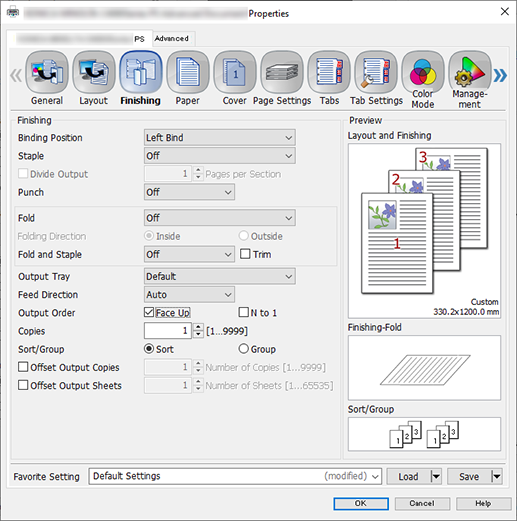
Select the [Finishing] tab, and add a check mark to [Face Up] in [Output Order].
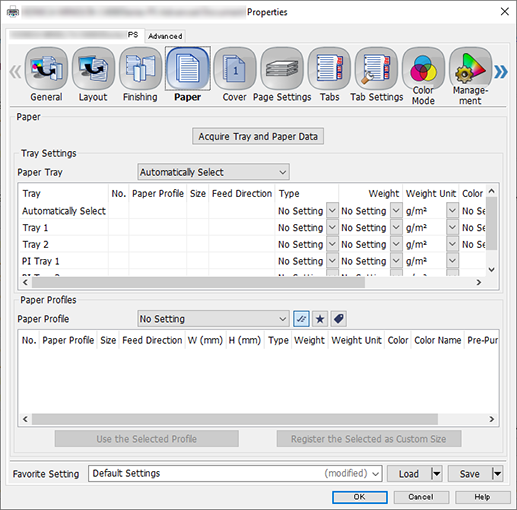
Select the [Paper] tab, and click [Acquire Tray and Paper Data].
"
 " is displayed if tray / paper information is successfully obtained.
"
 " is displayed if you were unable to acquire tray / paper information. Check to see if parts such as the optional paper feed tray are mounted properly.
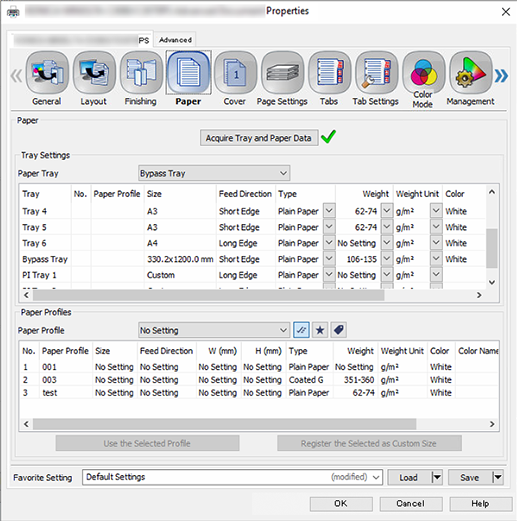
Select [Bypass Tray] for [Paper Tray], and click [OK].
Enter the [Copies] you want to print on the [Print] screen, and click [Print].
- Be sure to remove the banner unit option after you have finished banner printing. To remove the unit, perform the steps of the mounting procedure in reverse.
- If Banner Output Tray Unit MK-761 is mounted onto Output Tray OT-511 or Relay Unit RU-518m, [Please remove paper from sub tray then touch [OK]] is displayed for each 10 sheets output to the subtray, regardless of the paper size, and the printing is paused. Remove the paper from the sub tray and press [OK] on the screen. Press Start on the Control panel to resume printing.
[Layout] tab settings
Item | Setting Value |
|---|---|
[2-Sided] | Remove the check mark |
[Original Size] | Select [Custom Size...], and set the [Width] (320.0 mm / 12.60") and [Height] (1,200.0 mm / 47.24") |
[Paper Size] |


 in the upper-right of a page, it turns into
  and is registered as a bookmark.