
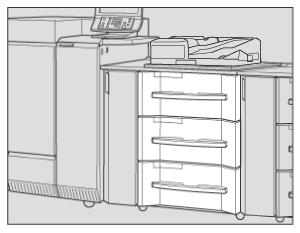
Making Fine Adjustment on Space between the Side Guide Plates of Paper Feed Unit PF-707m / Paper Feed Unit PF-711
If front and rear side guide plates are not fixed upright, in other words, any gap is found between top and bottom edges of them, feeding trouble may be caused. In this case, follow the adjustment procedure below to properly fix the top and bottom edges of the side guide plates.
Withdraw the tray to be adjusted.
supplementary explanationTrays cannot be withdrawn when the machine is not powered. Be sure to turn the sub power switch ON.
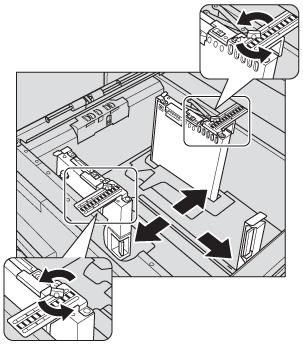
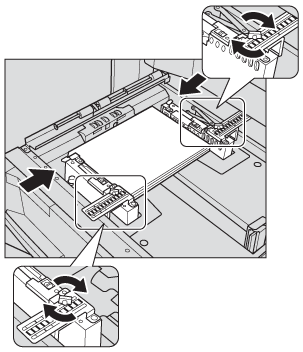
Fully widen the side guide plates and rear guide plate.
supplementary explanationTurn the two side guide fixing knobs of the side guide plates counterclockwise to loosen them.
supplementary explanationFully widen the side guide plates and rear guide plate while pressing the lock release lever of the side guide plate and rear guide plate.
NOTICE
When moving the side guide plates, be sure to hold both the lock release lever of the front one and the handle of the rear one. If moved only with the front side guide plate, the side guide plates may not be fixed in position.
Load paper of the size to be adjusted.
supplementary explanationLoad about 100 sheets of paper.
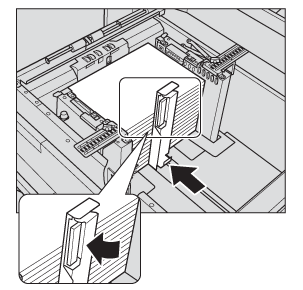
Fix the position of bottom edges of the side guide plates.
supplementary explanationPushing the lock release lever of the front side guide plate, move the side guide plates to align them to the paper.
NOTICE
Avoid making the space between the side guide plates too wide or too narrow for the paper to be seated straight.
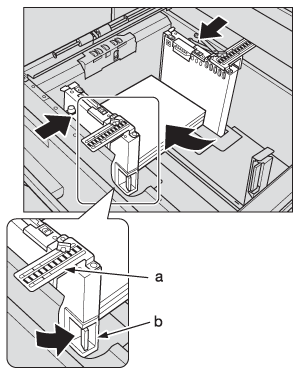
a: Paper size indicator
b: Lock release lever
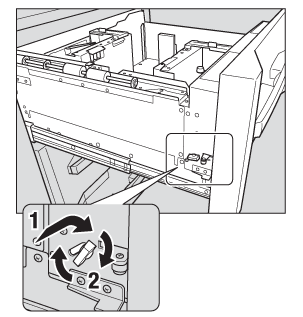
Turn the bottom plate fixing knob counterclockwise to loosen it, slide it to the front, and turn it clockwise to fix the plate.
Return the tray to its original position, then withdraw it again after the bottom plate of the tray goes up completely.
The sound of motor elevating the bottom plate can be heard when the tray is returned in position. After that automation is completed, again withdraw the tray to find that the bottom plate has been elevated to the top position.
NOTICE
Be sure not to withdraw the tray till the motor sound stops. Otherwise, the later operation may be affected because the bottom plate is not elevated completely to the top.
Fix the position of the top edges of the side guide plates.
supplementary explanationMove top edges of the side guide plates to align them to the paper, then turn the two side guide fixing knobs clockwise to fix the guides.
NOTICE
Avoid making the space between the side guide plates too wide or too narrow for the paper to be seated straight.
Lower the bottom plate of the tray.
supplementary explanationTurn the bottom plate fixing knob counterclockwise to loosen it, slide it to the back, and turn it clockwise to fix the plate. The bottom plate automatically goes down.

Load paper into the tray.
supplementary explanationAlign the stack of paper to the left side of the tray.
NOTICE
Do not load above the limit level indicated on the side guide plate of the tray.
Carefully load paper to be seated under the paper control lever at the air nozzle.
Push in the tray until it locks into place.
The paper level indicator of the tray changes from "
 " to "
  " on the MACHINE screen and COPY screen.