Registering the Color Configuration
Overview
When there is a job that is periodically output with the same paper and/or settings, you can register the necessary profiles and settings collectively as "color configuration." Complex color setting is made easy by simply specifying the registered "color configuration" when printing.
Color configuration can be registered by following the next two steps:
Registering the Profile Set
With this function, you save all 9 profiles that are applied to one paper type collectively as a profile set. Operate by following the wizard.
Registering the Color Configuration
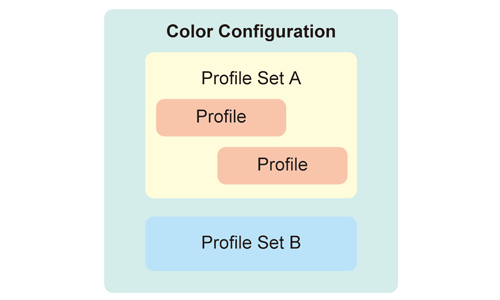
Then, register "color configuration," which consolidates several profile sets (used for all paper types for a specific job output) and other color settings information.
Tips
Color Centro allows you to create and save various color output settings as profiles, which can be applied as necessary.
A profile set is a group of the following 9 types of profiles.
RGB source profile, Printer profile, CMYK target profile, RGB-CMYK device link profile (image, graphics, text), and CMYK-CMYK device link profile (image, graphics, text)
• Meaning and Purpose of Color Configuration
In the case of frequently output jobs, by registering the job output settings as "color configuration," you can call the suitable color settings by simply specifying the color configuration when outputting the job, which saves you from repeatedly making intricate settings.
Because you do not need to make the settings from scratch when outputting a job, you can cut time spent on adjusting the settings significantly, not to mention that it saves you from concerns about erroneous settings.
•Register several profile sets, used for all paper types for a specific job output, and other color settings information collectively as "color configuration."
It is also useful for changing the coloration and gradation expression of photographs so as to suit the user's preference.
•When to perform
When you want to streamline color output setting for periodic, frequently output jobs
•Intended Environment
Operating system | Windows 7 |
Application | Color Centro 2.1 |
Printer driver | PS Plug-in driver |
Image Controller | Image Controller IC-604 |
Instrument | i1Pro |
Paper | Coated GL 128 g/m2 / 33 lb Bond (A3, Loaded in Tray3) * Load Coated GL: (A3) 128 g/m2 / 33 lb Bond in Tray3 and register it beforehand. |
* The sample screen may be different from the actual display depending on your system environment and application version/revision.
•Workflow
Registering a Profile Set with Color Centro
Register a Color Configuration
Setting the Default Color Configuration
• Related Section
•Precautions
To specify a color configuration for printing, go to Color Management on the printer driver and select Color Configuration. After the printer driver screen is opened, the color configuration that is set as default with Color Centro is set.
If you are not using color configuration, go to Color Management on the printer driver and make the settings manually in Manual Settings.
To reproduce stable colors, in addition to regular calibration, make other pre-output image quality adjustments as necessary, such as when changing screens or papers or when hue is important. For details, refer to Image quality adjustment using image controller.
Registering a Profile Set with Color Centro
Start Color Centro, and create and save a profile set.
Start Color Centro and log in to the machine. (Refer to Start Color Centro.)
The Color Centro top screen is displayed.
Click Color Configuration Management on the top screen.
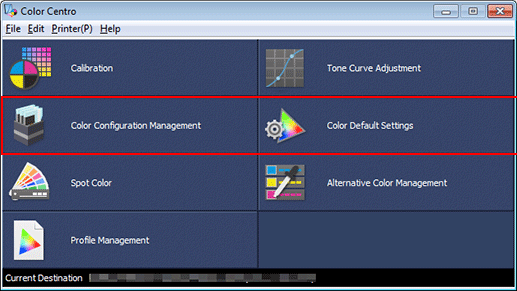
The Color Configuration Management screen is displayed.
Click Execute.
Color Centro Profiler starts.
Click Create new Profile Set
 .
.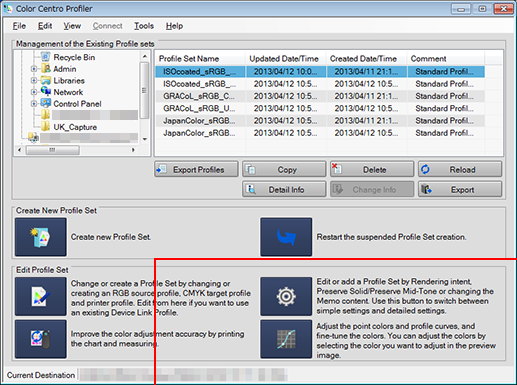
The wizard for creating a new profile set starts.
On the Confirmation of procedure screen, click Next.
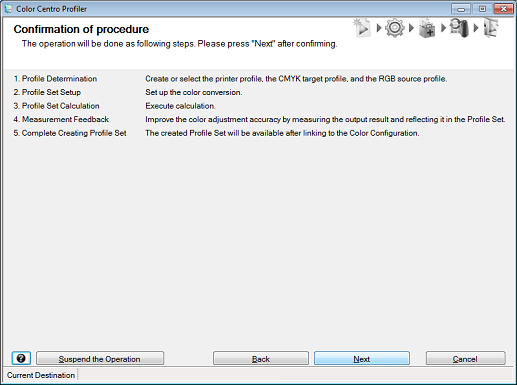
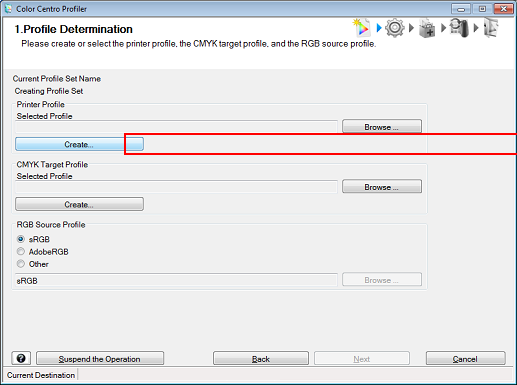
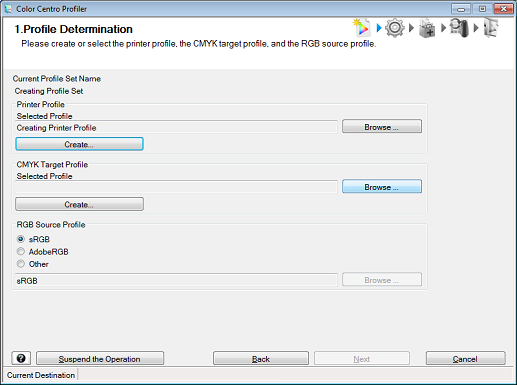
1. Profile Determination screen is displayed.
Click Create for the printer profile to be used.
Here, the procedure for creating a new printer profile is explained.
supplementary explanationTo select an existing printer profile, click Browse and select a profile.
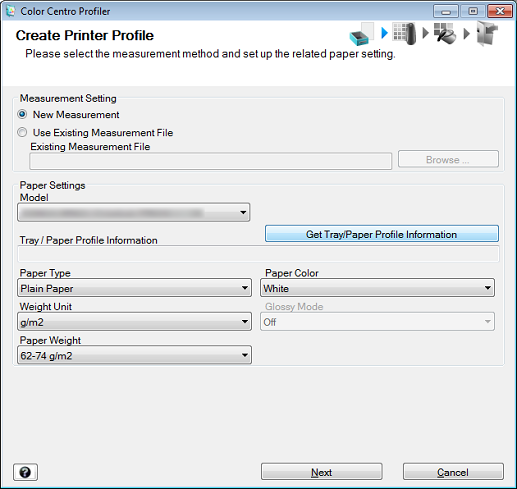
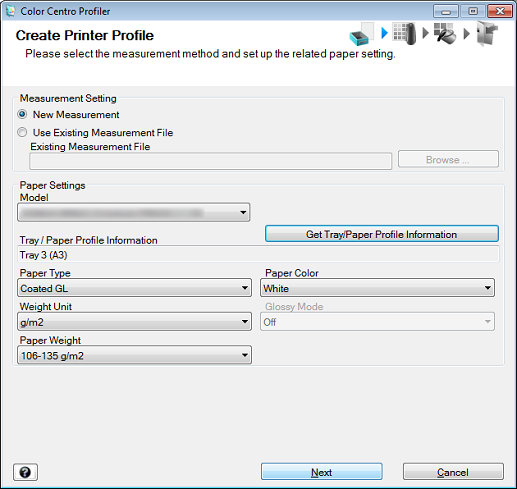
The Create Printer Profile screen is displayed.
Select New Measurement under Measurement Setting and click Get Tray/Paper Profile Information.
supplementary explanationTo make a new measurement with the instrument, select New Measurement.
Example: Click Get Tray/Paper Profile Information so as to use the paper setting for Tray3 (Coated GL: (A3) 128 g/m2 / 33 lb Bond).
Select Get Tray Information on the Get Paper Information screen. After selecting the tray in which the papers are loaded, click OK.
Example: Tray 3 is selected.

After checking that the selected tray and paper information are correctly displayed under Tray/Paper Profile Information, click Next.
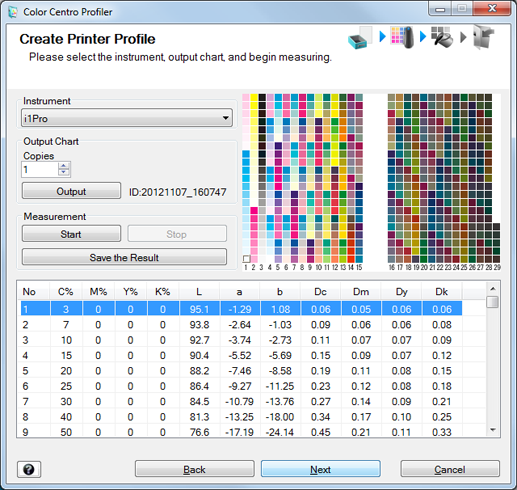
For Instrument, select the instrument to be used. Set Copies and click Output.
Print the color chart that is to be measured using the instrument.
Example: i1Pro is selected with 1 copy.
Item
Setting
Instrument
i1Pro
Copies
1
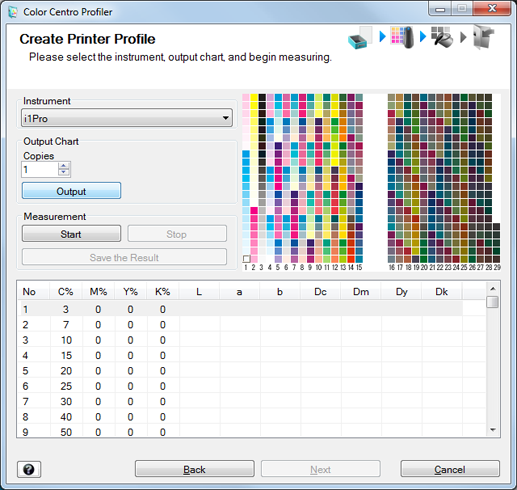
The Output Chart screen is displayed.
On the Output Chart screen, set the Paper Tray and Screen Setting. After setting, click Print.
Example: Set the Paper Tray to Tray 3, and the Screen Setting to Screen 1 (default).
Item
Setting
Paper Tray
Tray 3
Click Select Tray and select a tray.
Screen Setting
Screen 1 (default)
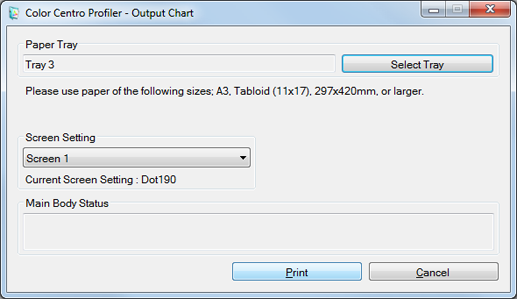
A test chart is printed.
Connect the instrument to the computer.
supplementary explanationThe device driver for the instrument must be installed on your computer beforehand. For details, refer to the instrument's manual.
Stack 10 sheets of blank paper whose type is the same as that of the paper where chart has been printed, and place the printed chart on top of it.
supplementary explanationTo eliminate the influence of the color of the table, place 10 sheets of paper of the same type as the chart underneath the chart to be measured.
Click Start.

When the following message is displayed, place the instrument flat on the calibration dock and click Yes.
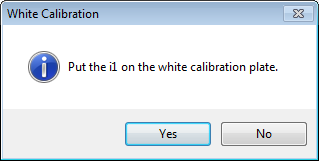
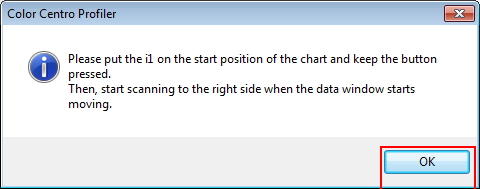
When the following message is displayed, click OK.
Press and hold the button on the instrument. When the bottom part of the screen starts scrolling, while holding the button, slide the instrument over the chart toward the right from the top left patch.
Measure the rest of the patch rows by sliding the instrument the same way.
After you finish the chart measurement, click Next on the Create Printer Profile screen.
When the chart measurement is completed, the measurement result is displayed at the bottom of the Create Printer Profile screen.
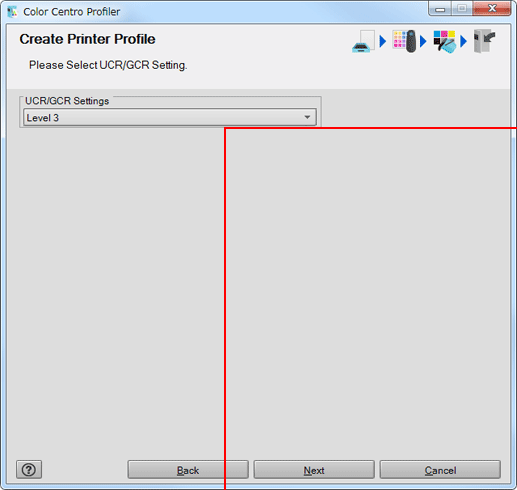
Check the UCR/GCR Settings and click Next.
Example: Level 3 remains set here.
The message, Calculating is displayed, followed by the message, Calculation is finished. is displayed.
Click Exit.
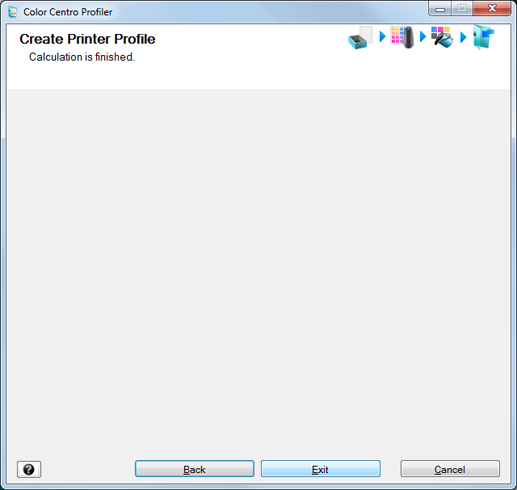
The created printer profile is saved.
Click Browse to select the CMYK target profile to be used.
Example: Click Browse to select an existing CMYK target profile.
The Select CMYK Target Profile screen is displayed.
Select a folder from the left side, and then select a CMYK target profile from the list on the right side. Click OK.
Example: The bottommost controller folder in the tree to the left side is selected.

The selected CMYK target profile is set.
Select an RGB source profile. Click Next.
Example: AdobeRGB is selected.
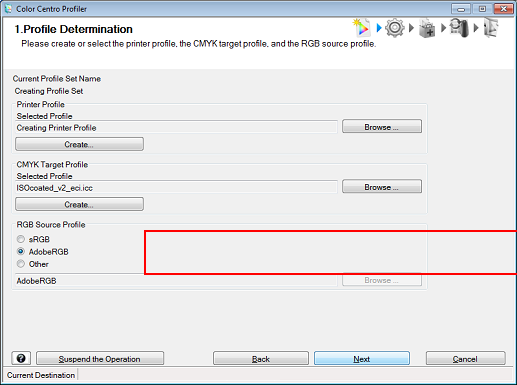
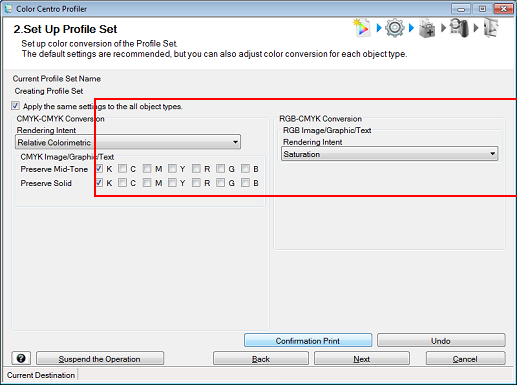
The 2. Profile Set Setup screen is displayed.
Set the color conversion (rendering) for each object. After setting, click Confirmation Print to check the result.
In this example, Apply the same settings to the all object types is selected. Selecting this option applies the same setting to image, graphics, and text (sample screen).
Item
Function
Apply the same settings to the all object types
Clearing allows you to use different rendering settings for image, graphics, and text.
CMYK-CMYK Conversion
Rendering Intent
Relative Colorimetric: Executes color conversion while regarding the paper color as pure white. The paper color parts are represented as colorlessness after color conversion.
Absolute Colorimetric: Executes color conversion while maintaining the measurement value of the paper color. The paper color parts are represented with the color near the actual paper color after color conversion.
* When you select Absolute Colorimetric, Preserve Mid-Tone and Preserve Solid (except for K) cannot be set.
Preserve Mid-Tone
Reproduces colors composed of single colors using only those colors.
Preserve Solid
Reproduces solid colored parts with the same solid colors as before the color conversion.
RGB-CMYK Conversion
Rendering Intent
Saturation: Reproduces colors so that they maintain a similar level of brightness as before conversion.
Perceptual: Reproduces colors so that they are close to the colors before conversion.
On the Confirmation Print screen, specify the image file to be printed, paper tray, and screen to be used. After setting, click Print.
Example: Set the Paper Tray to Tray 3, and the Screen Setting to Screen 1 (default).
Item
Setting
Image file to be printed out
Click Browse and select the TIFF, PS, or PDF file to be printed.
Only one type, TIFF, PS, or PDF, can be printed.
Paper Tray
Tray 3 (tray in which the relevant papers are loaded)
Screen Setting
Screen 1 (default)

The selected file is printed.
After checking the print, change the settings on the 2. Set Up Profile Set screen (Step 24) as necessary.
On the 2. Profile Set Setup screen (Step 24), click Next.

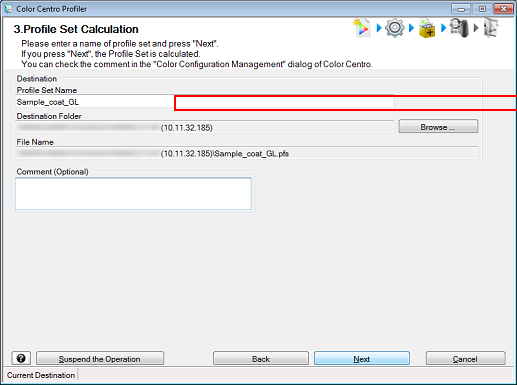
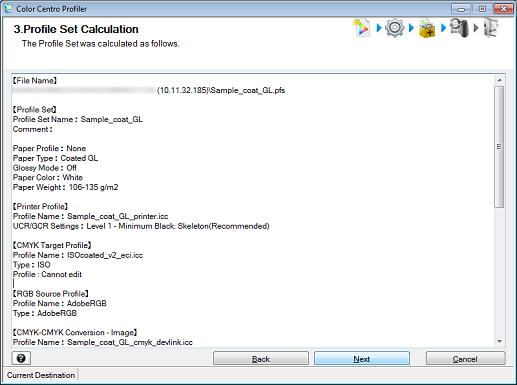
The 3. Profile Set Calculation screen is displayed.
Enter a profile set name in the Profile Set Name field and click Next.
Example: "Sample_coat_GL" is entered in Profile Set Name.
The message, Registering is displayed, followed by the message, The Profile Set was calculated as follows. is displayed.
Check the profile set calculation and click Next.
Select Finish and click Next.
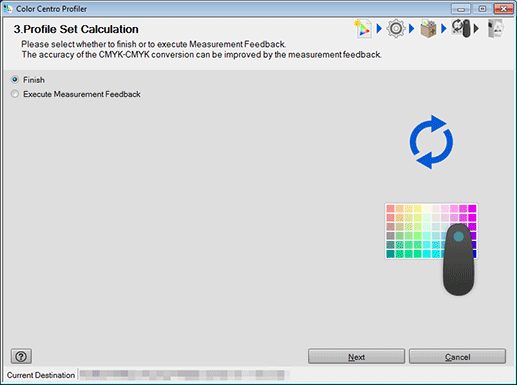
Selecting Execute Measurement Feedback enhances the accuracy of CMYK-CMYK conversion. For details, refer to Feeding Back the Measured Value.
Click Finish.
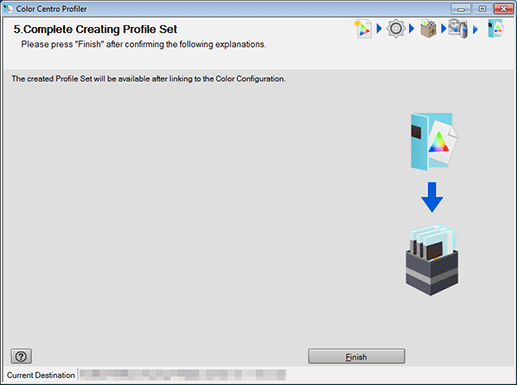
The created profile set is saved.
Proceed to register the profile set in color configuration by following the procedure in Register a Color Configuration.
Register a Color Configuration
You can create a color configuration with Color Centro and register existing profile sets to activate the color configuration.
The explanation in this section is given based on the premise that profile sets for all necessary paper types have already been created.
As an example, the procedure for creating and registering a color configuration with the following conditions is introduced here.
•There is a job that uses coated GL and colored paper.
•Two types of profile sets: "Sample-coat-GL" for coated GL and "Sample_ColorPaper" for colored paper, are prepared.
•The above two profile sets are registered in a color configuration that is created with the name "Sample_Config."
Start Color Centro, and click Color Configuration on the top screen. (Refer to Start Color Centro.)
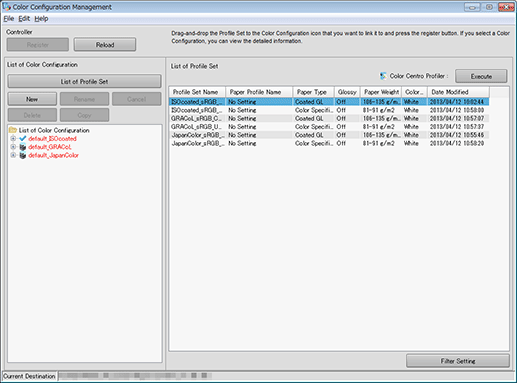
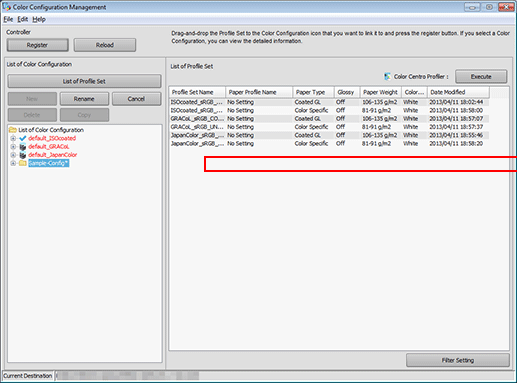
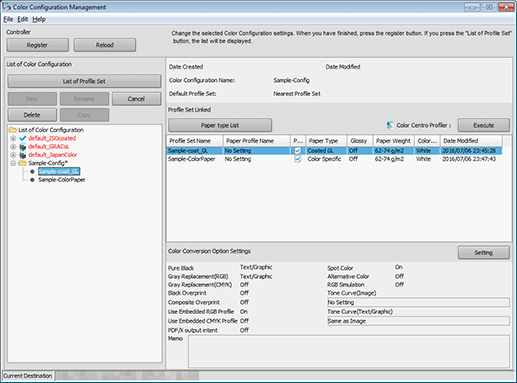
The Color Configuration Management screen is displayed.
Click New.
A new color configuration is added to the bottom of the tree with a temporary name new*, waiting for a name change.
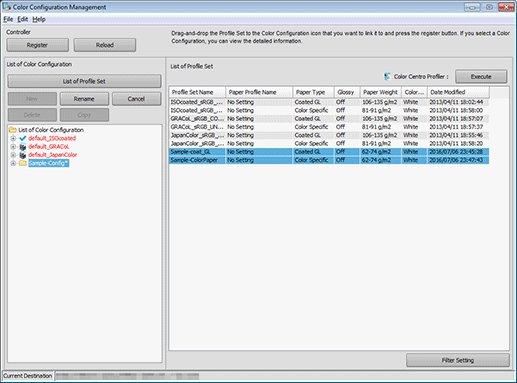
Delete the temporary name new* and enter a color configuration name to be registered.
Example: "Sample_Config" is entered as the color configuration name.
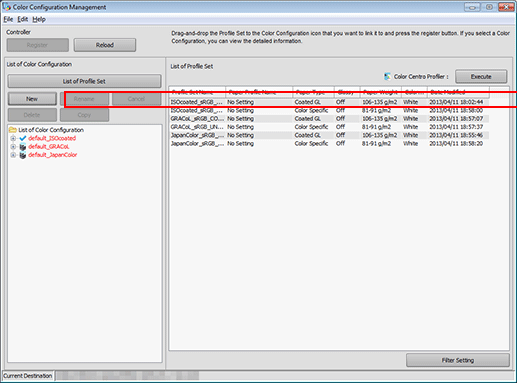
From the profile set list on the right, select the profile set to be registered, and drag to the color configuration added to the tree.
Example: Two profile sets: "Sample-coat-GL" for coated GL and "Sample_ColorPaper" for colored paper, are being registered.
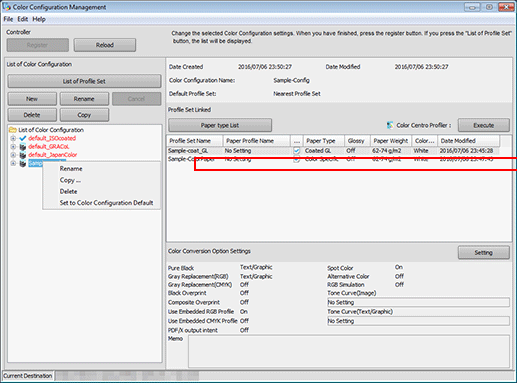
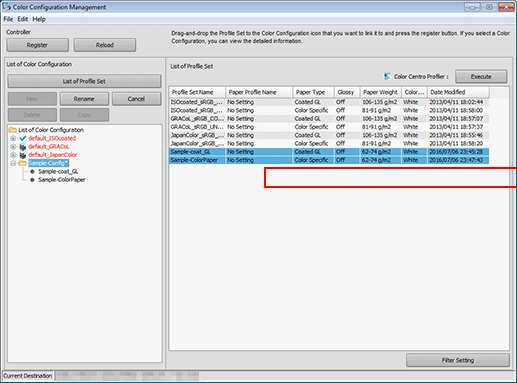
Check that the profile sets are added under the created color configuration.
Select the added profile sets and check the settings shown on the right side of the screen.
The correspondence of paper types and profiles, color conversion settings, and other information are displayed.
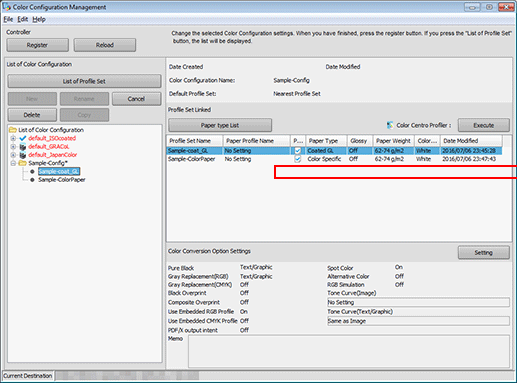
supplementary explanationIf paper type and/or weight are different, "Use approximate profile set" is set as the default. With this option, the most approximate profile set is automatically used.
supplementary explanationRegistered color configurations can be edited. (Refer to Editing and Registering a Color Configuration.)
Click Setting in Color Conversion Option Settings.
Color Conversion Setttings screen is displayed.
After setting the default color conversion option, click OK.
Change the settings on this screen to set the default color conversion option.
supplementary explanationFor details, refer to Changing the Color Conversion Setting.
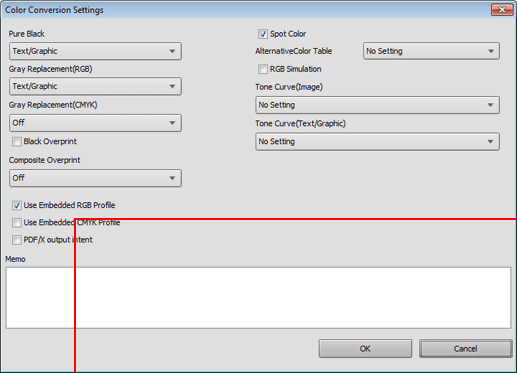
supplementary explanationTo use spot colors, select the box next to Spot Color. To use alternative colors, select the box next to Alternative Color.
supplementary explanationTo adjust the tone curve, set the Tone Curve (Image) and Tone Curve (Text/Graphics) to any option other than No Setting.
Click Register.
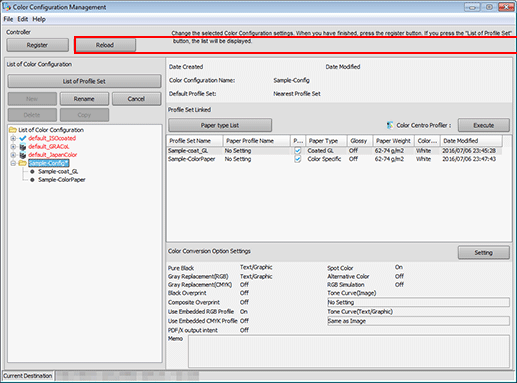
The color configuration is registered.
Setting the Default Color Configuration
You can set a frequently used color configuration as your default color configuration.
Right-click the color configuration that you want to set as default, and select Set to Color Configuration Default.