
Adjusting Tone Curves
Overview
Using Color Centro, you can adjust the tone curve (I/O density curve for CMYK colors) to adjust the color tone, brightness, and contrast of the whole page.
The adjusted tone curve can be registered in the image controller and called to be applied when printing.
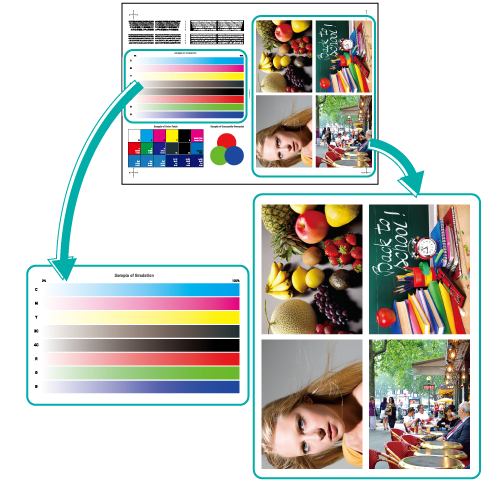
Using sample data (sample B), you can check the procedure during the actual operation.
• Meaning and Purpose of Tone Curves
By operating the I/O density curve for CMYK colors, you can adjust the reproduction of brightness, contrast, and gradation.
It is useful for changing the coloration, brightness, and/or contrast of photographs so as to suit the user's preference.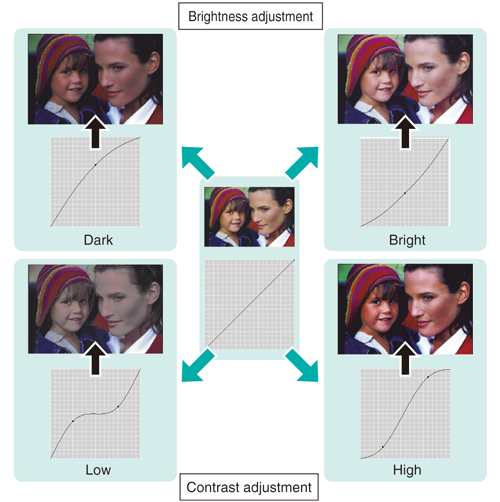
By registering the adjusted tone curve in the image controller, you can call this data at any time for any print.
• When to perform
When you want to change the brightness
When you want to change the contrast
When you want to change the overall coloration of a photo or illustration
•Intended Environment
Operating system | Windows 7 |
Application | Color Centro 2.1 / Adobe Acrobat XI Pro |
Printer driver | PS Plug-in driver |
Image Controller | Image Controller IC-604 |
* The sample screen may be different from the actual display depending on your system environment and application version/revision.
•Samples
Sample B: B_sample.pdf
Provided in the "/contents/sample/" folder on the User's Guide CD supplied with this machine.
•Workflow
Temporarily Saving Data on HDD
Adjusting the Tone Curve with Color Centro
Applying the Saved Tone Curve for Printing
•Precautions
Color output density can fluctuate over the course of a day due to humidity, temperature, and other conditions. Paper type, thickness, and screen may also affect color output density.
To reproduce stable colors, in addition to regular calibration, make other pre-output image quality adjustments as necessary, such as when changing screens or papers or when hue is important. For details, refer to Image quality adjustment using image controller.
Temporarily Saving Data on HDD
You can temporarily save data to the HDD before adjusting the tone curve.
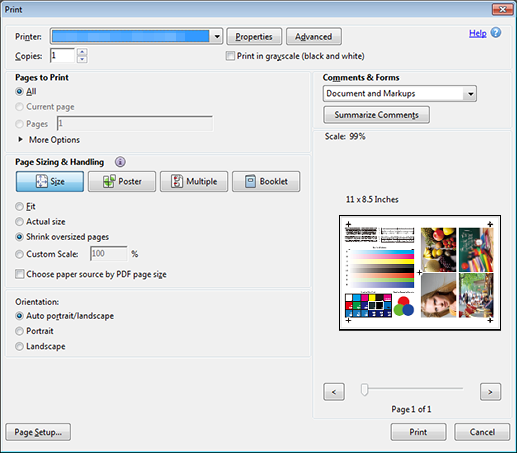
Open the original data with the application, and then click Print on the File menu.
Example: Sample B (B_sample.pdf) is opened.
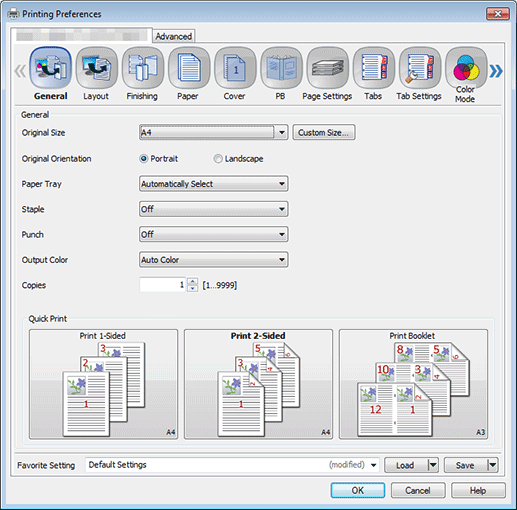
Select the printer to use for printing and click Properties.
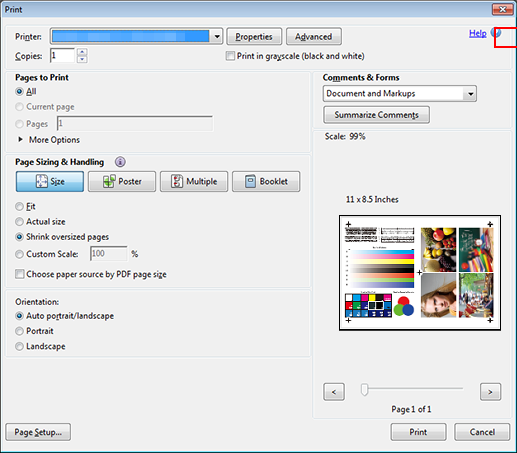
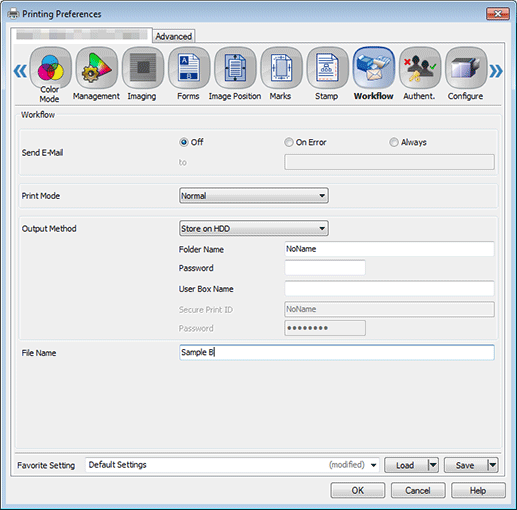
Click the Workflow tab, and then select Store on HDD in Output Method.
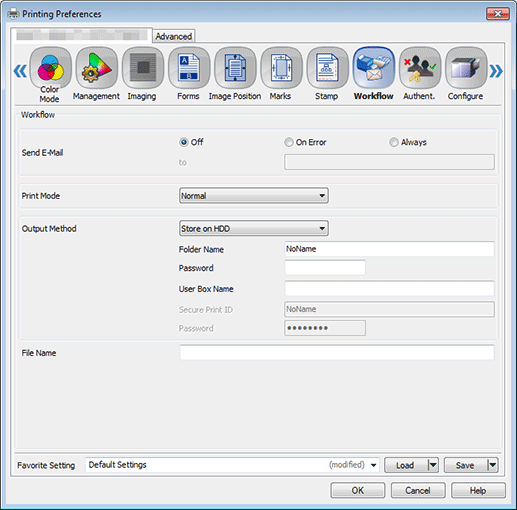
Enter a file name in the File Name field and click OK.
Click Print on the Print screen.
The data is saved to the HDD.
Adjusting the Tone Curve with Color Centro
Start Color Centro, and adjust the tone curve.
Start Color Centro and log in to the machine. (Refer to Start Color Centro.)
The Color Centro top screen is displayed.
Click Tone Curve Adjustment on the top screen.
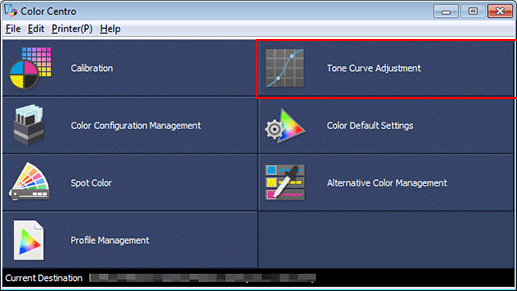
The Tone Curve Adjustment screen is displayed.
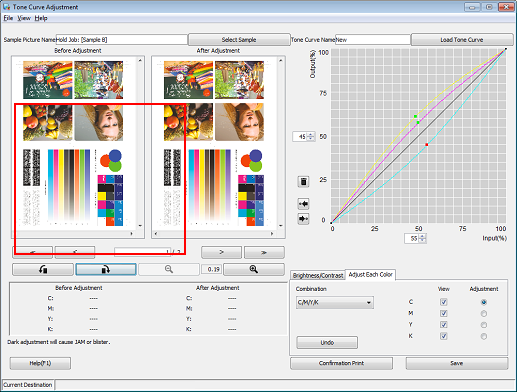
Click Select Sample.

Press Hold Job.
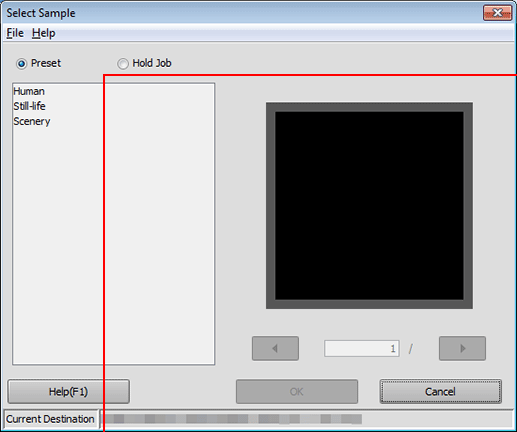
Select the file name for the temporarily saved job and click OK.
When Hold Job is selected, the jobs temporarily saved on the HDD are displayed in a list.
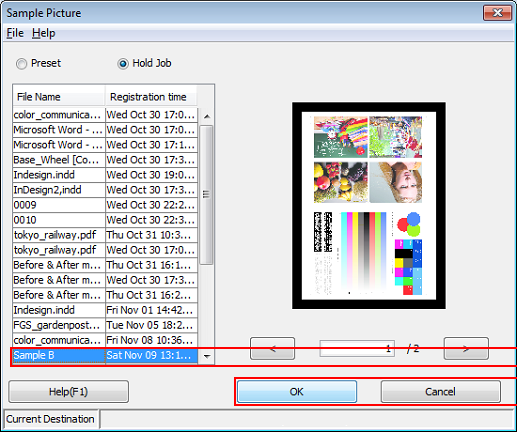
The selected image is loaded to the Tone Curve Adjustment screen, and the sample image is displayed.
Click Adjust Each Color, and then select C/M/Y/K for Combination.
supplementary explanationTo adjust brightness and/or contrast, click Brightness/Contrast.
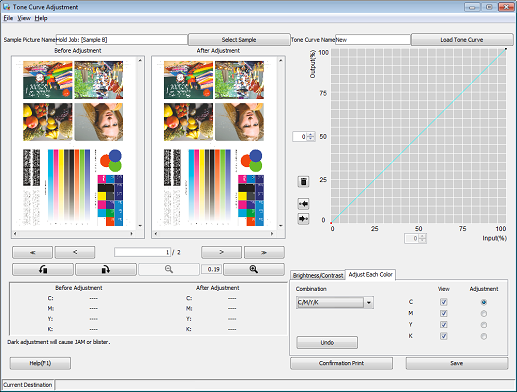
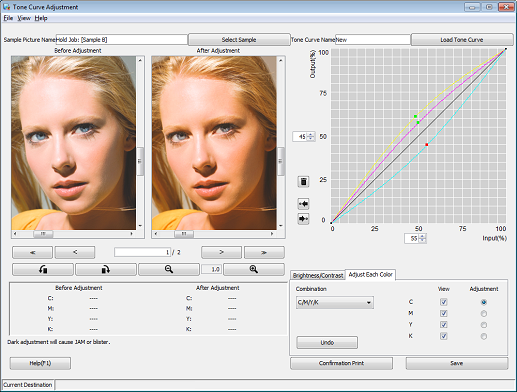
Under Adjustment, select the radio buttons of the colors that you want to adjust (C/M/Y/K). Click on the tone curve and drag the displayed handle (operating point) to adjust the tone curve.
Make the adjustment while checking the sample images under Before Adjustment and After Adjustment.
supplementary explanationTo change the displayed part of the image, move the scroll bar.
supplementary explanationYou can use the buttons under the sample images to turn the images 90 degrees clockwise and counter-clockwise, and to zoom in and out the images.
supplementary explanationTo make an image brighter (to make colors lighter), make the curve more concave.
supplementary explanationTo make an image darker (to make colors deeper), make the curve more convex.
supplementary explanationTo raise the contrast (to make darker colors darker and lighter colors lighter for enhanced sharpness), make an S-shaped curve.
supplementary explanationTo lower the contrast (to make darker colors lighter and lighter colors darker for more even expression), make a reverse S-shaped curve.
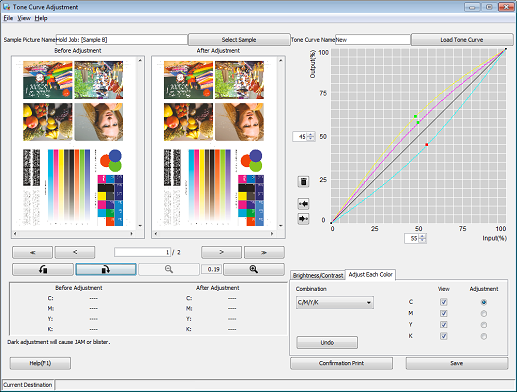
After making the adjustment, click Save.
Enter the name of the adjusted tone curve. Select Controller as the Destination Folder and click Save.
Selecting Controller saves the spot color to the image controller.
Example: The tone curve is saved with the name "Sample-Curve."
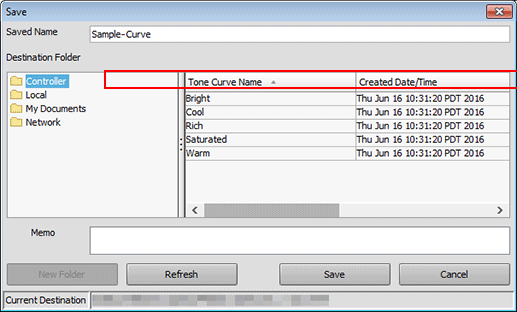
When the Save complete message is displayed, click OK.

Close the screen by selecting Close from the File menu.
Applying the Saved Tone Curve When Printing
You can apply the saved tone curve when printing.
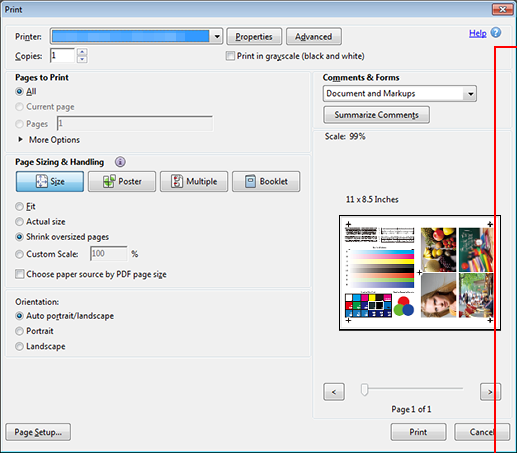
Open the original data with the application, and then click Print on the File menu.
Example: Sample B (B_sample.pdf) is used.
Select the printer to use for printing and click Properties.
Select Default Settings for Favorite Setting and click Load.
Before setting the tone curve, restore the default setting.
Click the Management tab, and then click Acquire Color Management Data.
When the color management data is acquired, a green checkmark is displayed.
supplementary explanationIf the Management tab is not displayed, click
 to switch the tab display.
supplementary explanationIf the color management data could not be acquired, a red mark is displayed. Check if an optional paper tray is correctly mounted.
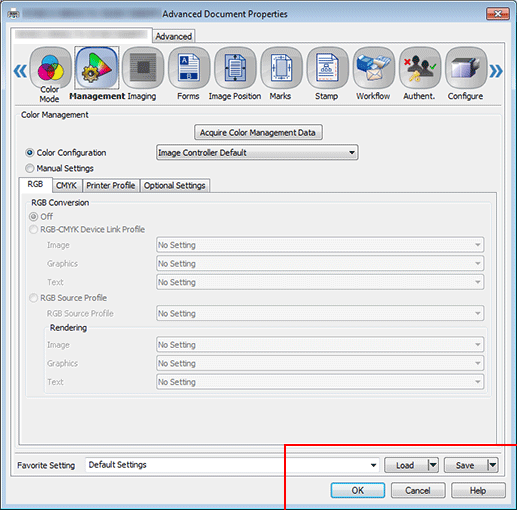
Click Optional Settings and clear Use Default Setting of Selected Color Configuration.
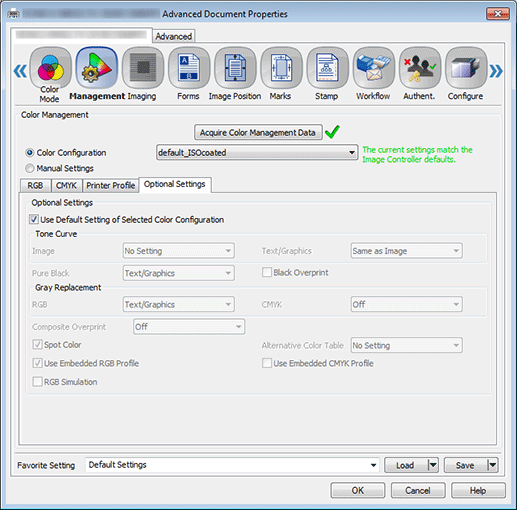
supplementary explanationIf Use Default Setting of Selected Color Configuration under Optional Settings is checked, remove the check. If this is checked, tone curve cannot be selected.
Under Tone Curve, select the tone curve you want to apply and click OK.
You can set different tone curves for Image and Text/Graphics.
Example: "Sample-Curve" is selected.
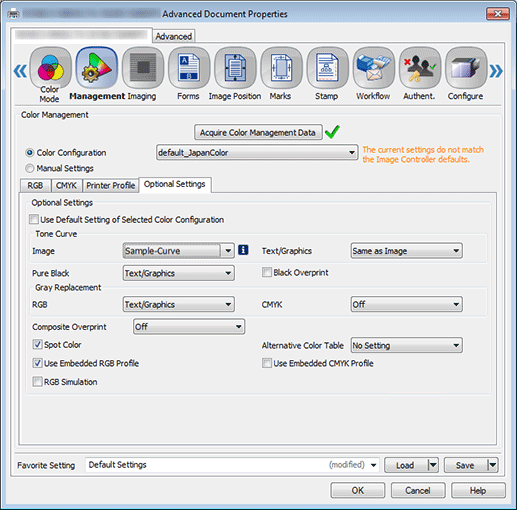
supplementary explanationA warning symbol
 is displayed when you set a tone curve. This is because it is different from the controller's current default setting. Proceed by clicking OK.
On the Print screen, enter the Copies and click Print.
The original is printed using the applied tone curve.