Setting a Hot Folder
Create a Hot Folder by using the machine.
Example: This section describes an example of sharing a Hot Folder with multiple users and making the user setting to the folder.
To make the user setting, you have to register the user setting (user name and password) in advance (Refer to Registering a User Setting).
You can also create Hot Folder by using PageScope Web Connection. For details about PageScope Web Connection, refer to Hot Folder Setting.
Follow the procedure on Registering a User Setting to display the [Administrator Setting Menu] screen.
Press [Network Setting] on the [Administrator Setting Menu] screen
 [NIC Setting]
 [Hot Folder Setting] in sequence.
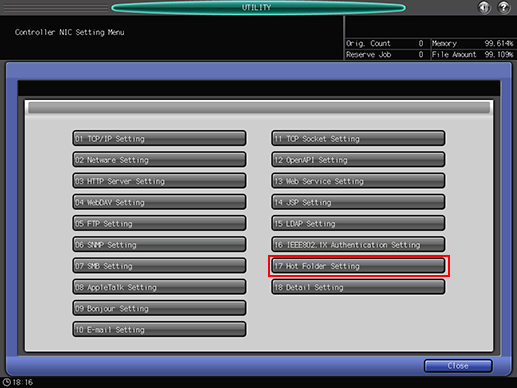
The [Hot Folder Setting] screen is displayed.
Press [Folder Setting].
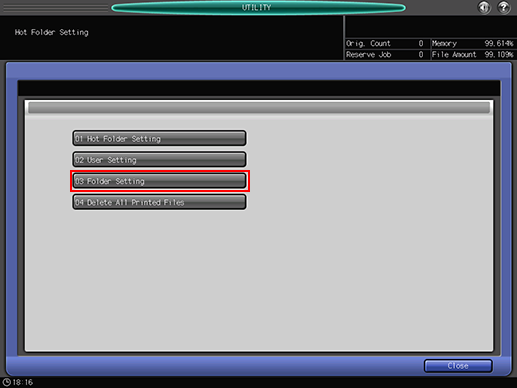
The [Folder Setting] screen is displayed.
Press [Register].
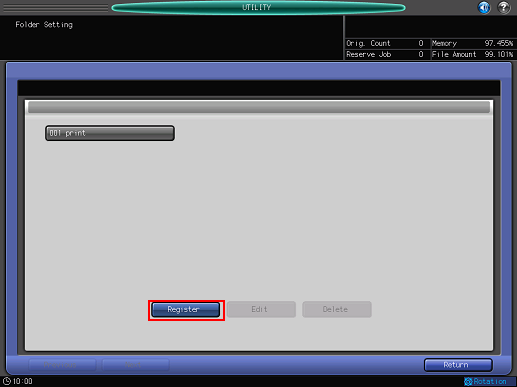
Multiple Hot Folders can be created (up to 100 folders).
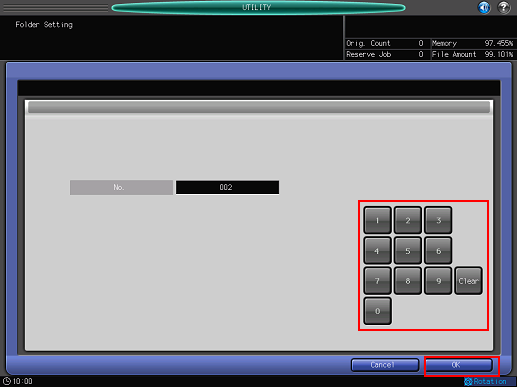
Press [Change] for [No.]
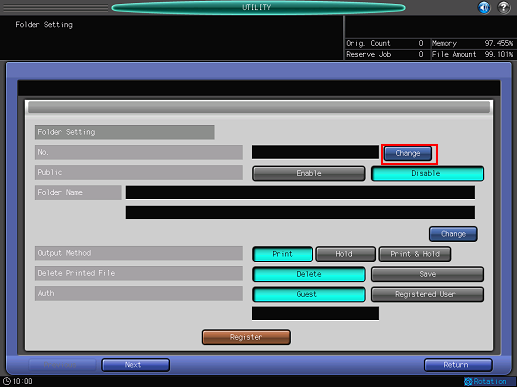
Enter the registration number and press [OK].
Example: "2" is entered.
For the input method, refer to Inputting Characters.
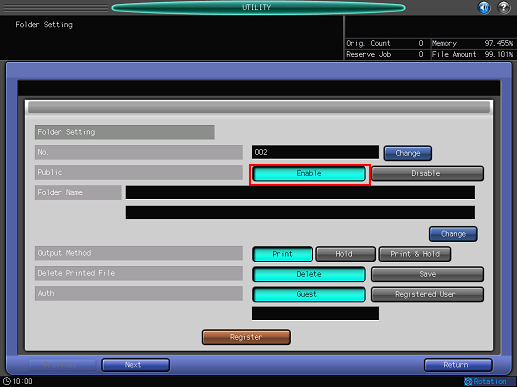
Press [Enable] for [Public].
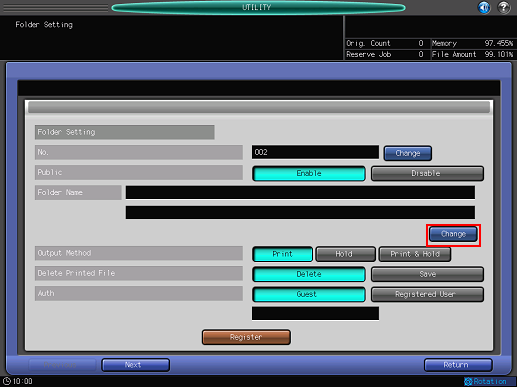
Press [Change] for [Folder Name].
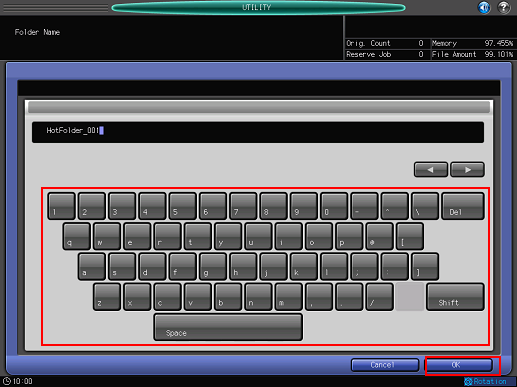
Enter a folder name and press [OK].
Example: "HotFolder_001" is entered.
For the input method, refer to Inputting Characters.
Press [Registered User] for [Auth].
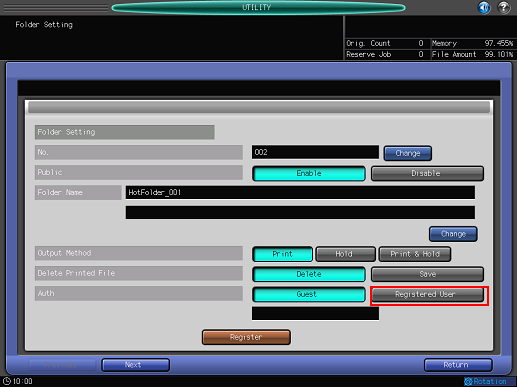
To make the user setting, you have to register the user setting (user name and password) in advance (Refer to Registering a User Setting).
Select a user setting to use for the Hot Folder access authentication, and then press [OK].
Example: Registering a User Setting001 User_001" registered in " is selected.
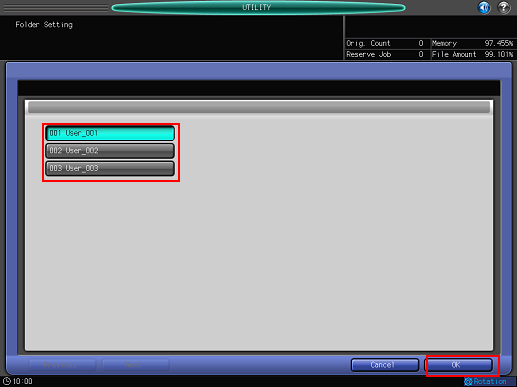
Only a single user setting can be assigned to a Hot Folder for access authentication.
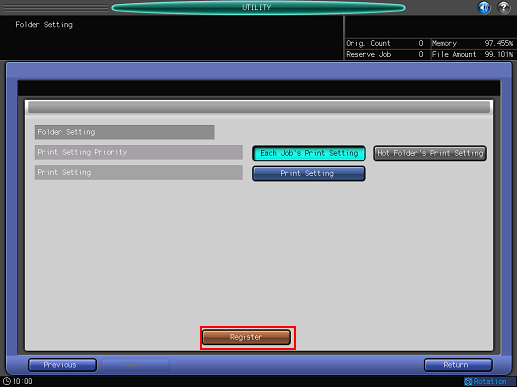
Set the following options, as necessary.
The settings in this case are as follows:
Item
Setting
[Output Method]
[Print]
[Delete Printed File]
[Delete]
[Print Setting Priority]
[Each Job's Print Setting]
[Print Setting]
This setting screen has 2 pages to go through. Use [Next] or [Previous] at the bottom-left corner of the screen to switch.
After setting the items, press [Register].
Press [Close].
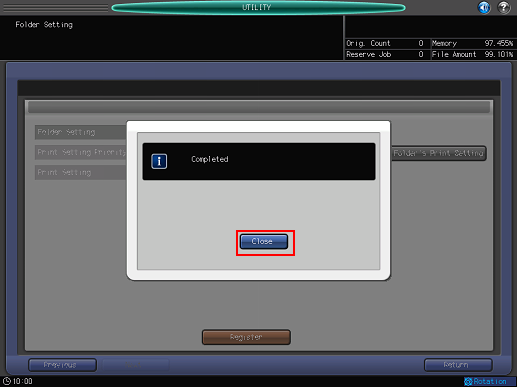
When the registration fails, retry from Step 4 and change the folder number without overlaps.
Press [Return].
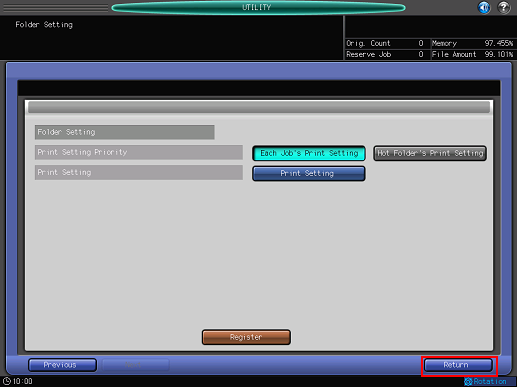
The screen returns to the [Folder Setting] screen.
Press [Return].
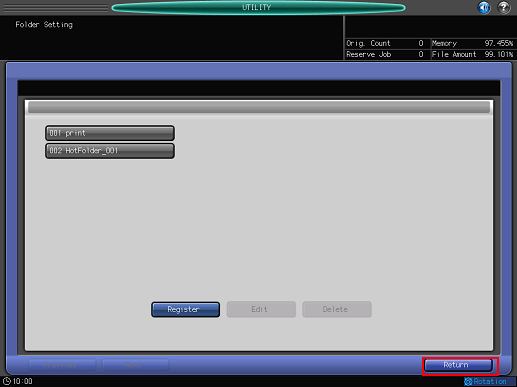
Press [Hot Folder Setting].
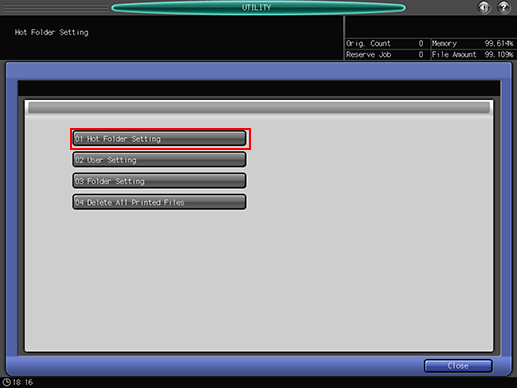
The [Hot Folder Setting] screen is displayed.
Select the following items, and then press [OK].
Item
Setting
[Hot Folder Function]
[Enable]
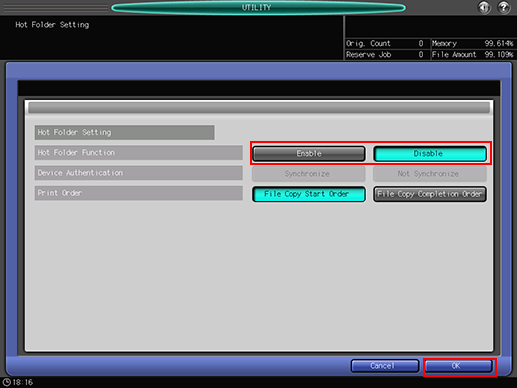
The Hot Folder is set up.

