
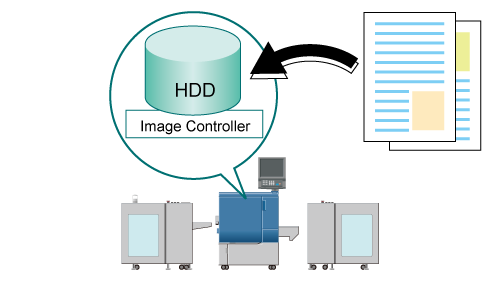
Using HDD: Temporarily Holding Jobs in HDD
You can temporarily hold print data as a "job" in the HDD of the machine. It is possible to change the print setting, edit the hold jobs on a per page basis and print the data as necessary using the touch panel on the main body. You can also create a specific folder to store the hold jobs.

You can temporarily hold print data as a "job."
The hold jobs are retained in the HDD even if the power of the machine is turned off.
• Examples Introduced in This Section
The data is temporarily held in the HDD of the machine using the printer driver.
•Intended Environment
Operating system | Windows 7 |
Application | Acrobat XI Standard |
Printer driver | PPD driver |
* The sample screen may be different from the actual display depending on your system environment and application version/revision.
• Related Section
•Precautions
A maximum of 500 jobs can be temporarily held.
If you need to manage jobs in folders or save important jobs for a long time, save them as HDD saved jobs. (Refer to Using HDD: Managing Jobs in Folders.)
Temporarily Holding from the Printer Driver
You can use the printer driver to temporarily hold the print data as a "print job" in the HDD of the machine.
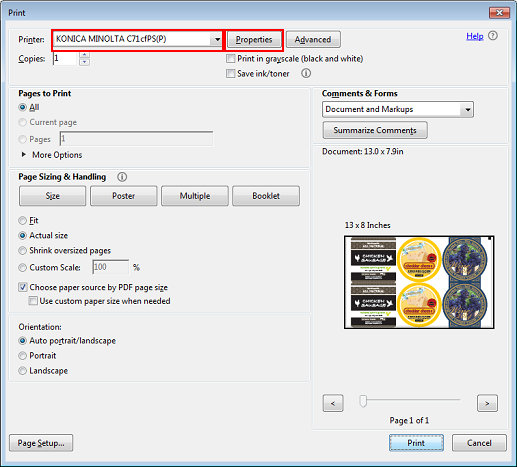
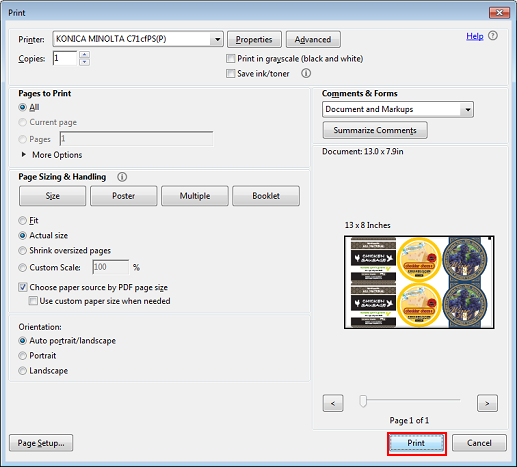
In the application, open the data to temporarily hold and click [Print] in the [File] menu.
The [Print] screen is displayed differently depending on the application used.
If there is no [File] menu, click the [Print the file] button.
Select the printer to use for printing and click [Properties].
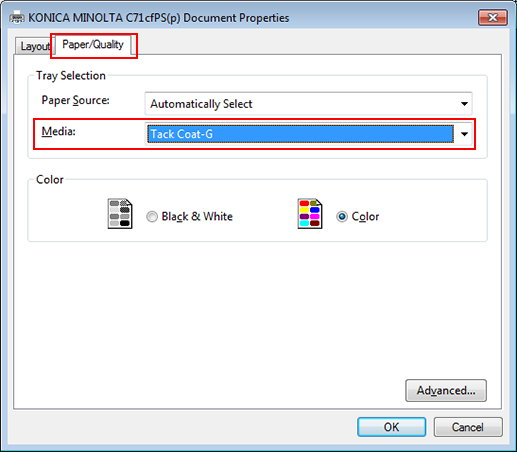
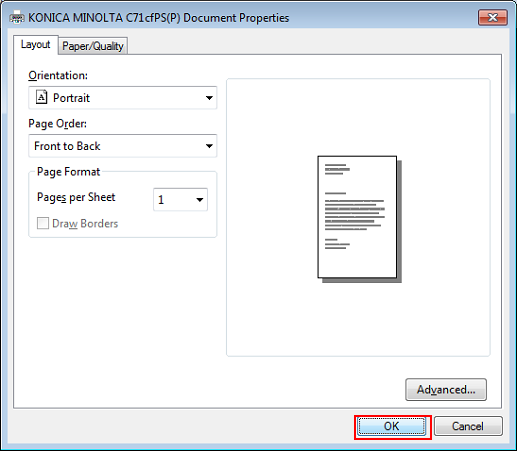
Click [Paper/Quality], and then select the paper type for [Media].
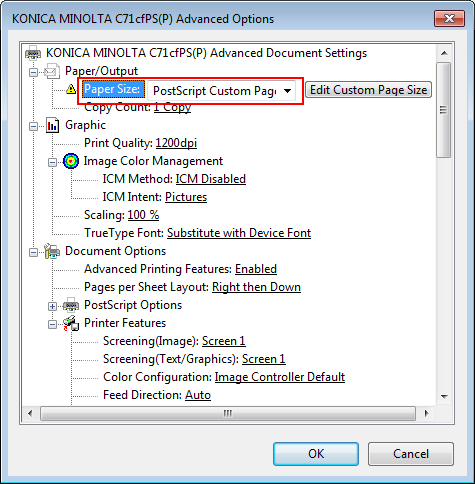
Click [Advanced].

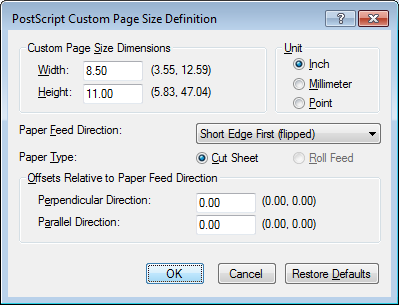
Specify [Paper Size] as [PostScript Custom Page Size].
Click the [ Edit Custom Page Size] edit to specify the paper size.
Set the print position.
Click [Print Position Setting], and then select [Left], [Center], or [Right]. Usually, select [Center].

Set the paper weight (thickness) of paper.
Click [Weight], and then select the current media weight (thickness).
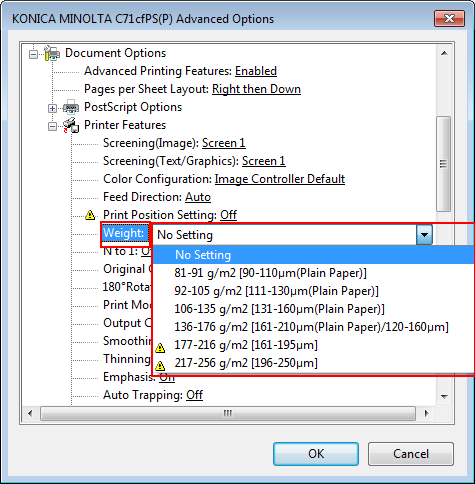
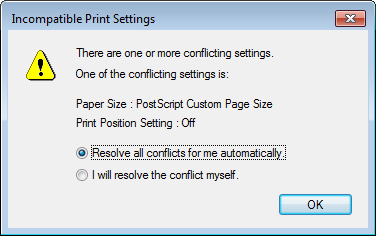
If the selected weight (thickness) is not supported for the paper type,
 is displayed. If the paper setting conflicts such as the case of selecting , [Incompatible Print Settings] is displayed. In this case, select [Resolve all conflicts for me automatically.] or [I will resolve the conflict myself.], and then check the paper setting.
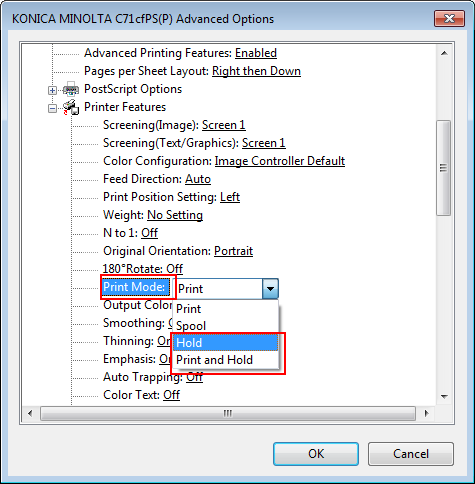
Select [Hold] or [Print and Hold] in [Print Mode] and click [OK].
[Hold]: The print data is temporarily held in the HDD when you print.
[Print and Hold]: The print data is printed and temporarily held in the HDD when you print.
Click [OK] in the property screen of the document.
On the [Print] screen, click [Print].
The data is temporarily held in the HDD and displayed as a print job in [JOB LIST] - [Hold Job] on the touch panel of the main body.