
[Job History] Screen
You can display the [Job History] screen by clicking the [Job History] in the [Job Centro] screen. The job history can be saved in a file in the CSV format (the administrator only).
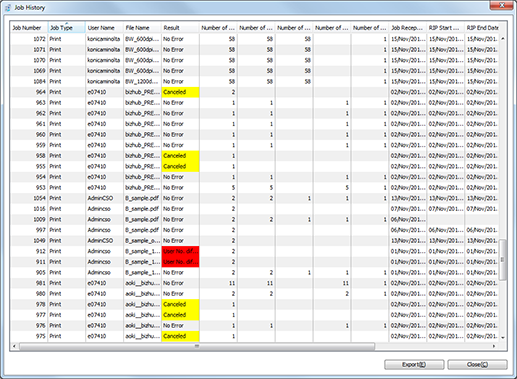
Display Items of Job History
Items to be displayed vary depending on a job type.
Job Type | Copy | Scan | |||
Save | Save | ||||
[Job Number] | Available | Available | Available | Available | Available |
[User Name] | Available | Available | Available | Available | Available |
[File Name] | Available | Available | Available | Available | Available |
[Result] | Available | Available | Available | Available | Available |
[Number of Pages] | Available | Available | Available | Available | Available |
[Number of Pages Printed] | Available | Available | |||
[Number of Monochrome Pages Printed] | Available | Available | |||
[Number of Color Pages Printed] | Available | Available | |||
[Number of Copies Printed] | Available | ||||
[Job Reception Date] | Available | Available | Available | Available | Available |
[RIP Start Date] | Available | Available | |||
[RIP End Date] | Available | Available | |||
[Print Start Date] | Available | Available | |||
[Print End Date] | Available | Available | Available | ||
[Paper Size] | Available | Available | Available | ||
[Paper Type] | Available | Available | Available | Available | |
For the print of a hold job or an HDD job from the Job Management screen, [RIP Start Date] and [RIP End Date] are not displayed.
To adjust the display width of the column, double-click on the boundary between items on the item bar. The display width of the column is automatically adjusted according to the longer character strings: the strings of the item name or the strings of the item in the list.
To sort the data by item, click the header of the column. You can switch between ascending order and descending order by clicking.
You can set Display/Undisplay of the item by right-clicking on the header item to display the [List Items Settings] screen. For details, refer to Set List Items.

The administrator can export (save) a job history. For details, refer to Export Job History (Save).