[Connect Printer] Screen
On the [Connect Printer] screen, you can select a printer to be connected.
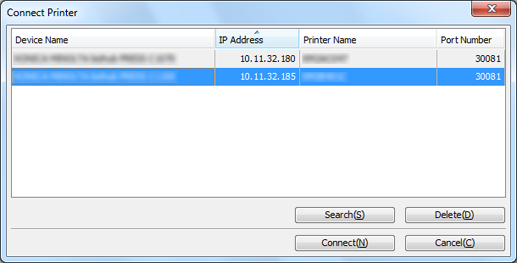
Name | Description |
|---|---|
(Printer list) | Display the printers available for connection. For details, refer to "About Printer List." |
[Search] | Search for printers to be displayed in the list. For details, refer to "Adding to Printer List." |
[Delete] | Delete a printer from the list. For details, refer to "Deleting from Printer List." |
[Connect] | Connect to the selected printer. |
[Cancel] | Does not perform login operation, and Job Centro does not start. |
About Printer List
The printer list displays the following items. Up to 20 items can be displayed.
Name | Description |
|---|---|
[Device Name] | The device name of the registered printer. |
[IP Address] | The IP address of the registered printer. |
[Printer Name] | The printer name of the registered printer. |
[Port number] | The port number of the registered printer. |
To adjust the display width of the column, double-click on the boundary between items on the item bar. The display width of the column is automatically adjusted according to the longer character strings: the strings of the item name or the strings of the item in the list.
Add to Printer List
Add a printer to the printer list on the [Connect Printer] screen.
On the [Connect Printer] screen, click [Search].
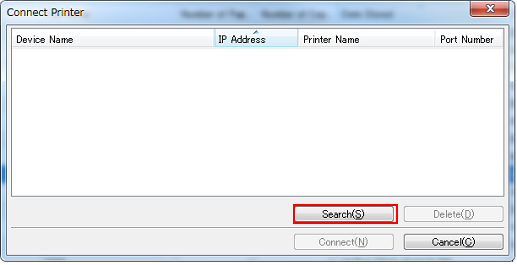
The [Search Printers] screen is displayed.
Select [Auto Search], [IP Address Range Search], or [IP Address Designation Search].
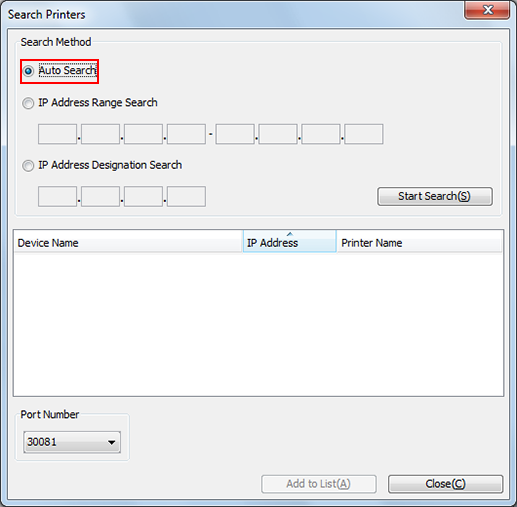
If selecting [Auto Search], you can search for the printer corresponding to Job Centro within the same subnet mask.
If selecting [IP Address Range Search] or [IP Address Designation Search], enter the IP address.
Click [Start Search].
The printers meeting the search condition are listed.
Select the printer to be displayed on the [Connect Printer] screen, and click [Add to List].
Up to 20 printers can be added to the list.
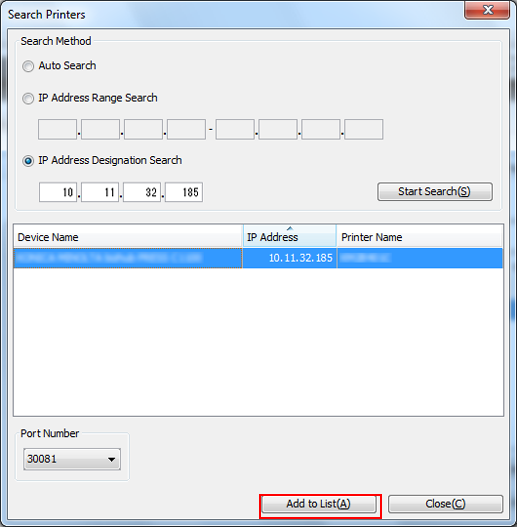
Click [Close]
The screen returns to the [Connect Printer] screen.
Delete from Printer List
Delete a desired printer from the printer list on the [Connect Printer] screen.
Select the printer from the printer list on the [Connect Printer] screen.
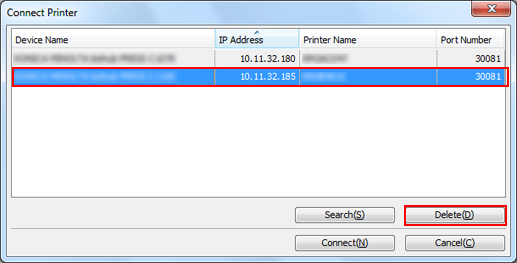
Click [Delete].
The [Delete] screen is displayed.
Click [OK].
The selected printer is deleted from the list.
