
Confirming the Automatic Inspection Report
Viewing the report from the machine
When you want to check the result of Auto Inspection, confirm AutoInspect.Report, and take the appropriate action such as reprinting. This section describes how to check a report from the main unit.
NOTICE
To create AutoInspect.Report, enable Create Auto Inspection Report before performing automatic inspection.
To display AutoInspect.Report, configure Automatic Inspection NIC Setting.
Press AutoInspect.Report on the MACHINE screen.
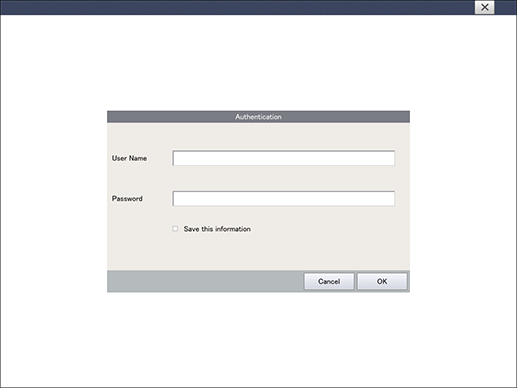
The login window opens.
Enter the user name and password for User Name and Password to log in.
User Name: webuser
Enter any password.
The AutoInspect.Report screen is displayed.
supplementary explanationTo change Password, select UTILITY - Administrator Setting - UK-301 Security Settings - Web Access Password Setting. After changing the password, turn the sub power switch of this machine OFF and ON.
supplementary explanationIf you select the Save this information check box, User Name and Password are stored, so you do not need to enter them to log in the next time and after.
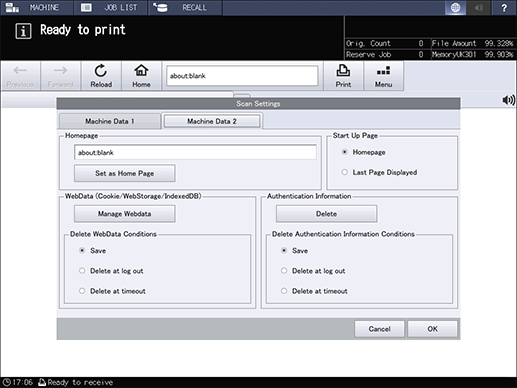
supplementary explanationTo delete User Name and Password that are stored, press Web Browser on the MACHINE screen, select Menu - Setting - Setting, and press Delete in Machine Data 2.
supplementary explanationWhen the machine is equipped with Image Controller IC-313, Image Controller IC-314, or Image Controller IC-417, Save this information is not available.
supplementary explanationBeyond that, you need to enter User Name and Password every time depending on the option configuration.
Press Link (Report).
A list of Completed Job and Out of range is displayed.

Display item
Description
Job ID
Displays the ID of the output job.
Date/Time
Displays the date and time at which the job is output.
Filename
Displays the file name of the output job.
Result
Displays the inspection result such as "Successful" or "Stain".
Report Creation Status
Indicates the report creation status. If the report has not been created, you will not be able to confirm the details in Link(Report). Allows you to confirm the details of the report.
Link(Report)
Allows you to confirm the details of the report.
supplementary explanationYou can switch the language to Japanese or English via the drop-down list on the upper right of the screen.
supplementary explanationWhen an error is detected, the character color is changed.
supplementary explanationIf the HDD capacity of the Auto Inspection Unit UK-301 reaches 100%, no report is created.
Select an unnecessary report, and press Delete to delete such a report.
Press the file name under Out of range, and also press Display.
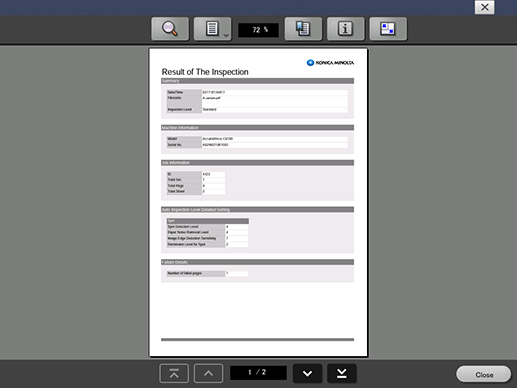
The Result of The Inspection screen is displayed.
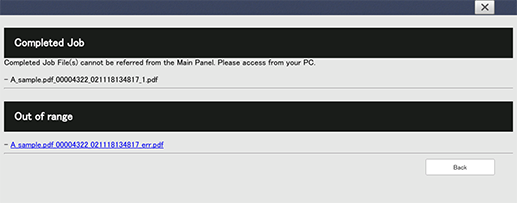
To check files in Completed Job, access from Web Utilities.
Press
 .
.A list of out-of-range parts is displayed.
Key type
Description

Searches for characters in a report. When the target is found, it is indicated by the green marker.

Sets the page display unit to Single Page or Synchronize Page.
Allows you to check the page on which a spot is detected.

Allows you to check information such as the file name or size.

Allows you to change the screen display method such as enlargement or reduction.
supplementary explanationPressing on the upper right of the screen returns to the MACHINE screen. Pressing Close on the lower right of the screen returns to the Completed Job, Out of range screen.
supplementary explanationFor details on Result of The Inspection, refer to Viewing the report via Web Utilities of the Auto Inspection Unit UK-301.
Select the part you want to check, and press OK.
The detected page is displayed.
supplementary explanationFor details on the detected parts, refer to Web Utilities.
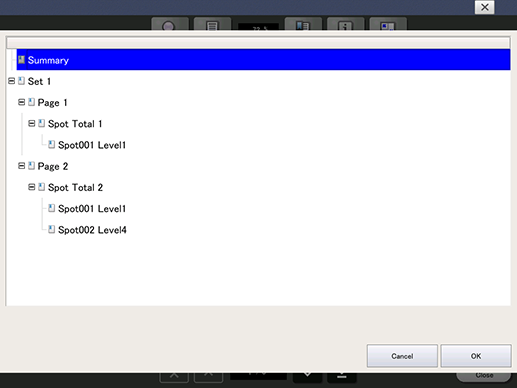
Type
Description
Set
Indicates the number of the set in which an out-of-range image is detected.
Page
Indicates the number of the page on which an out-of-range image is detected.
Spot Total
Indicates the total number of detected spots. Up to 20 spots are displayed.
Spot(XXX) Level (n)
Indicates the spot level (n). For details on the spot level, refer to Automatic Inspection Level Setting. ("xxx" indicates a serial number.)
Omission Total
Indicates the total number of detected omissions. Up to 20 omissions are displayed.
Omission(XXX) Level (n)
Indicates the omission level (n). ("xxx" indicates a serial number.)
Alignment error
Displayed when the system failed in alignment with the reference image.
csv read error
Displayed when the system failed to create a report.
Too many spots
Displayed when too many spots are detected.
Viewing the report via Web Utilities of the Auto Inspection Unit UK-301
When you want to check the result of Auto Inspection, confirm AutoInspect.Report, and take the appropriate action such as reprinting. This section describes how to check a report from Web Utilities.
NOTICE
To create AutoInspect.Report, enable Create Auto Inspection Report before performing automatic inspection.
To display AutoInspect.Report, configure Automatic Inspection NIC Setting.
Open the Web browser.
For details on the browser operating environment of Web Utilities, refer to Operating Environment.
Enter the following URL in the address bar and press Enter.
"http://< IP address of Auto Inspection Unit UK-301>/"
Example: When the IP address of the Auto Inspection Unit UK-301 is set to "192.168.1.20", type http://192.168.1.20/.
This displays the top page of Web Utilities of the Auto Inspection Unit UK-301.
NOTICE
In Automatic Inspection NIC Setting, specify the IP address of the Auto Inspection Unit UK-301 in advance.
Click List of Auto Image Inspection Report.
The login window opens.
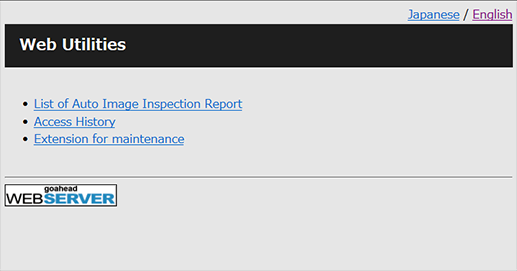
supplementary explanationTo change the language, click Japanese / English on the upper-right side of the screen.
supplementary explanationIn addition, Access History that contains the operation contents and Extension for maintenance of the menu for a service engineer (CE) are displayed on the top page of Web Utilities.
Enter the user name and password for User Name and Password to log in.
User Name: webuser
Enter the desired password for Password.
When the log in process is completed, the List of Report page is displayed.
supplementary explanationTo change Password, select UTILITY - Administrator Setting - UK-301 Security Settings - Web Access Password Setting.
Confirm the target Automatic Inspection Report.
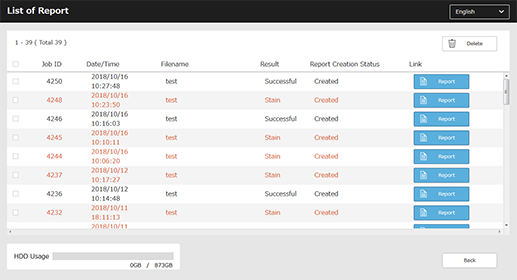
The following items are displayed in List of Report.
Job ID
Date/Time
Filename
Result (Successful/Stain)
Report Creation Status (Created/Uncreated)
Link (Report)
Tips
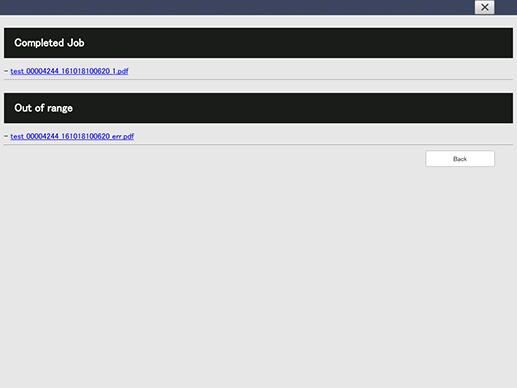
Click Report to display Completed Job and Out of range.
When an error is detected, the character color is changed.
If the HDD capacity of the Auto Inspection Unit UK-301 reaches 100%, no report is created. Select an unnecessary report, and press Delete to delete data.
Display item | Description |
|---|---|
Completed Job | Shows a report of the printout that satisfies the inspection standard. Up to 1,000 pages can be created as a report. If the number of pages exceeds 1,000, the excess is divided into another PDF file. |
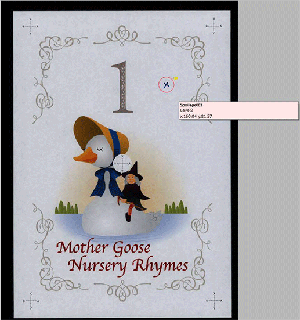
Out of range | Shows a report of the printout that does not satisfy the inspection standard. If you view a report via Web Utilities of the Auto Inspection Unit UK-301, the problem part is framed in red, and the reason is displayed. |
Result of The Inspection | Allows you to confirm the inspection result. Selecting this item displays the detection date and time as well as the inspection level. For details on each item, refer to the following information. |
Summary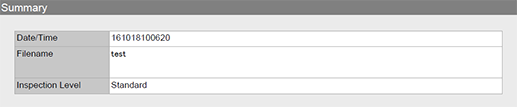
Name | Description |
|---|---|
Date/Time | Displays the detection date and time. |
Filename | Displays the file name that is used for printing. |
Inspection Level | Displays the inspection level. Standard Essential Premium |
Machine Information
Name | Description |
|---|---|
Model | Displays the model code that is used for printing when an automatic inspection is performed. |
Serial No. | Displays the serial number of the model that is used for printing when an automatic inspection is performed. |
Job Information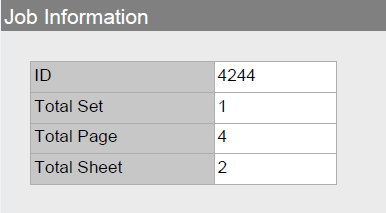
Name | Description |
|---|---|
ID | Displays the ID of the job for which an automatic inspection is performed. |
Total Set | Displays the number of sets specified for the job. |
Total Page | Displays the number of pages for each copy. * When Image Controller IC-313, Image Controller IC-314, or Image Controller IC-417 is used, the total number of pages in a single job is displayed. |
Total Sheet | Displays the number of sheets that are used for each copy. * When Image Controller IC-313, Image Controller IC-314, or Image Controller IC-417 is used, the number of sheets used for each job is displayed. |
Auto Inspection Level Detailed Setting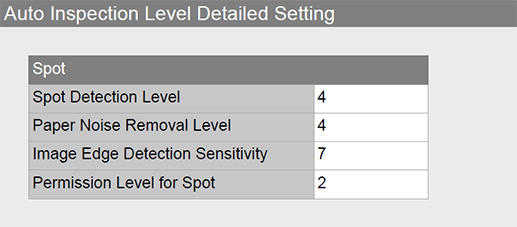
Displays the items specified in Automatic Inspection Level Setting. For details, refer to Automatic Inspection Level Setting.
Name | Description |
|---|---|
Spot Detection Level | Displays Spot Detection Level. |
Paper Noise Removal Level | Displays Paper Noise Removal Level. |
Image Edge Detection Sensitivity | Displays Image Edge Detection Sensitivity. |
Permission Level for Spot | Displays Permission Level for Spot. |
Failure Details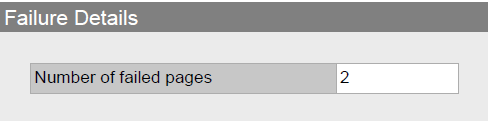
Name | Description |
|---|---|
Number of failed pages | Displays the number of pages that are judged to be out of range. |
Out of range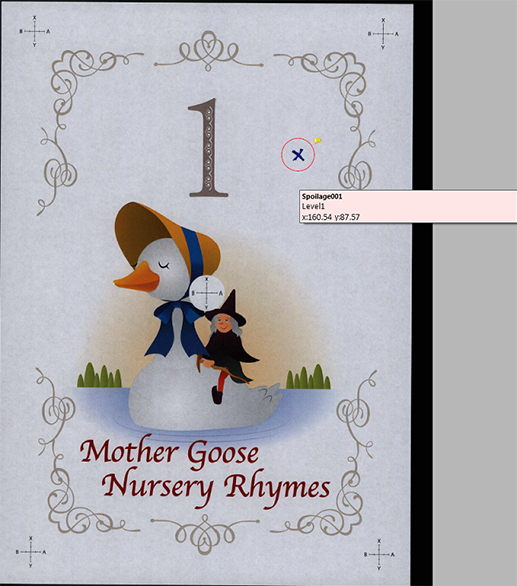
The part related to the problem is framed in red, and details are displayed as shown below.
Name | Description |
|---|---|
Spot(XXX) | Displays the number of detected spots. ("XXX" indicates a serial number.) |
Level(X) | Displays the spot detection level. ("X" indicates the level.) |
x:XXX.XX y:XXX.XX | Displays the spot position by using the upper left of the screen as the origin of coordinates. ("x" indicates the lateral position, and "y" indicates the vertical position.) |