
Changing the Screen from the Printer Driver
The user can change the screen via the printer driver when printing.
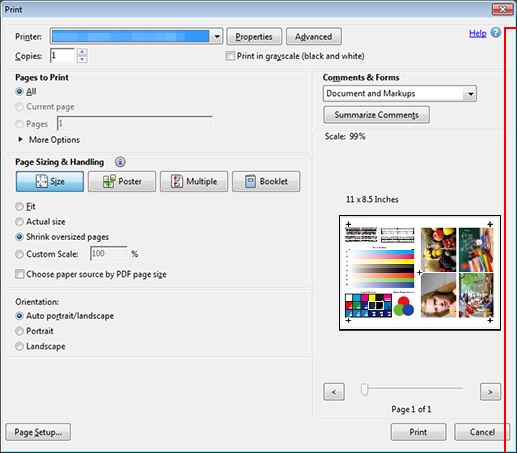
Open the original data with the application, and then click Print on the File menu.
The Print screen is displayed differently depending on the application used.
If there is no File menu, click the Print the file button.
Select the printer to use for printing and click Properties.
Click the Imaging tab and select the screen for Image under Fixed Screen.
Example: The following shows an example of a default screen. The selectable screen types can be changed by the administrator from the UTILITY menu. The available screen types may also vary depending on the image controller.
Screen 1 (Dot190): Uses fine dot arrangement. Suitable for printing catalogs and brochures.
Screen 2 (Dot150): Uses fewer lines for reduced granularity. Suitable for printing color photographs and leaflets.
Stochastic (FM1): Uses non-periodic dot arrangement. Dot size is fixed; intensity is expressed by changing the number and position of dots. Suitable for sharp reproduction of color photographs and text.
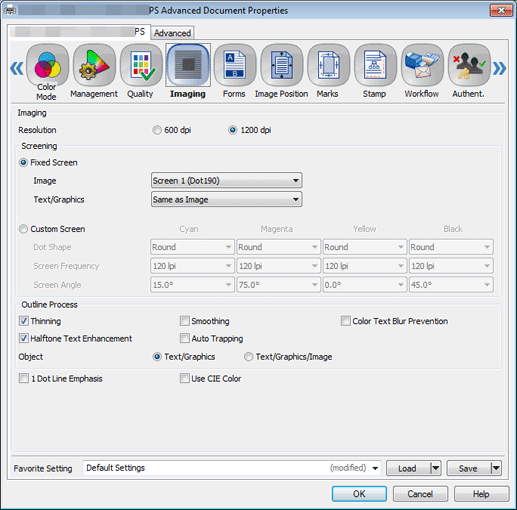
supplementary explanationSelecting Custom Screen allows you to access advanced settings: dot shape, screen line count, and screen angle. (Refer to [Custom Screen].)
Select a screen for Text/Graphics, and click OK.
To use the same screen that is used for Image, select Same as Image.

Click Print on the Print screen.
The original is printed using the selected screen.