
Checking Send History
The [Send History] screen of the [JOB LIST] screen provides a listing of send history.
Details of each job can be checked on the [Ticket Details] screen.
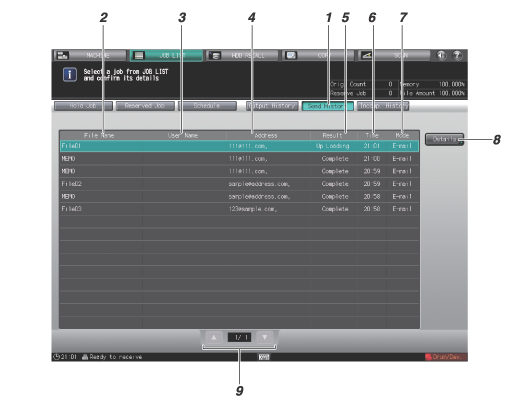
No. | Name | Description |
|---|---|---|
1 | [Send History] | Press to display the [Send History] screen. |
2 | [File Name] | Displays the file name when applied. |
3 | [User Name] | Displays the user name when registered. |
4 | [Address] | Displays the destination address. |
5 | [Result] | Displays the send result to Image Controller. Check the send result to the destination on the [Controller Machine Setting Menu] screen displayed by pressing [Controller] of the [MACHINE] screen. For information about how to check the job on the [Controller Machine Setting Menu] screen, refer to Job List: Checking or Controlling Job. |
6 | [Time] | Displays the time of transmission in 24-hour format. |
7 | [Mode] | Displays the mode (Email/HDD/FTP/SMB/Queue*1/USB*2) of the send job. When selecting multiple destinations, only one destination is displayed. (The order of priority is: Email - HDD - FTP - SMB - Queue*1/USB*2) *1: Displays only when Image Controller IC-308 or Image Controller IC-310 is mounted. *2: Displays only when Image Controller IC-602 is mounted. |
8 | [Details] | Pressed for a job to be checked in detail after you select it from the list. The [Ticket Details] screen for the selected job is displayed. |
9 | Scroll keys | Used to scroll the list of send history. The current page number and total page count of the list are displayed between the keys. |
Follow the procedure below to check the details of jobs.
Press [JOB LIST] tab on the screen, then press [Send History].

Check the status of jobs sent in the list of the screen.
If 15 or more jobs are sent, press [
 ] or [
 ] to display.
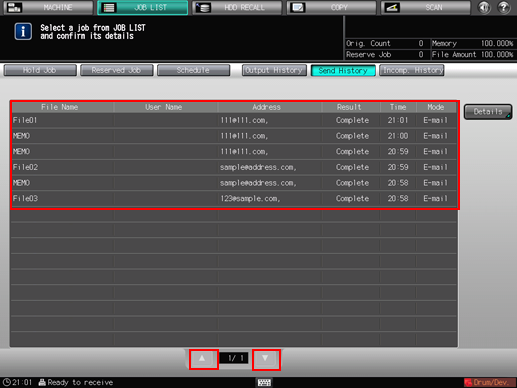
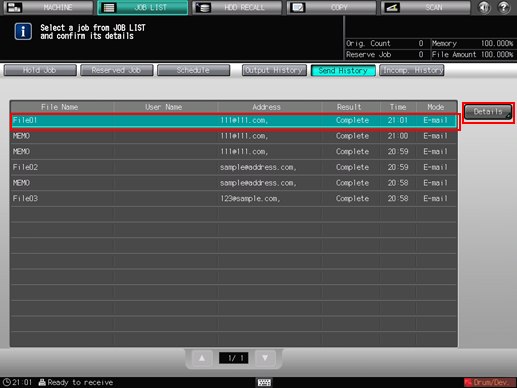
Press and highlight a job that you want to check it, then press [Details].
Check the details on the [Ticket Details] screen.
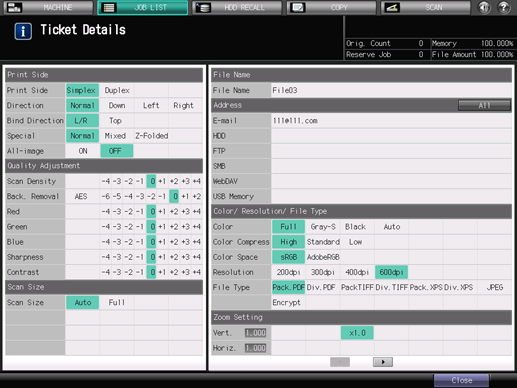
After checking the details, press [Close].