
Inserting a Front Cover or Blank Sheet into Copied Documents
To insert front and back covers ([Cover Sheet])
To display:
- [Classic Style]
- [Copy]
- [Application]
- [Tailoring]
- [Cover Sheet]
- [Tailoring]
- [Application]
- [Copy]
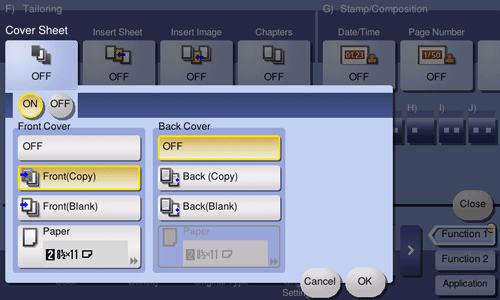
You can insert a cover sheet before the first page or after the last page of the text. The paper used for the front and back cover sheets can be different from that used for body pages (in paper color and thickness). They can be printed at the same time.
Setting | Description |
|---|---|
[ON]/[OFF] | Select [ON] to set Cover Sheet. |
[Front Cover] | Specify the method to insert a front cover.
|
[Back Cover] | Specify the method to insert a back cover.
|
To insert a different sheet into the specified page ([Insert Sheet])
To display:
- [Classic Style]
- [Copy]
- [Application]
- [Tailoring]
- [Insert Sheet]
- [Tailoring]
- [Application]
- [Copy]
Inserts paper (colored paper, thick paper, etc.) different from a text page before the specified page.

Setting | Description |
|---|---|
[ON]/[OFF] | Select [ON] to set Insert Sheet. |
[Insert Position] | Set a page number where you wish to insert a different sheet.
|
[Insert Paper] | Select the paper tray loaded with the paper to be inserted. Use the same size insertion sheets and body sheets, and stack them in the same orientation. |
[Insert Type] | Select whether or not to copy on the insertion paper. |
To arrange the first page of the chapter on the front side ([Chapters])
To display:
- [Classic Style]
- [Copy]
- [Application]
- [Tailoring]
- [Chapters]
- [Tailoring]
- [Application]
- [Copy]
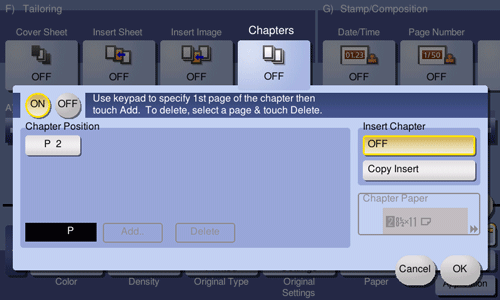
Makes copies so that the first page of each chapter is always printed on the front side of paper when an original is copied onto both sides of paper.
Setting | Description |
|---|---|
[ON]/[OFF] | Select [ON] to set Chapters. |
[Chapter Position] | Specify the chapter page to be printed on the front side.
|
[Insert Chapter] | Select whether to use the same page or a different page for the chapter and the text.
|
[Chapter Paper] | If [Insert Chapter] is set to [Copy Insert], select the paper tray where the Chapter Paper is stacked. If the chapter paper and text paper differ, use the same size of paper and stack them in the correct direction. |

When the Chapters function is specified, [1Sided > 2Sided] of [Duplex/Combine] is automatically set. To scan a 2-sided original, select [2Sided > 2Sided].
To insert an original into the specified page ([Insert Image])
To display:
- [Classic Style]
- [Copy]
- [Application]
- [Tailoring]
- [Insert Image]
- [Tailoring]
- [Application]
- [Copy]
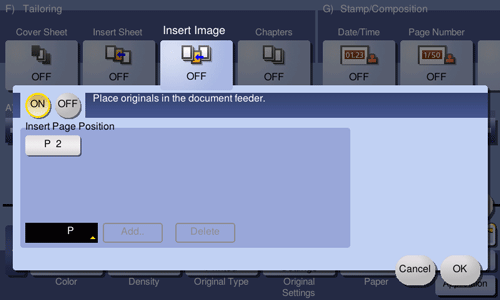
Inserts the original scanned on the Original Glass after the page you have specified in the original scanned using the ADF.
Setting | Description |
|---|---|
[ON]/[OFF] | Select [ON] to specify Insert Image. |
[Insert Page Position] | Specify a page number you want to insert a sheet into. The original is inserted after the page you have specified.
|