Home >
Network / Security > Improving Login Security > External Server Authentication > Constructing Active Directory on Windows
Constructing Active Directory on Windows
Overview
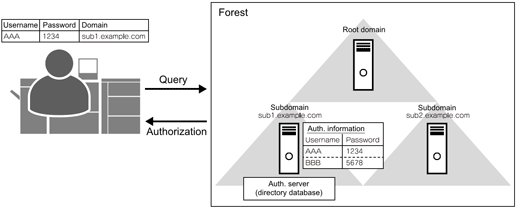
This section describes the process for building a directory data base using Active Directory on Windows that can be used for authentication management and LDAP searches. Follow the procedure detailed below to build the database.
1. Add an Active Directory Domain Services Role to the server (Adding Active Directory Domain Services Roles)
2. Construct the various server elements that comprise the forest, domain, and DNS server (Constructing Active Directory Domains)
3. Add user objects used for authentication and directory searches (Registering User Objects)
Example of authenticating with sub1.example.com
This section describes the process assuming use of Windows Server 2016.
Adding Active Directory Domain Services Roles
1
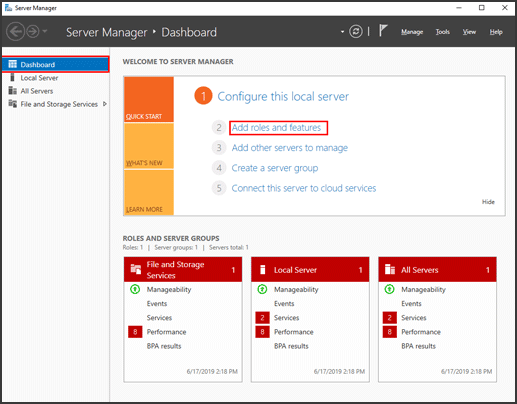
Open Server Manager and click [Dashboard], and then [Add roles and features].
2
Click [Next] on the [Before You Begin] screen.
3
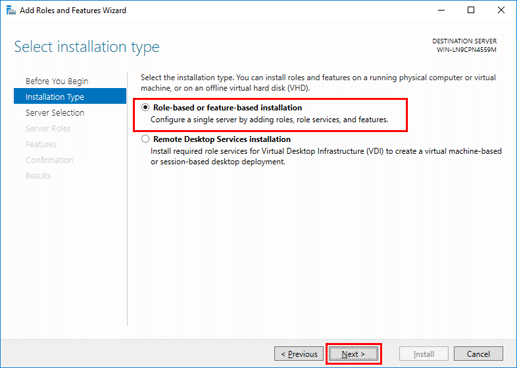
Select [Role-based or feature-based installation] and click [Next].
4
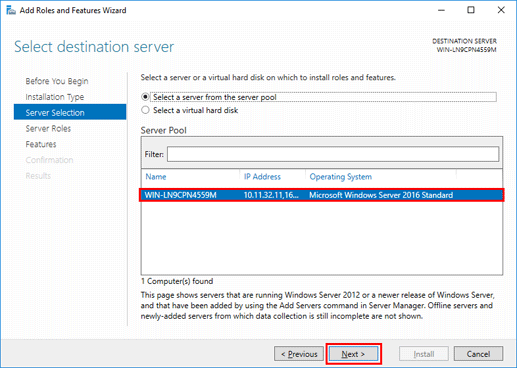
Select the desired server and click [Next].
5
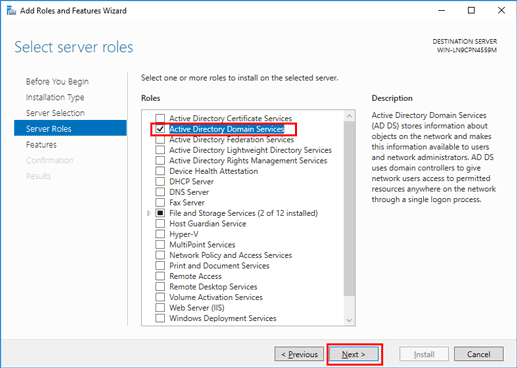
Select [Active Directory Domain Services] and click [Next].
6
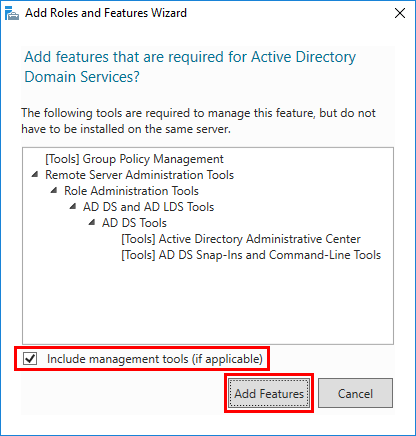
Select [Include management tools (if applicable)] and click [Add Features].
7
Check that [Active Directory Domain Services] is selected on the [Select Features] screen and then click [Next].
8
Click [Next] on the [Active Directory Domain Services] screen.
9
Click [Install] on the [Confirm installation options] screen.
Constructing Active Directory Domains
1
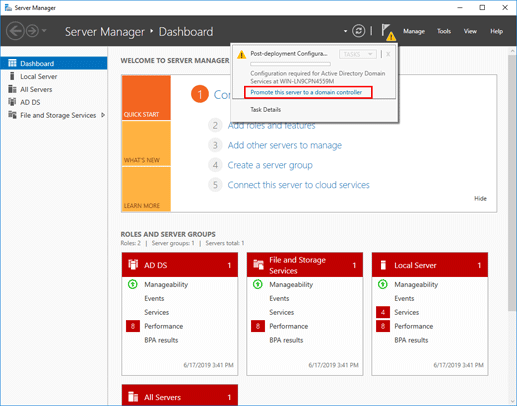
Open Server Manager, click the flag icon on the top right, and then click [Promote this server to a domain controller].
2
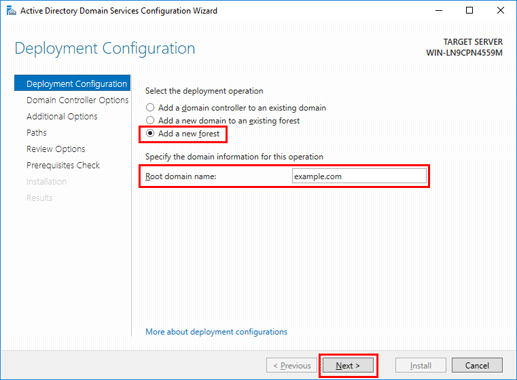
Select [Add a new forest], enter [Root domain name] and then click [Next].
3
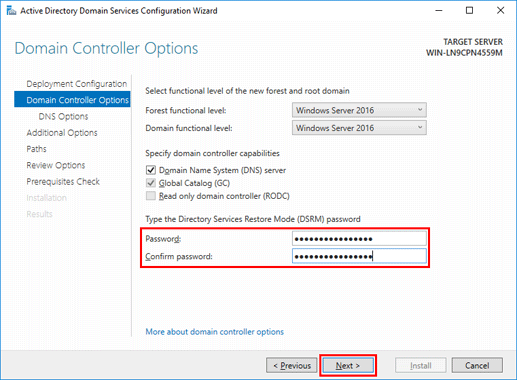
Enter the password used for logging in to the server into [Password] and [Confirm password], and click [Next].
4
Click [Next] on the [DNS Options] screen.
5
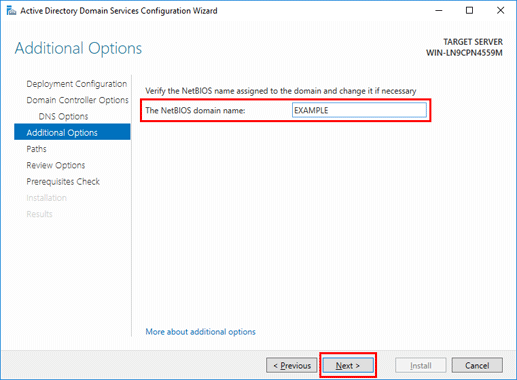
Change the [The NetBIOS domain name] as required, and click [Next].
6
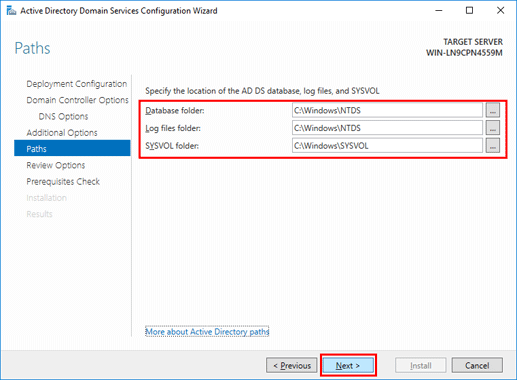
Specify the folders and click [Next].
7
Check the configuration details on the [Review Options] screen and click [Next].
8
Click [Install] on the [Prerequisites Check] screen.
Checking the Domain Controller and DNS Server
1
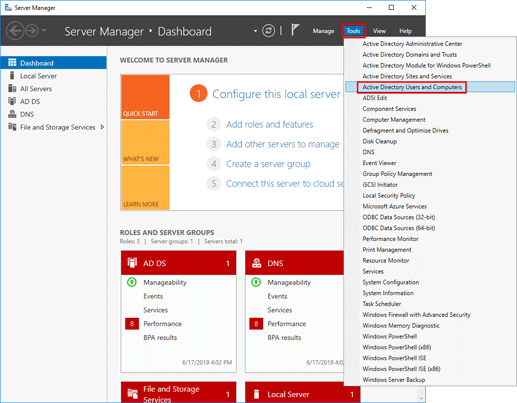
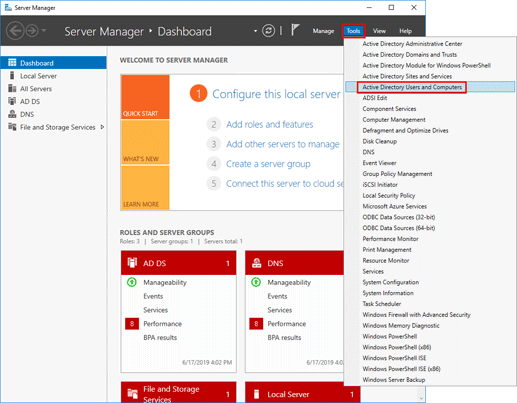
Open Server Manager and click [Tools], and then [Active Directory Users and Computers].
2
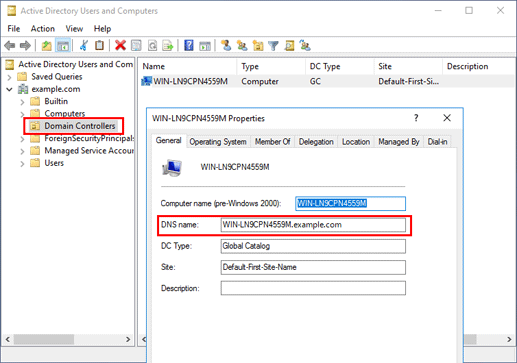
Click [Domain Controllers] and check that the [DNS name] is configured with the "Computer Name + Route Domain".
3
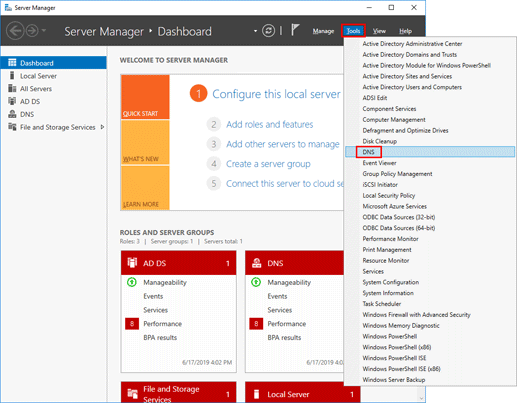
Return to the Server Manager screen and then click [Tools], and then [DNS].
4
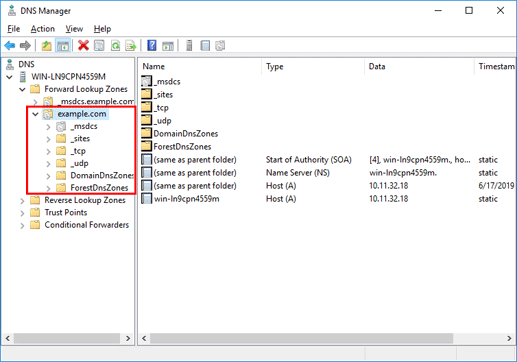
Open the [Forward Lookup Zones].
5
Check that the zone related to the constructed Active Directory domain is created.
Registering User Objects
1
Open Server Manager and click [Tools], and then [Active Directory Users and Computers].
2
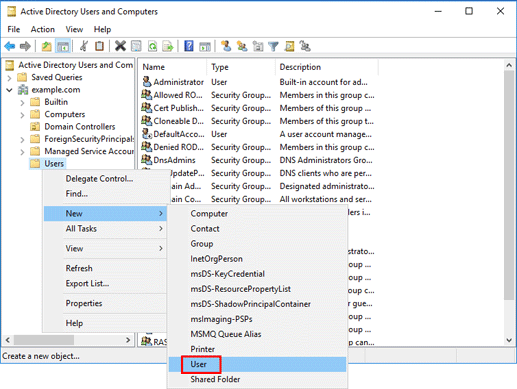
Right-click [Users] in the constructed Active Directory domain. Click [New], and then [User].
3
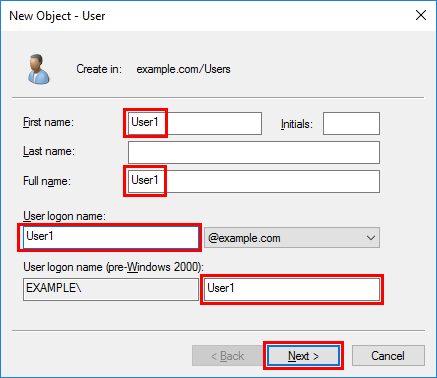
Enter the required information for [First name], [Full name], [User logon name], and [User logon name (pre-Windows 2000)], and then click [Next].
4
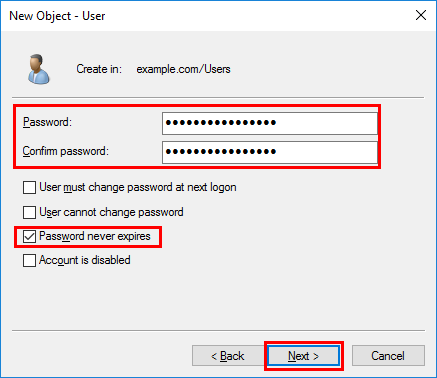
Enter any password you like into [Password] and [Confirm password], only select [Password never expires], and click [Next].
6
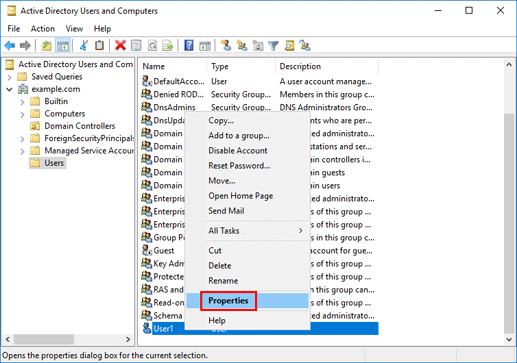
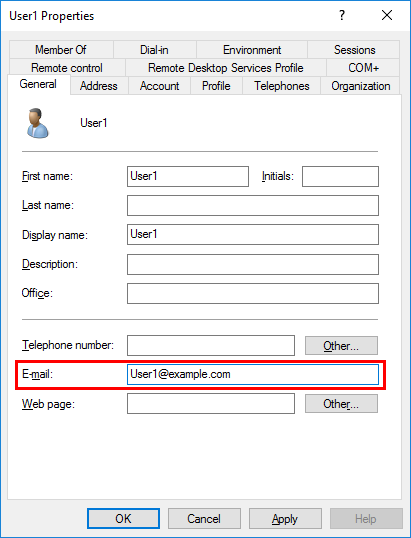
Right-click on a registered user and click [Properties].
8
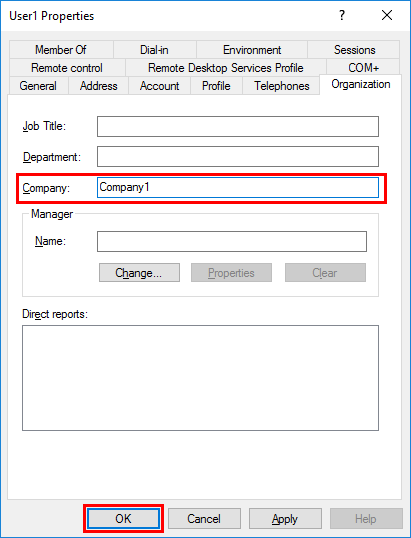
In the [Organization], enter the required information into [Company], and click [OK].
9
Repeat Step 1 through Step 8 and create the items below.
Username: User2, User3
Email Address: User2@example.com, User3@example.com
Company Name: Company1, Company2






















 in the upper-right of a page, it turns into
  and is registered as a bookmark.