


[Storage All Restore]
Overview
Select [Storage All Backup] to back up data in the Auto Inspection Unit AI-101 HDD and SSD to an external storage device, and restore the data to the Auto Inspection Unit AI-101 HDD and SSD.
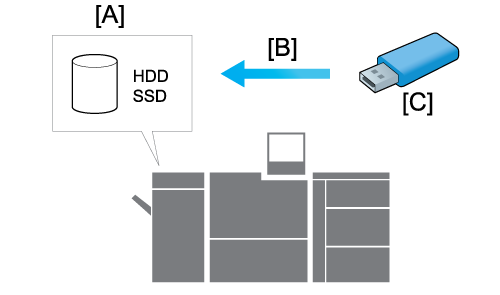
A: Auto Inspection Unit AI-101
B: Restore
C: External storage

NOTICE
The following settings are required to use this function.
- Set [Enhanced Security Mode] to [OFF].
- Set [Storage Encryp. Set.(AI-101)] to [ON].

Tips
- During restore operations, the system automatically enters the power-saving state and hence no other functions can be used. You will not be able to return to the previous screen if an error interrupts the operation after the system enters the power-saving state.
- To cancel the restore operations after they have begun, set the Sub power switch to OFF. Do not set the Main power switch to OFF.
- All the data in the Auto Inspection Unit AI-101 HDD and SSD will be overwritten and erased.
- [Storage All Restore] can only be performed when [Storage Encryp. Set.(AI-101)] are the same for both back up and restore.
- If the restore fails or is cancelled during processing, the machine reboots. In this case, all data on the HDD and SSD will be deleted.
- The data to which the HDD and SSD of Auto Inspection Unit AI-101 was backed up on another machine cannot be stored in Auto Inspection Unit AI-101 of this system.
- If there are any abnormalities in the data that was backed up to an external storage device, the restore operation will be canceled.

Reference
- For details about [Enhanced Security Mode], refer to [Enhanced Security Mode].
- For details about [Storage Encryp. Set.(AI-101)], refer to [Storage Encryp. Set.(AI-101)].
Conditions for restore operations
Ensure that Auto Inspection Unit AI-101 is mounted
Ensure that the external storage media for restoration is securely connected to the USB connection port of Auto Inspection Unit AI-101
Ensure that only one external storage medium for restoration is connected
Ensure that Enhanced Security mode is not set
Setting Procedure
1
Connect the external storage device for restoration to the USB connection port of Auto Inspection Unit AI-101.
2
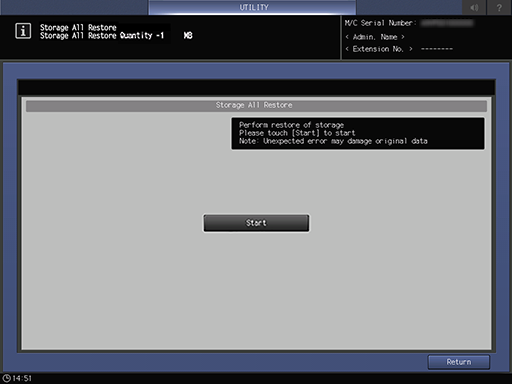
Press [Start] to display the total size of restored data in the message display area on the screen.
A dialog box is displayed to ask for consent to overwrite and erase all data on the HDD and SSD. Press [Yes] to start restoration of all data.
An error message dialog box will be displayed if the restoration operations fail. Press [Close] to retry restoration. If you turn the Sub power switch off and back on again without retrying restoration, all the data on the HDD and SSD will be erased.
NOTICE
- Be careful that the set all the data on the HDD and SSD will be erased if the restore fails or is canceled during processing.
3
After operation is completed, turn the Sub power switch off and back on again.
 in the upper-right of a page, it turns into
  and is registered as a bookmark.