
[Chart Adjustment]
You can print a chart and scale measurement points. Entering the measured value adjusts the magnification and printing position.
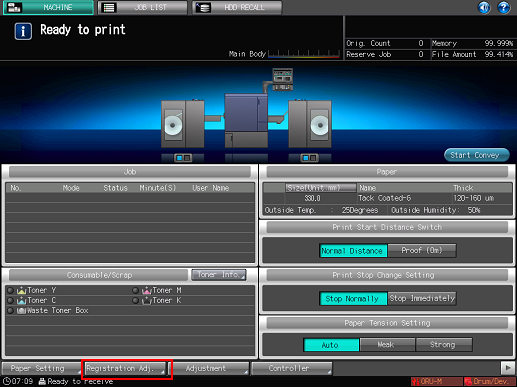
Press [Registration Adj.] on the [MACHINE] screen.
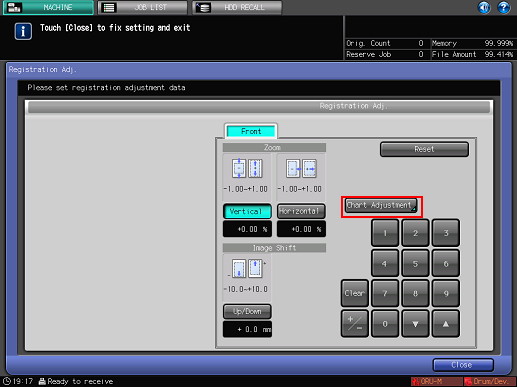
Press [Chart Adjustment].
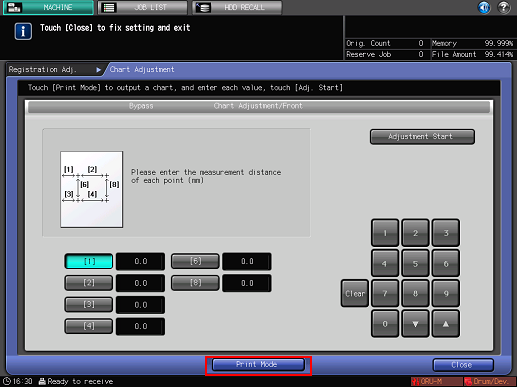
Press [Print Mode].
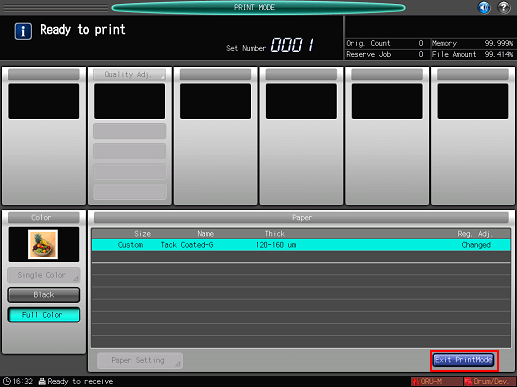
Press Start on the control panel.
A test chart is printed.
Press [Exit PrintMode].
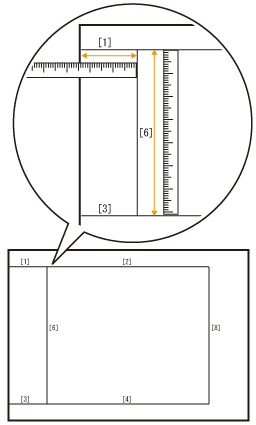
Measure the length of the lines indicated by the numbers from [1] to [8] ([5] and [7] are omitted.) on the printed chart.
For [1] and [3], measure the length from the vertical line to the edge of the media.
The figure shows an example when measuring lines [1] and [6].
You can enter values in increments of 0.1 mm.
Be sure to write down the measured value.
Press the number indicating each point and use the touch panel keypad or [
 ], [
], [ ] to enter the measured value.
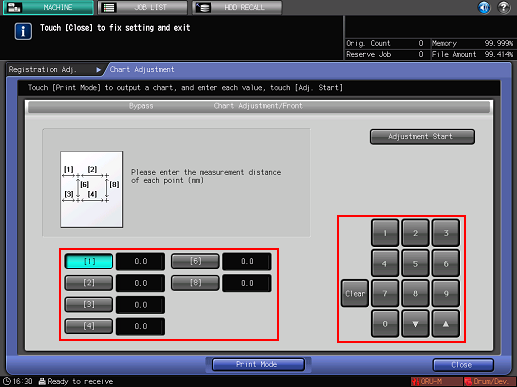
Press [Clear] to reset the value.
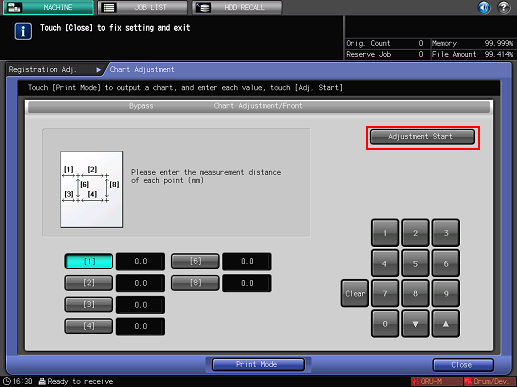
Press [Adjustment Start].
Press [Close].
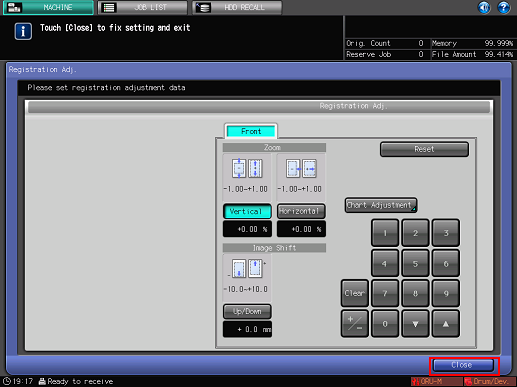
Now, the [Chart Adjustment] is completed.
For fine adjustment, adjust Zoom/Image Shift adjustment.