Quick Installation of the Fax Driver
System environment requirements
The following system environment is required to use the fax driver.
Item | Specifications |
|---|---|
Operating system | Windows 10 Home * Windows 10 Pro * Windows 10 Enterprise * Windows 10 Education * Windows 11 Home Windows 11 Pro Windows 11 Enterprise Windows 11 Education Windows Server 2012 Datacenter Windows Server 2012 Standard Windows Server 2012 Essentials Windows Server 2012 R2 Datacenter Windows Server 2012 R2 Standard Windows Server 2012 R2 Essentials Windows Server 2016 Datacenter Windows Server 2016 Standard Windows Server 2016 Essentials Windows Server 2019 Datacenter Windows Server 2019 Standard Windows Server 2019 Essentials Windows Server 2022 Datacenter Windows Server 2022 Standard Windows Server 2022 Datacenter: Azure Edition Windows Server 2022 Essentials * Supports the 32-bit (x86) or 64-bit (x64) environment. |
CPU | Any processor of the same or higher specifications as recommended for your operating system |
Memory | Memory capacity as recommended for your operating system Sufficient available memory space is required for your operating system and the applications to be used. |
Installing the fax driver on your computer
Install the fax driver on the PC by using the installer.
Download the Universal Print Driver (PC-FAX) from our website when the following cases occur.
The driver DVD is not included with the product.
You have lost the driver DVD.
Your computer is not equipped with a DVD drive.
When using the driver DVD, select the driver from the installation menu; the installer starts automatically. If the installer does not start, open the driver folder on the DVD, double-click [UPDSetup.exe] (in the 32-bit environment) or [UPDSetup64.exe] (in the 64-bit environment).
When using the downloaded driver, double-click [UPDSetup.exe] (in the 32-bit environment) or [UPDSetup64.exe] (in the 64-bit environment) in the folder.
If the [User Account Control] window appears, click [Continue] or [Yes].
If you click [Install(Manual Setting)], you can manually set the printer.

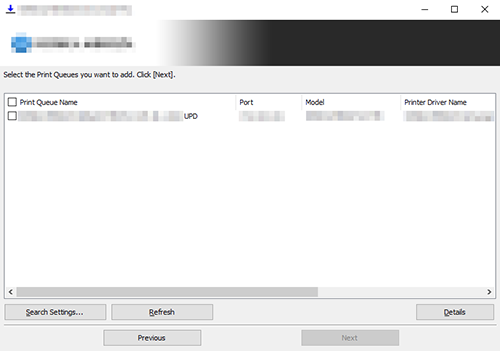
If this machine is not detected, restart it. If this machine is not detected even after restart, return to step 4 and click [Install(Manual Setting)]. Click [Add to list], and manually set the printer.
If multiple same models are displayed, check the IP addresses. You can check the IP address of this machine in the screen that is displayed by tapping [Utility] - [Device Information].
If you click [Refresh], you can search the device again.
If you click [Search Settings], you can specify detailed search conditions and search for the device.
If there is a port corresponding to the IP address of the device, delete it in advance.

[Print Queue Name] (Printer name): Automatically set from the information of the device selected in the list.
[Port]: Set the port used for the printer.
[Model]: The model corresponding to the device selected in the list is selected automatically.
[Printer Driver Name]: The driver corresponding to the device selected in the list is selected automatically.
[Share Setting and Share Name]: When sharing the printer, select the [Share this print queue] check box and enter the share name.
[Admin Settings]: Allows you to change the default print settings.
For details on the initial settings for the fax driver, refer to Configuring the Default Settings of the Fax Driver.
- For details about how to update the fax driver using the installer, refer to Update the printer driver.

 in the upper-right of a page, it turns into
  and is registered as a bookmark.