


[Transfer Error]
Overview
Configure settings to reduce an occurrence of transfer failure onto paper (white dot noise, low image density).
Set the appropriate value from the results of charts with different adjustment values (current values).

Tips
About Charts
- Charts are output with 5-level adjustment values (-40, -20, current value^0, +20, +40) (max. 5 sheets).
The adjustment range is -100 to +100. If the adjustment value is outside the range, the chart is not output.
Example: If the current value is +100, the adjustment values are set to +60, +80, +100, +120, and +140, so the charts for +140 and +120 are not output. - Each chart is printed with "Front" (front side) or "Back" (back side) in addition to the adjustment value.
Example: Front +100 - Charts can be output for the following paper sizes: A4, A3, SRA3, 8.5 e 11, 11 e 17, 12 e 18, or 13 e 19.
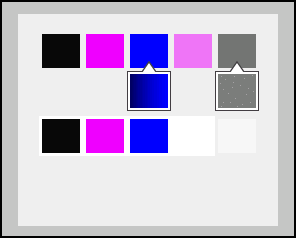
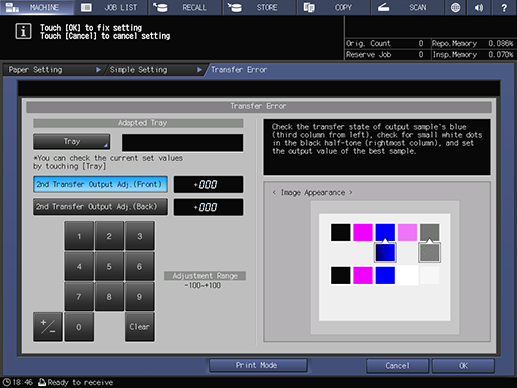
- Check the transfer condition of the blue (third row from the left) on the output chart as well as whether there are any small white spots in the black halftone (first row from the right). Set the adjustment value for the chart in the best condition.
Tips
- The higher the "-" value of the setting item, the stronger the current will flow. However, white dot noise may occur in the image.
- The higher the "+" value of the setting item, the weaker the current will flow. However, the image density may become lower.
- [Transfer Error] is synchronized with [2nd Transfer Output Adj.(Front)] and [2nd Transfer Output Adj.(Back)] of [Expert Adj.]. If you adjust using either one, the adjustment value will be the same.
Setting Items
Setting item | Description |
|---|---|
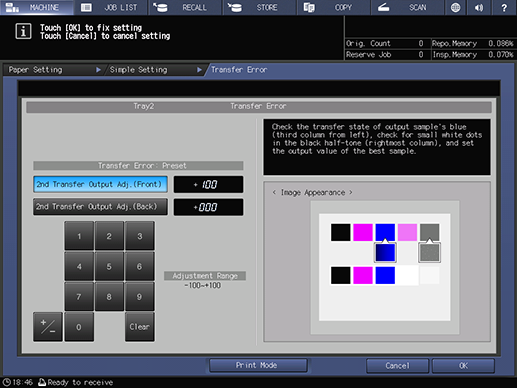
[2nd Transfer Output Adj.(Front)] | Set the adjustment value when a transfer failure occurs on the front side of paper. |
[2nd Transfer Output Adj.(Back)] | Set the adjustment value when a transfer failure occurs on the back side of paper. |
[Clear] | Returns the entered numeric value to the default. |
Keypad | Used to enter numeric values. Press [+ / -], and set the sign of the numeric value. Range: -100 to +100 |
Setting Procedure (For [Paper Setting])
1
Select a paper tray to output charts.
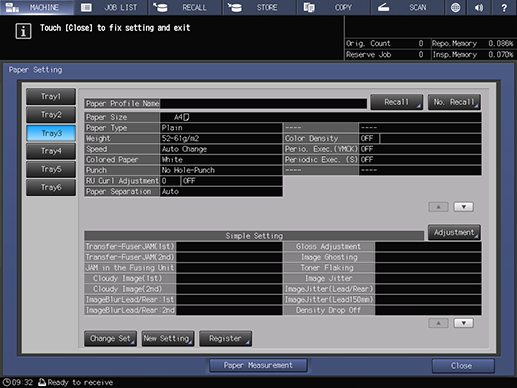
2
Press in order of [Adjustment] - [Next] - [Transfer Error].
The setting screen is displayed.
3
Press [Print Mode].
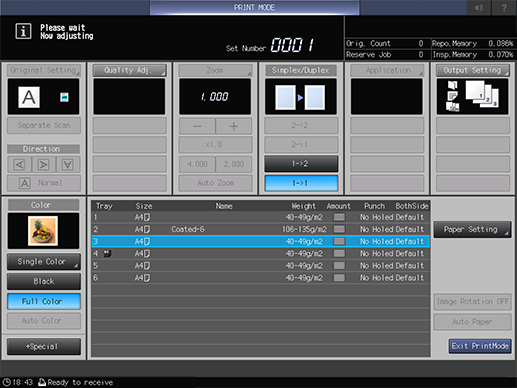
In [Simplex/Duplex], set the print side of a chart.
[1->2]: Select this option when you want to adjust both the front and back sides.
[1->1]: Select this option when you want to adjust only the front side.
Tips
- If you want to include special toner in the adjustment, select [+Special] in [Color].
4
Press Start on the Control panel.
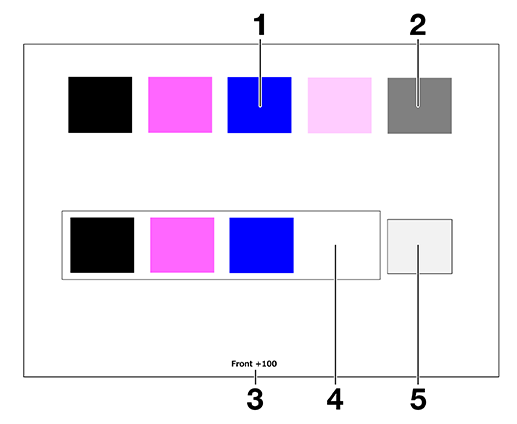
A chart is output with the adjustment values printed.
1: Check the blue transfer status.
2: Check that there are no small white spots in the black halftone.
3: "Front" (front side) or "Back" (back side) and the adjustment value
4: Solid background of special color
5: Halftone of special color
Check the images of each printed chart and select the chart with the optimal adjustment value.
5
Select [2nd Transfer Output Adj.(Front)] or [2nd Transfer Output Adj.(Back)], and use the on-screen keypad or Keypad of Control panel to enter the optimal adjustment value for the chart selected in step 4.
Use [+ / -] to select the positive or negative value.
6
Press [OK].
Setting Procedure (For [Transfer Error] of [Simple Setting])
This is the procedure used to adjust [Transfer Error] in [Simple Setting].
1
Press [Tray].
2
Select a paper tray to output charts, and press [OK].
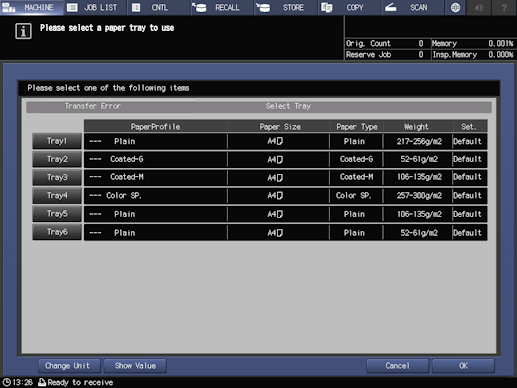
This returns to the [Transfer Error] screen.
3
Perform the operations following Step 3 in the Setting Procedure (For [Paper Setting]).
 in the upper-right of a page, it turns into
  and is registered as a bookmark.