
To Perform Auto Image Adjustment
Overview
Auto Image Adjustment is a function for making real-time adjustments while printing images if the image position or gradation becomes misaligned during printing. As the adjustments are made automatically, it helps improve image stability during printing.
Paper sizes compatible with Auto Image Adjustment: SRA3, 13 e 19, 12 e 18, SRA4 w or custom paper sizes with a length (paper feed direction) of between 225.0 mm / 8.86" and 900 mm / 35.43"
The following is recommended
Auto Image Adjustment includes the following features.
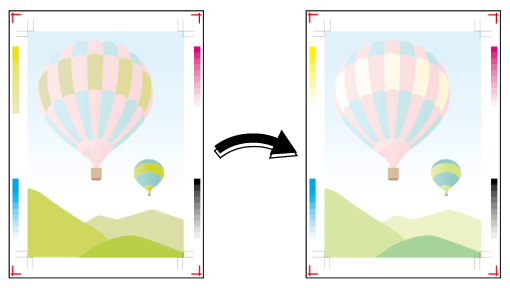
Crop marks and gradation patches for adjustments are automatically printed on the trim margin, helping eliminate costs associated with wasting paper.
As the adjustments are made automatically, it helps to improve printing quality stability.
- For quality adjustments (gradation adjustments) to be performed automatically, it is necessary to end [Color Density Control] for the paper being used, and set [Color Density] for [Paper Setting] to [Default Adj. Data] or [Registered Adj. Data].
- For [Auto Image Adjustment], it is necessary to perform both-side adjustment for the paper trays that you plan on using for feeding paper. Be sure to perform both-side adjustment whenever you change the paper and at the start of each day.
- The adjustment function may not work for the first dozen or so sheets after you begin printing. As such, automatic image adjustment is only effective for jobs containing at least the specified amount of sheets.
- Print adjustment crop marks and gradation patches in the trim margin, and adjust image position misalignments and gradation by scanning with Intelligent Quality Care Unit IQ-501.
- [Auto Image Adjustment] is not enabled by default. Follow the instructions detailed in the procedure, and configure the settings accordingly to use this function for printing.
- For paper with at least 225.0 mm / 8.86" length in the paper feed direction, standard paper with sizes other than SRA3, 13 e 19, 12 e 18, and SRA4 w can be adjusted automatically. For details, contact your service representative.
- If the paper edges are curled or creased, the crop marks are missing, or you are using a different sized paper, the scan cannot be performed correctly and the process results in an error. Check the size and condition of the paper if an error is displayed. The actual size may differ, even if the sizes appear to be the same.
- If there is not enough trim margin, you can set [Periodical Both Sides Adj.] to automatically adjust both sides for each prescribed number of sheets to be output. You cannot set both [Auto Image Adjustment] and [Periodical Both Sides Adj.] at the same time. [Periodical Both Sides Adj.] is not available if [Auto Image Adjustment] is set. For details about [Periodical Both Sides Adj.], refer to [Periodical Both Sides Adj.].
Target Jobs
Does not depend on the file format.
Target Tools
Touch panel (machine store jobs) | Printer Driver | Print Manager | Machine Hot Folder | Hot Folder |
|---|---|---|---|---|
. | . | . | . | . |
Assumed Operating Environment
Item Name | Contents |
|---|---|
OS | Windows 10 |
Option | Intelligent Quality Care Unit IQ-501 |
- The actual screen displayed may differ depending on the application version or revision, and the environment you are using.
Setting Procedure
This section describes the process for configuring the settings for Auto Image Adjustment with Print Manager.
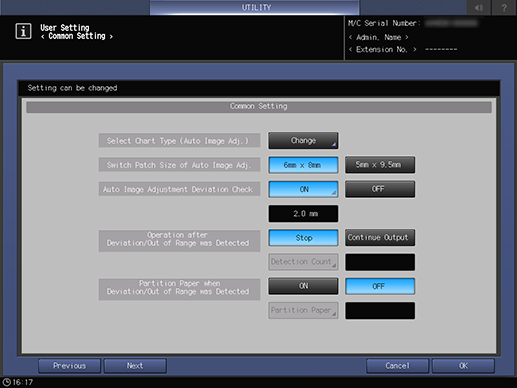
You can perform advanced settings of Auto Image Adjustment function using [IQ Function Set.] on the [MACHINE] screen, or using the system’s Utility/Counter - [Common Setting].
Setting items: [Select Chart Type (Auto Image Adj.)]/[Switch Patch Size of Auto Image Adj.]/[Auto Image Adjustment Deviation Check]/[Operation after Deviation/Out of Range was Detected]/[Partition Paper when Deviation/Out of Range was Detected]/[Automatic Reprint when Deviation/Out of Range was Detected]/[Output Tray for Out of Range]
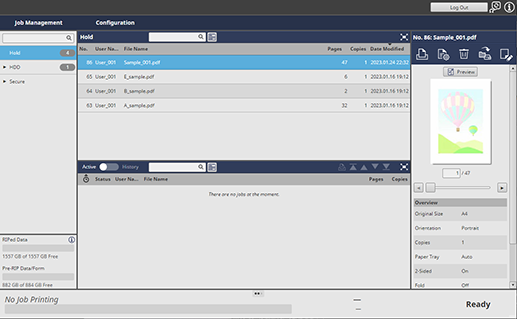
Select a job for which Auto Image Adjustment is performed from the job list.
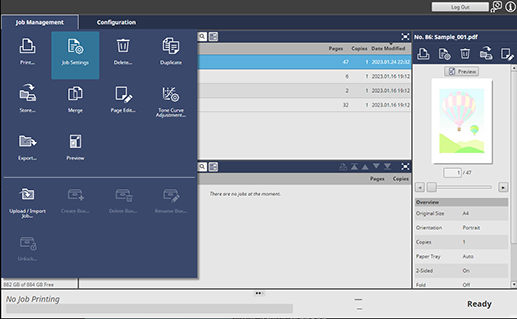
Click [Job Settings] in [Job Management].
To select [Job Settings], right-click on the job and select it from the menu.
You can also do this by selecting a job, and then clicking "
 ".
".You can also do it by double-clicking the job.
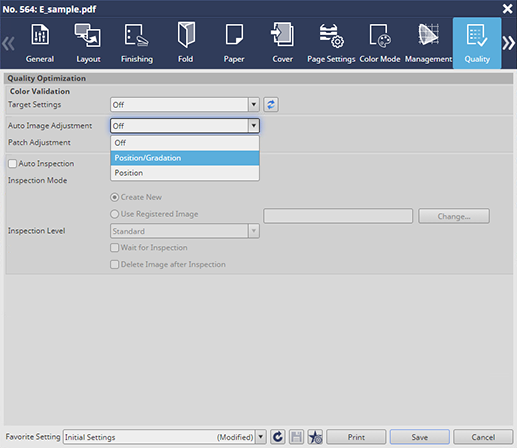
Select the [Quality] tab, and set [Auto Image Adjustment] to [Position/Gradation].
Click [Print] to print the copies.
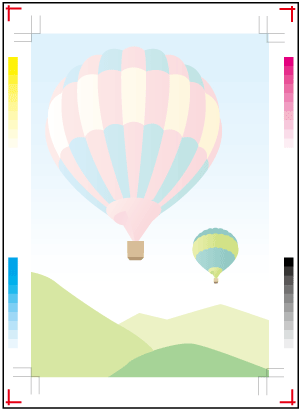
Check to see if the crop marks and gradation patches are correctly printed in the white section of the trim margin.
The position where the gradation patch is printed can be adjusted on the [Patch Adjustment] screen in Step 5. You can adjust the position of the patches by moving them toward the edge of the paper using a positive setting, and toward the center of the paper using a negative setting (the patch position moves in the crosswise direction to the paper feed).
If there are no issues, click [Print].
The image quality is adjusted automatically during printing.
- You can set whether images of the original scanned by Intelligent Quality Care Unit IQ-501 when executing [Auto Image Adjustment] can be acquired by your service representative in the form of a log. For details, refer to [Acquire Image Log(AutoImage)].
- If Intelligent Quality Care Unit IQ-501 is mounted, and the position detection mark printed on the trim margin cannot be scanned, or if the image position is misaligned, you can check the results that were detected as errors. For details, refer to [IQ Detected Result].
- The system is equipped with an automatic inspection function that can automatically detect spots and dirt on the image generated during printing and reject any paper showing the problem. This helps to reduce labor costs associated with making manual inspections, while also helping to improve the efficiency of the printing process. For details, refer to Automatically Outputting Paper When Problems Occur.


 in the upper-right of a page, it turns into
  and is registered as a bookmark.