
Holding Jobs, Storing Jobs on HDD, Storing Secure Jobs and Printing
Overview
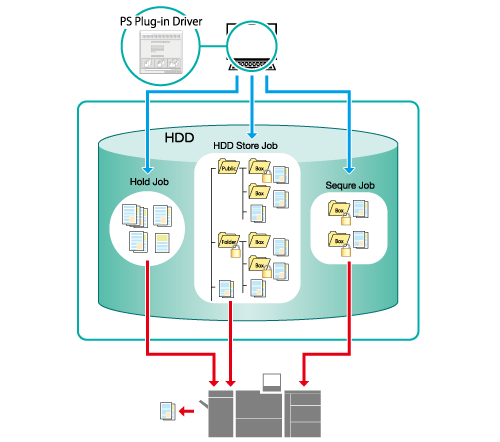
Print jobs sent from a computer using the printer driver can be stored on the Image Controller HDD as hold jobs, HDD store jobs, or secure jobs. You can also print and store jobs at the same time.
Stored jobs can be worked on using Print Manager.
The following is recommended
This function includes the following features.
Storing print jobs on the HDD allows you to output them as many times as you like, as and when required (hold jobs, HDD store jobs).
You can store print jobs in different folders as needed. The jobs can be stored in password protected folders (HDD store jobs).
Store secure jobs to password protected secure boxes. Output is suspended until the password is entered, preventing information leaks from output items. Secure jobs are also automatically deleted after they are output, ensuring no data is left on the machine's HDD (secure jobs).
- The jobs stored on the HDD are retained, even if the Image Controller power is turned OFF.
Target Jobs
Does not depend on the file format.
Assumed Operating Environment
Item Name | Contents |
|---|---|
OS | Windows 10 |
Application | Adobe Acrobat Reader DC |
Printer Driver | PS Plug-in Driver |
- The actual screen displayed may differ depending on the application version or revision, and the environment you are using.
- When setting up the printer driver, make sure you check that none of the previous settings are left in any of the item tabs. If any of the previous settings do remain, make sure you clear them.
Setting Procedure
Open the original in the application, and click [Print] in the [File] menu.
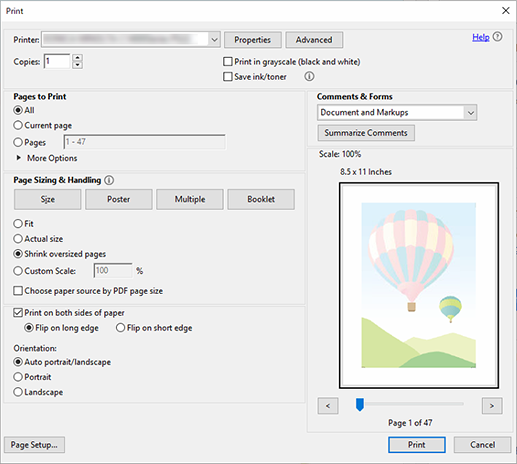
Select the printer to use for printing, and click [Properties].
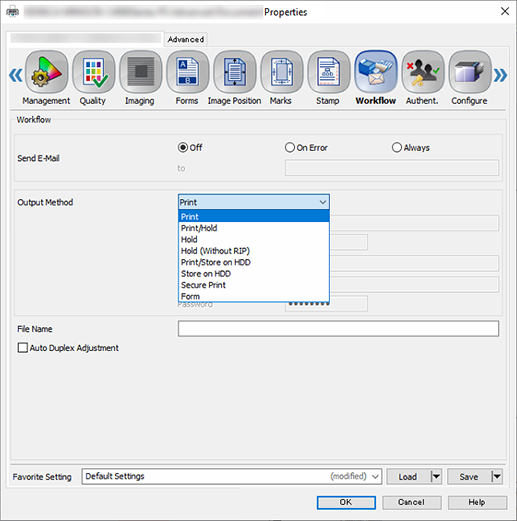
Click the [Workflow] tab, and then select [Output Method].
Select from [Print/Hold], [Hold], [Hold (Without RIP)], [Print/Store on HDD], [Store on HDD] or [Secure Print]. For details about each setting, refer to [Output Method] of [Workflow].
Proceed to Step 6 if you select [Print/Hold], [Hold], or [Hold (Without RIP)].
Proceed to Step 4 if you select [Print/Store on HDD] or [Store on HDD], and set the storage destination.
Proceed to Step 5 if you select [Secure Print].
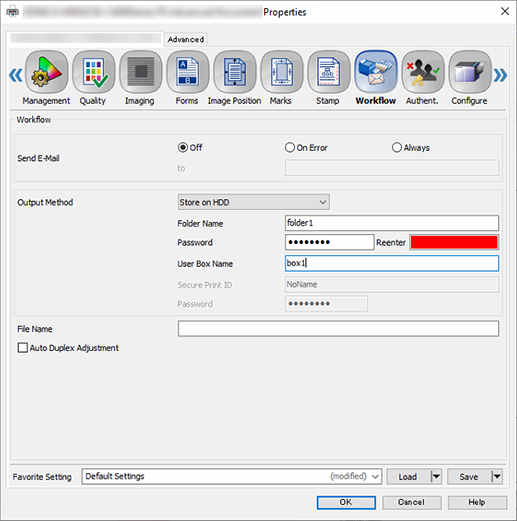
Set the [Folder Name] and [Password] for the input destination. Proceed to Step 6 after completing these settings.
For the [Folder Name], enter the folder name created on the Print Manager[HDD].
When storing jobs to a box set within a folder, you can enter a [User Box Name].
If the entered box details do not exist, the box will be created automatically.
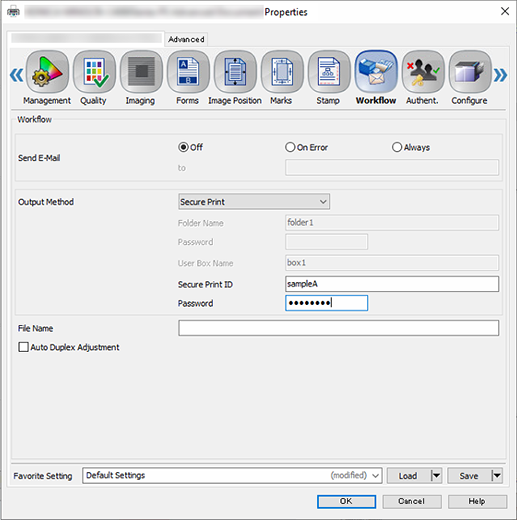
Set the [Secure Print ID] and [Password]. Proceed to Step 6 after completing these settings.
Enter the same password in [Reenter].
Up to 8 single-byte characters can be entered for the [Secure Print ID] and [Password].
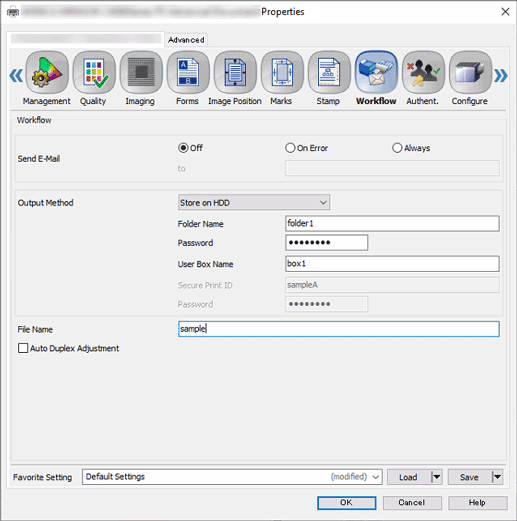
Enter the [File Name], and click [OK].
The file name field can be left blank. If you leave the file name field blank, the job is stored under the file name of the original data.
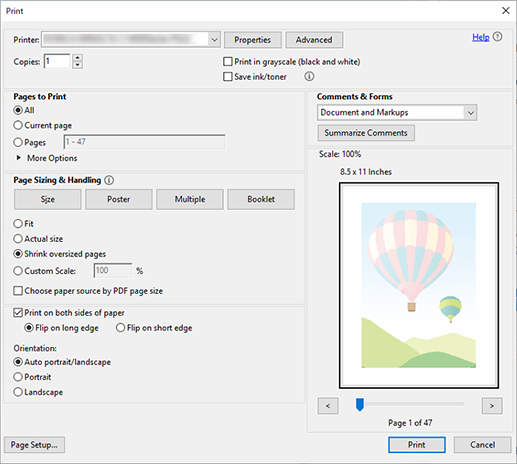
Click [Print].
The job is printed according to the configured items, and stored on the HDD.
For details about how to edit or print jobs stored on the HDD, refer to the information below.


 in the upper-right of a page, it turns into
  and is registered as a bookmark.