Loading Cover Paper in Cover Tray of Perfect Binder PB-503
Cover paper setting of perfect binding for the cover tray can be made in [Paper Setting] from the [MACHINE] screen or [COPY] screen.
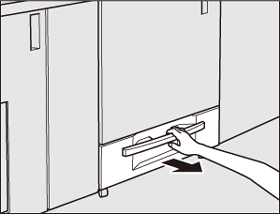
Withdraw the cover tray.
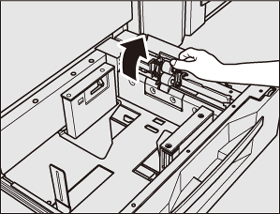
Open the feed roller.
Load cover paper with the front side up.
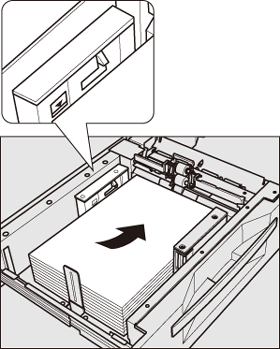
Align it to the feed roller side.

Do not load above the limit level indicated on the side guide plate of the tray. Carefully load cover paper to be seated under the paper control lever at the air nozzle.
When making books bound on the left side, load cover paper with the front side up, and with the head facing the rear side of the tray. Loaded covers will be trimmed on the left side when made into books.
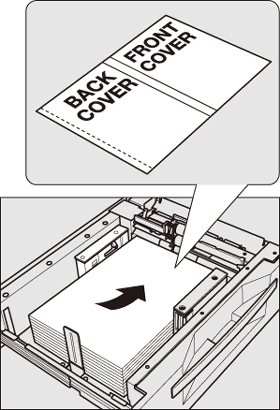
When making books bound on the right side, load cover paper with the front side up, and with the head facing the front side of the tray. Loaded covers will be trimmed on the left side when made into books.
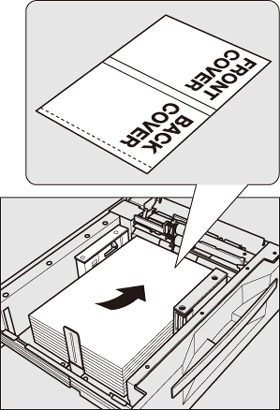
Align the side guide plate and rear stopper to cover paper.
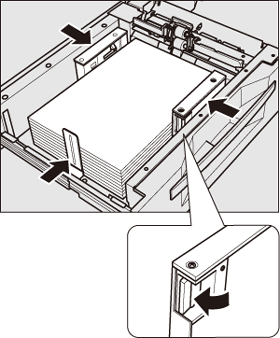
Pushing the lock release lever of the front side guide plate, move the side guide plate to align them to the cover paper.
Then, move the rear stopper to the edge of the cover paper.

Be sure that the side guide plate and rear stopper are securely aligned to the cover paper. Otherwise, a paper jam may be caused.
When paper is seated properly, close the feed roller.
Push in the cover tray until it locks into place.

Do not push the tray into the machine forcibly. Otherwise, machine trouble may be caused due to unexpected shock.
