


[Specified Level Area]
Overview
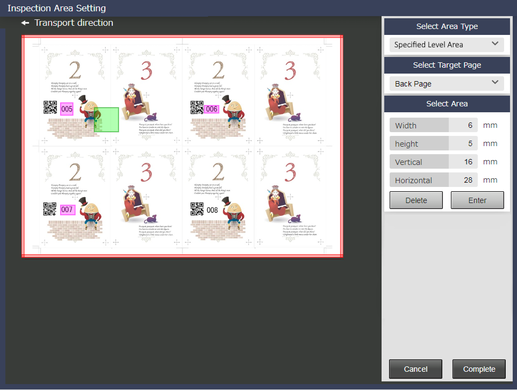
Separately from the level set with [Automatic Inspection Level Setting], set the area to be inspected in the level of the individually set [Custom].
This function is useful when you want to inspect only a specific part such as a logo particularly severely.

Tips
- To set the inspection level of [Specified Level Area], select [Automatic Inspection Level Setting] - [Custom] in [Common Setting]. Make this setting before starting the automatic inspection. For details, refer to Setting Procedure ([Automatic Inspection Level Setting]).
Setting Items
Setting item | Description | |
|---|---|---|
[Select Area Type] | [Specified Level Area] | Separately from the level set with [Automatic Inspection Level Setting], set the area to be inspected in the level of the individually set [Custom]. |
[Select Target Page] | [Front Page] | Sets an automatic inspection area in the front page. |
[Back Page] | Sets an automatic inspection area in the back page. | |
[Select Page] | Sets an automatic inspection area in the selected page. Only 1 page is selectable. | |
[Front and Back] | Sets the area on both the front and back sides at once. | |
[Select Area] | [Width] | Enter a numeric value for the horizontal width of the automatic inspection area. |
[Height] | Enter a numeric value for the vertical width of the automatic inspection area. | |
[Horizontal] | Enter a numeric value for the horizontal position of the automatic inspection area. | |
[Vertical] | Enter a numeric value for the vertical position of the automatic inspection area. | |
[Delete] | Deletes the selected [Select Area]. If there are multiple area settings, they will be deleted in the reverse order of clicking [Enter]. | |
[Enter] | The set [Select Area] is applied. When setting multiple areas, click [Enter]; this will enable you to set the next area. Up to 30 [Select Area] can be specified for each target side. | |
Tips
- When an area is set to [Front Page] or [Back Page] in [Select Target Page], the area cannot be set to [Select Page].
- If an area is set to [Select Page] of [Select Target Page], the area cannot be set to [Front Page] or [Back Page].
Setting Procedure
1
Select [Specified Level Area] in [Select Area Type].
2
Select the target side to set the area in [Select Target Page].
To use this function, [Front Page] / [Back Page] / [Front and Back] and [Select Page] cannot be set at the same time.
3
In [Select Area], set the position and size of the area.
[Width] / [Height]: Enter the area from the starting point to the lower right direction using a positive value, and the area to the upper left direction using a negative value, using the horizontal and vertical positions as the starting points (0 mm).
[Horizontal] / [Vertical]: Enter the position of the area to the lower right direction using a positive value, using the upper left edge of the displayed reference image as the starting point (0 mm).
Tips
- If a mouse is connected to this system, you can drag the mouse to set the area.
4
Click [Enter].
You can repeat step 2 to step 4 to specify up to 30 areas for the target side you selected in step 2.
To change the determined area, click [Delete], and then make settings again.
Automatic inspection method: For A, proceed to step 5.
Automatic inspection method: For B, proceed to step 7.
For details about the automatic inspection methods, refer to Automatic Inspection and Inspection Area Settings.
5
Select [Data Registration] in [Profile].
6
Enter the file name in the text box, and click [Register].
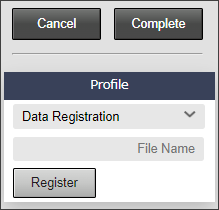
The area configuration file is registered in [List of Inspection Area Setting Profiles] as [Inspection Area Setting Profiles] (CSV file).
Each time you click [Register], [Inspection Area Setting Profiles] is added to [List of Inspection Area Setting Profiles]. The file is added without being overwritten even if registered with the same file name.
7
Click [Complete].
 in the upper-right of a page, it turns into
  and is registered as a bookmark.