User's Guide

Enabling User Authentication or Account Track on the Printer Driver
- Open the [Printers] window or [Printers and Faxes] window.
- In Windows XP/Server 2003, open the Start menu, then click [Printers and Faxes].
If [Printers and Faxes] is not displayed on the Start menu in Windows XP/Server 2003, open the [Start] menu, then click [Control Panel] - [Printers and Other Hardware] - [Printers and Faxes]. When
[Control Panel] is displayed in Classic View, double-click [Printers and Faxes]. - In Windows Vista/Server 2008, open the Start menu, then click [Control Panel] - [Hardware and Sound] - [Printers]. When [Control Panel] is displayed in Classic View, double-click [Printers].
- In Windows 7/Server 2008 R2, open the Start menu, then click [Devices and Printers].
- In Windows XP/Server 2003, open the Start menu, then click [Printers and Faxes].
- Right-click the icon of this machine, and click [Properties] (or [Printer Properties]).
- From [Device Option] on the [Configure] tab, select [User Authentication] or [Account Track] and select the target option from [Setting].
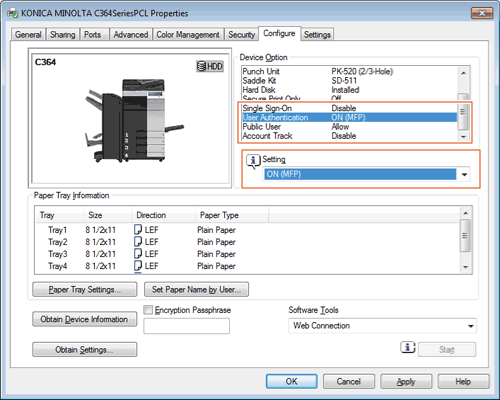
- Click [OK].