


Before Creasing
Overview
If you want to crease the paper of 351 g/m2 / 94 lb Bond or more using Trimmer Unit TU-510, reposition the adjustment bracket of Creaser Unit CR-102 / Creaser Unit CR-103.
Procedure
This section describes how to reposition the adjustment bracket of Creaser Unit CR-102.
When using Creaser Unit CR-103, also follow the same procedure.
1
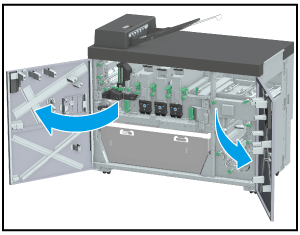
Pull out the conveyance rack, referring to steps 1 to 3 on Procedure (Changing the Partition plate Position in Job Separator JS-507).
2
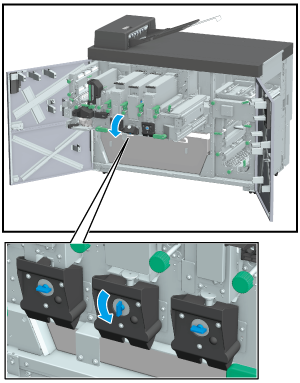
Turn the Option fixing bracket counterclockwise, and open the cover.
3
Remove the Creaser Unit CR-102.
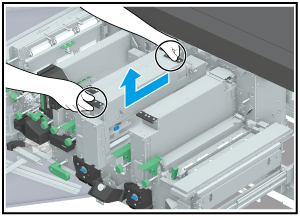
When removing, hold the black handles and lift the unit in the direction of the arrow as shown in the figure.
Put the removed Creaser Unit CR-102 on a stable table.
4
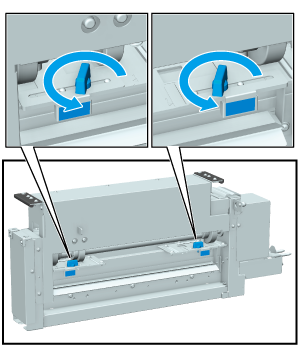
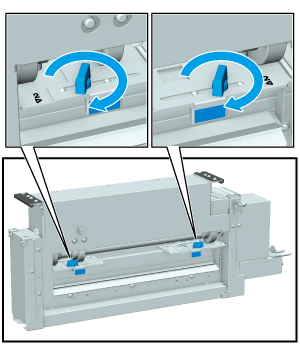
Turn the knobs (2 locations) of the Creaser Unit CR-102 adjustment brackets counterclockwise, and loosen them.
5
Hold the blue label parts of the Creaser Unit CR-102 adjustment brackets (2 locations), and move the unit to the center side.
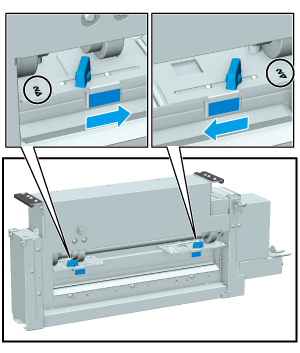
Move the adjustment brackets to the position at which you can see the "2*" and "2)" marks.
If the paper weight is below 350 g/m2 / 93 lb Bond, return the adjustment brackets to the position at which you can see the "1*" and "1)" marks.
6
Turn the knobs (2 locations) of the Creaser Unit CR-102 adjustment brackets clockwise, and tighten them.
7
Mount Creaser Unit CR-102 in Trimmer Unit TU-510.
8
Close the cover, and turn the Option fixing bracket clockwise.
9
Return the Lock lever [TU6] to its home position.
10
Push the conveyance rack in the inside, and return it to its home position. Then, return the Lever [TU4] to the right and the Lever [TU5] to the left.
11
Close the Trimmer unit right side door and Trimmer unit left side door.
 in the upper-right of a page, it turns into
  and is registered as a bookmark.