
Using HDD: Temporarily Holding Jobs in HDD
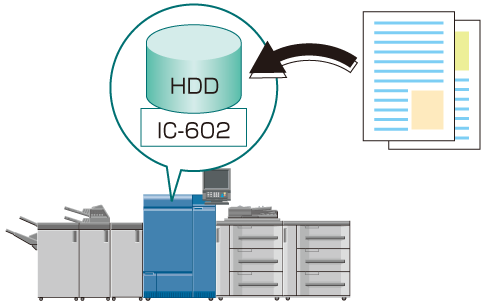
You can temporarily hold print/copy data as a "job" in the HDD of the machine. It is possible to change the print setting, edit the hold jobs on a per page basis and print the data as necessary using the touch panel of the main body or Job Centro installed in a computer. You can also create a specific folder to store the hold jobs.

Print data can only be temporarily held as print jobs when Image Controller IC-602 is mounted.
Combining Job Centro and Image Controller IC-602 allows you to import PS/PDF/TIFF files to Image Controller IC-602 and temporarily hold them as print jobs. (Refer to Import a Job File.)
The hold jobs are retained in the HDD even if the power of the machine is turned off.
• Examples Introduced in This Section
Using the touch panel of the main body or the printer driver to temporarily hold in the HDD of the machine.
Temporary Holding from the Main Body
Using the touch panel of the main body to temporarily hold copy data as a "copy job."Temporary Holding from the Printer Driver
Using the printer driver to temporarily hold print data as a "print job."
•Intended Environment
Operating system | Windows 7 |
Application | Adobe Acrobat X Pro |
Printer driver | PS Plug-in Driver |
Image Controller | Image Controller IC-602 |
* The sample screen may be different from the actual display depending on your system environment and application version/revision.
• Related Section
•Precautions
A maximum of 500 jobs can be temporarily held.
If you need to manage jobs in folders or save important jobs for a long time, save them as HDD saved jobs. (Refer to Using HDD: Managing Jobs in Folders.)
Temporarily Holding from the Main Body
On the touch panel of the main body, you can temporarily hold the copy data scanned with the ADF or original glass as a "copy job" in the HDD of the main body.
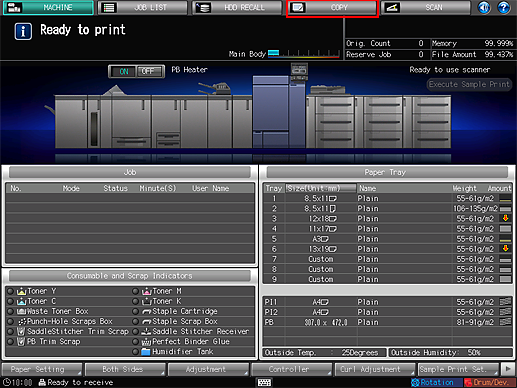
Press [COPY] on the control panel of the main body.
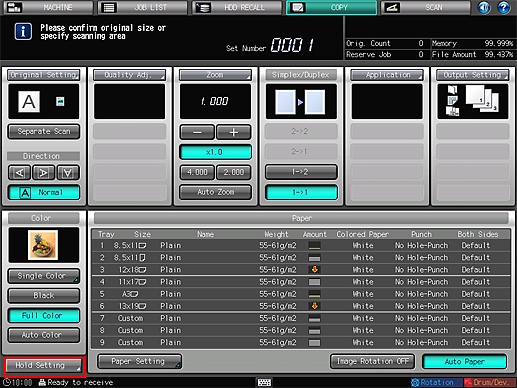
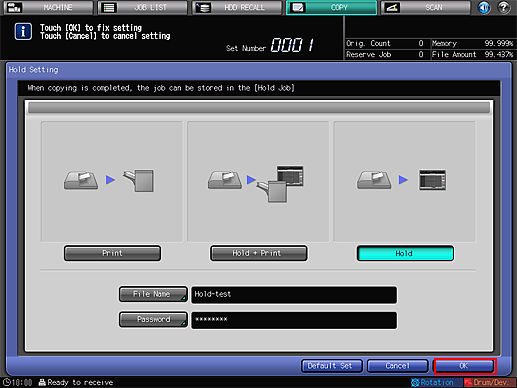
Press [Hold Setting].
Press [Hold] (or [Hold + Print]) and press [File Name].
[Hold]: The scan data of the original is temporarily held in the HDD when you press Start.
[Hold + Print]: The original is copied and its scan data is temporarily held in the HDD when you press Start.
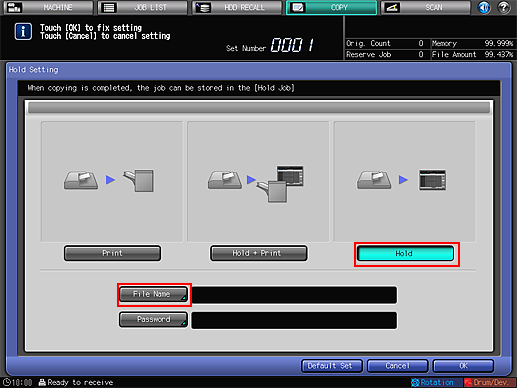
Enter a file name (64 single-byte characters) and press [OK].
It is possible to skip entering a file name. If you do not specify a file name, a 4-digit number (serially from 0001) is assigned automatically.
For details about how to enter, refer to Inputting Characters.

Press [Password] to set a password to the hold data.
If you do not set a password, go to step 7.

Enter the password (up to 8 single-byte alphanumeric characters) and press [OK].
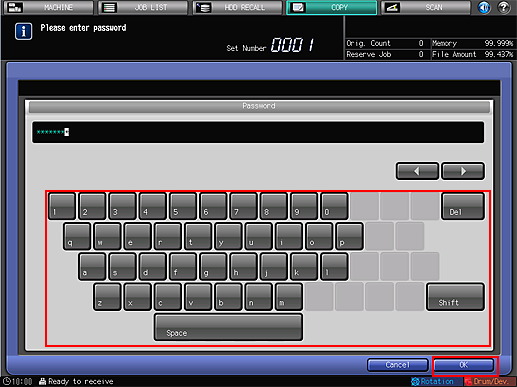
Press [OK].
Specify the paper tray on the touch panel of the main body, set the original and press Start on the control panel.
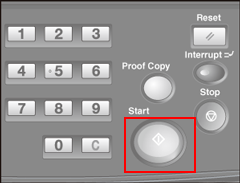
A copy of the original is temporarily held in the HDD and displayed as a copy job in [JOB LIST] - [Hold Job] on the touch panel of the main body, and [Hold Job] of Job Centro.
Temporarily Holding from the Printer Driver
You can use the printer driver to temporarily hold the print data as a "print job" in the HDD of the machine.
In the application, open the data to temporarily hold and click [Print] in the [File] menu.
The [Print] screen is displayed differently depending on the application used.
If there is no [File] menu, click the [Print the file] button.
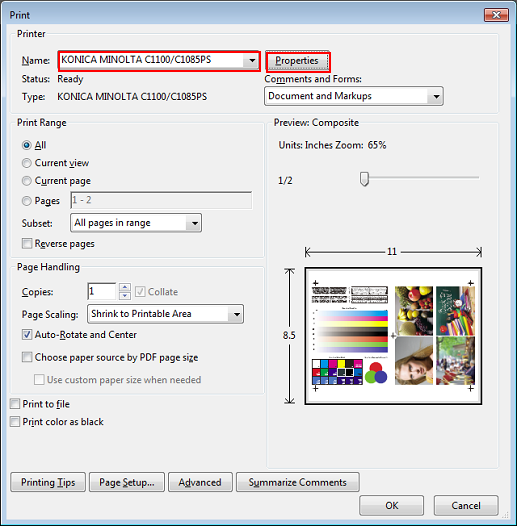
Select the printer to use for printing and click [Properties].
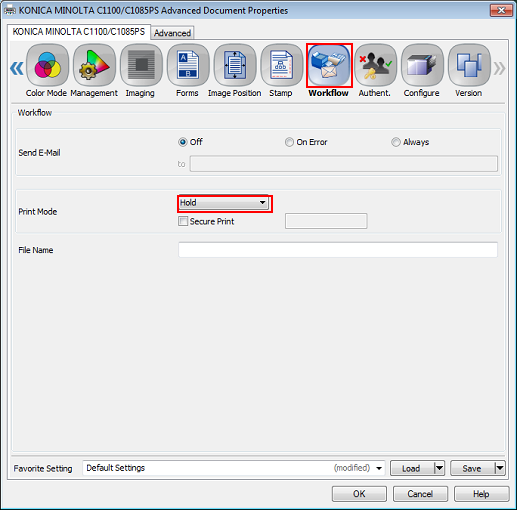
Click the [Workflow] tab and select [Hold] (or [Print and Hold]) in [Print Mode].
[Hold]: The print data is temporarily held in the HDD when you execute printing.
[Print and Hold]: The print data is printed and temporarily held in the HDD when you execute printing.
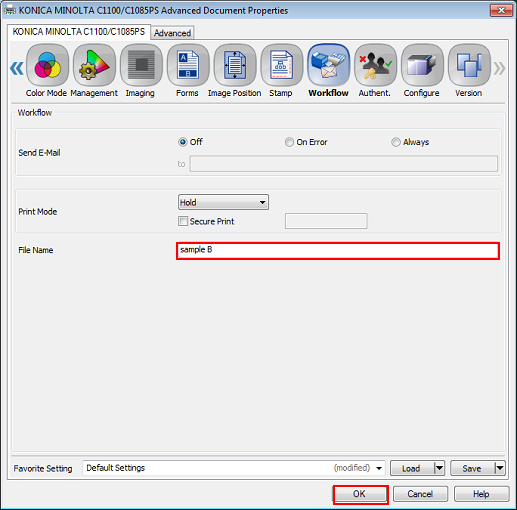
Enter a file name in the [File Name] field and click [OK].
It is possible to skip entering a file name. If you do not specify a file name, the name of the file to be printed is assigned automatically.
Click [OK] on the [Print] screen.
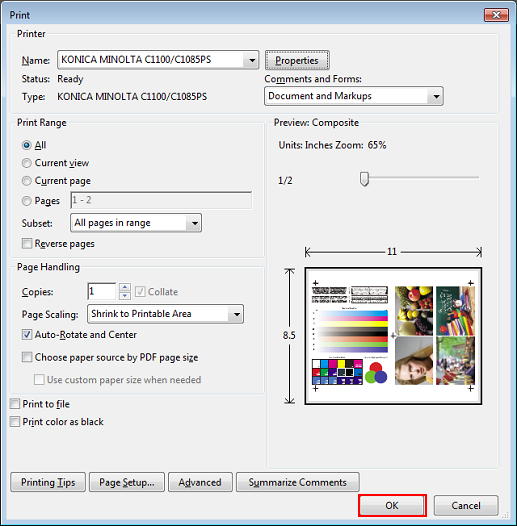
The data is temporarily held in the HDD and displayed as a print job in [JOB LIST] - [Hold Job] on the touch panel of the main body, and [Hold Job] of Job Centro.