
Checking the Color Density Control Setting
You can enables the color density control and set the execution timing, etc.
When using the color density control function (Adjustment of color sensor for each paper type / Color density manual control), always set the Use Color Density Control to ON.
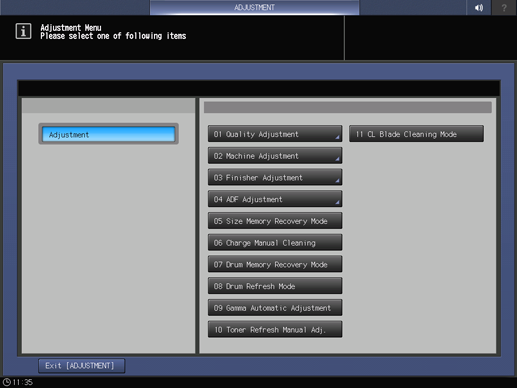
On the touch panel of the main body, press Adjustment on the MACHINE screen.

The Adjustment Menu is displayed.
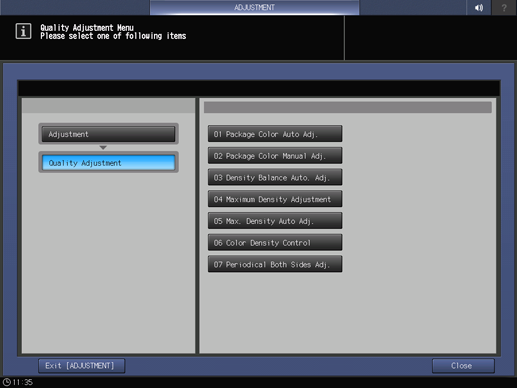
Press Quality Adjustment on the Adjustment Menu.
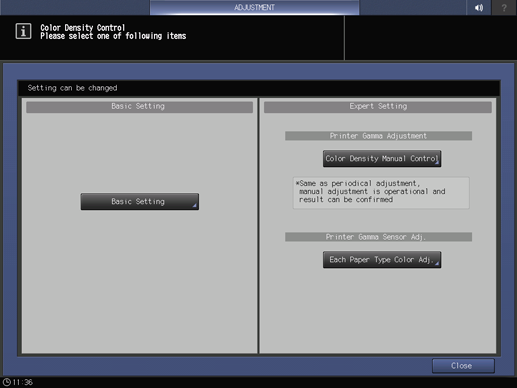
Press Color Density Control.
Press Basic Setting.
Check that each item is set as shown below.
Item
Description
Use Color Density Control
ON
Periodical Adj. Execution
ON
Adjustment Execution Timing
Before Job Start (Available when you want to prioritize the hue standardization in a single job)
During Job Runs (Available when you want to prioritize the hue standardization among multiple jobs.)
Chart Tray Setting
OFF
supplementary explanationTo periodically perform density adjustment using Relay Unit RU-518 or Integrated Color Care Unit IQ-501, set the Periodical Adj. Execution to ON.
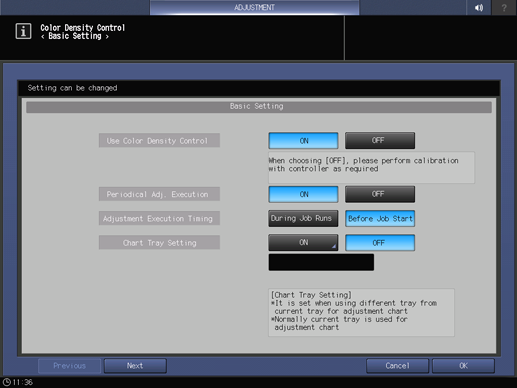
Press OK.
Press Close.
Press Exit [ADJUSTMENT].
The auto adjustment is set up. A chart is printed out periodically, and calibration is executed automatically.