Rotate/Skew Adjustment
Tips
If User Setting or Administrator Setting - Common Setting - Both Sides Rotate/Skew in UTILITY is set to Disable, the Rotate/Skew adjustment does not function. To perform the Rotate/Skew adjustment, set Both Sides Rotate/Skew to Enable.
Press Paper Setting on the MACHINE screen.

Press the tray you performed Front adjustment for.
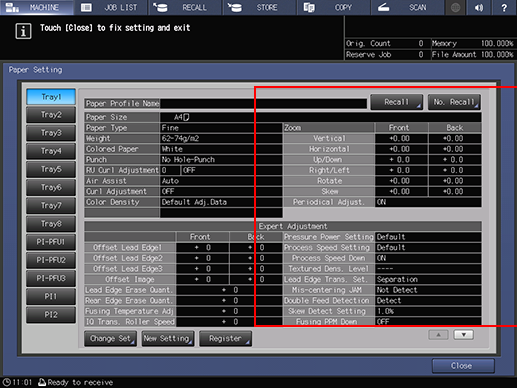
Press Change Set.
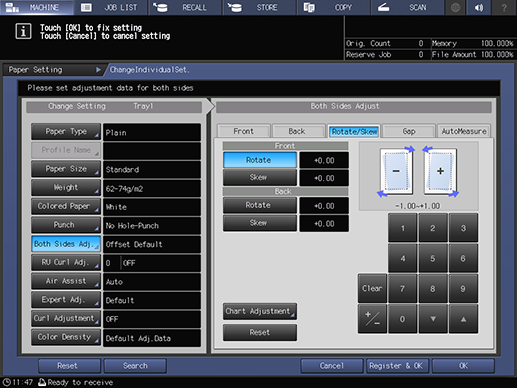
Press Both Sides Adj..
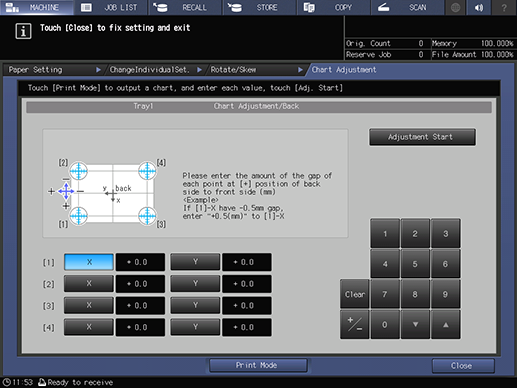
Press Rotate/Skew, and press Chart Adjustment.

Press Print Mode.

When the PRINT MODE screen is displayed, press Start on the control panel.
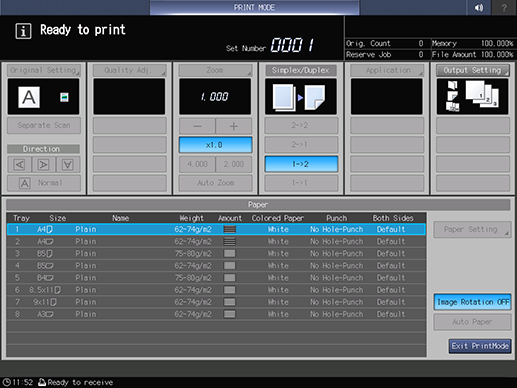
supplementary explanationA test chart is printed. Print approximately three sheets for a test chart.
Press Exit PrintMode.

Measure the gap between the guide for each of [1] to [4] in the back side (Back) and the guide in the front side (Front) of the second and third output charts.
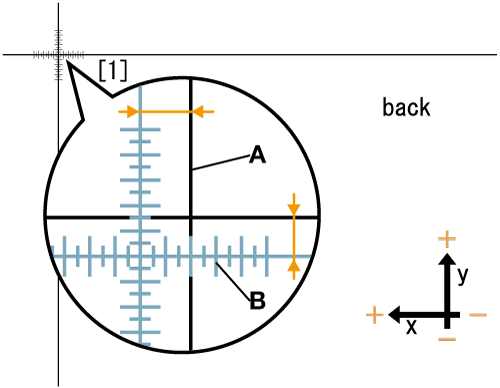
supplementary explanation"A" (black guide) in the figure indicates the front side, and "B" (blue guide) indicates the back side (for explanation, guide B is shown in blue but printed in black on the actually output test chart).
supplementary explanationThe scale resolution is 0.5 mm.
supplementary explanationMeasure the gap between the print positions in the horizontal direction (X-axis) and vertical direction (Y-axis).
supplementary explanationYou can enter a value in 0.1 mm increments.
supplementary explanationFor example, when the cross (+) of [1] is misaligned by 2.0 mm in the plus side in the X-axis direction and 1.5 mm in the minus side in the Y-axis direction compared with the front side as shown in the figure, move the blue line in the back side by 2.0 mm in the minus side in the X-axis direction and 1.5 mm in the plus side in the Y-axis direction.
supplementary explanationBe sure to make note of the measurement values.
Press X or Y of each point, and use the keypad or down / up on the screen to enter the numeric value.
supplementary explanationWhen setting X of 1 to -2.0 and Y to +1.5 using the keypad on the screen, select X in 1, and press 2, 0, and +/- in order. Then, select Y, and press 1 and 5 in order.
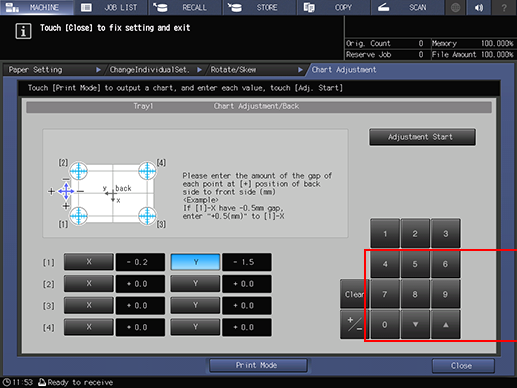
When the entry is completed, press Adjustment Start.
supplementary explanationThe adjustment values you entered are applied to Front and Back on the Rotate/Skew screen.
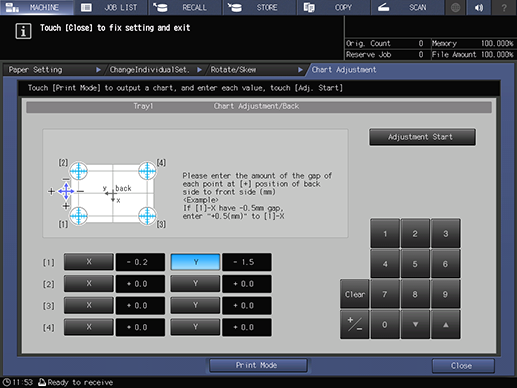
Press Chart Adjustment.

Press Print Mode.

When the PRINT MODE screen is displayed, press Start on the control panel.
supplementary explanationA test chart is printed. Print approximately three sheets for a test chart.
Check the misalignment of print position using the second and third output charts.
supplementary explanationRepeat Step 9 to 14 until the front and back are aligned.
Press Exit PrintMode.
Press Close.
Press OK to finish the adjustment.