
Sending to You
To send to your E-mail address (Scan to E-mail)
To send to your E-mail address in the user authentication environment (Scan to Me)
Sending to Your Address (Scan to Me)
Scan to Me
By selecting the [Me] key displayed in the [Address Book] screen, you can send E-mails to your E-mail address. If you log in to this machine that provides user authentication, the [Me] key appears in the [Address Book] screen. The [Me] key is assigned to an E-mail address of the login user. To use this function, you do not have to register your E-mail address in the address book.
Operations required to use this function (for the administrator)
Register an E-mail address in the user's registration information.
The registration process is explained using Web Connection. For details, refer to Here.

If Active Directory is used as an authentication server, register the user's E-mail address in Active Directory.
Operation flow
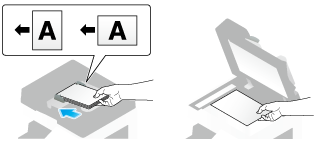
Load the original.
Enter user information, and log in to this machine.
For details on how to log in, refer to Here.
Tap [Scan/Fax].
Select [Me].
Configure Scan option settings as necessary.
Press the Start key.
Tap [Check Setting] before sending, and check the destination and settings as necessary.
To redo operations for specifying destinations or option settings, press the Reset key.
Transmission begins.
If you press the Stop key while scanning an original, the scanning process stops, and a list of stopped jobs appears. To cancel scanning of the original, delete inactive jobs from the list.
To send the download URL to your E-mail address in the user authentication environment (Scan to URL)
Sending the download URL to your address (Scan to URL)
Scan to URL
If you select the [URL] key displayed on the [Address Book] screen, you can send the URL to download the original data scanned on this machine, to your E-mail address by E-mail. When you log in to this machine that provides user authentication, the [URL] key appears on the [Address Book] screen. The [URL] key has the login user's E-mail address registered. The scanned original data is saved in a User Box on this machine without being attached to an E-mail during the pre-specified period, so data can be acquired regardless of the transmission capacity limit of the E-mail server.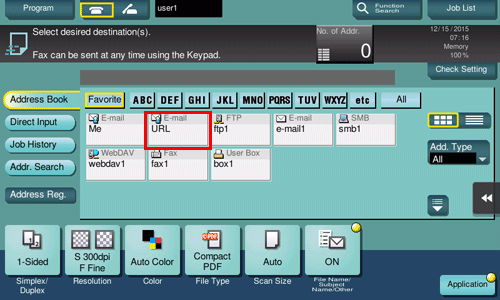
Operations required to use this function (for the administrator)
Register an E-mail address in the user's registration information. Also, check that the Scan to URL function is enabled.
How to configure the setting is explained using Web Connection. For details, refer to Here.
If Active Directory is used as an authentication server, register the user's E-mail address in Active Directory.
Operation flow
Load the original.
Enter user information, and log in to this machine.
For details on how to log in, refer to Here.
Tap [Scan/Fax].
Select [URL].
When [URL] is selected as the sending destination, you cannot specify another destination simultaneously.
Configure Scan option settings as necessary.
Press the Start key.
Tap [Check Setting] before sending, and check the destination and settings as necessary.
To redo operations for specifying destinations or option settings, press the Reset key.
Transmission begins.
If you press the Stop key while scanning an original, the scanning process stops, and a list of stopped jobs appears. To cancel scanning of the original, delete inactive jobs from the list.

To send to the shared folder on your computer (SMB Send)
To send to the shared folder on the server in the Active Directory authentication environment (Scan to Home)
Sending to Your Computer (Scan to Home)
Scan to Home
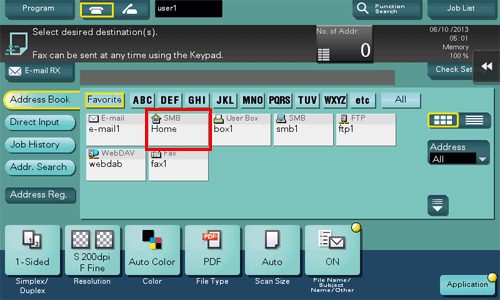
If you log in to this machine while user authentication is installed on this machine and Active Directory is used as an authentication server, the [Home] key appears in the [Address Book] screen.
To send scanned original data to a shared folder on the server or your computer, select the [Home] key.
Operations required to use this function (for the administrator)
Enable the Scan to Home function.
How to configure the setting is explained using Web Connection. For details, refer to Here.
Operation flow
Load the original.
Enter user information, and log in to this machine.
For details on how to log in, refer to Here.
Tap [Scan/Fax].
Select [Home].
Configure Scan option settings as necessary.
Press the Start key.
Tap [Check Setting] before sending, and check the destination and settings as necessary.
To redo operations for specifying destinations or option settings, press the Reset key.
Transmission begins.
If you press the Stop key while scanning an original, the scanning process stops, and a list of stopped jobs appears. To cancel scanning of the original, delete inactive jobs from the list.
To save on USB memory
Save Scanned Data on a USB Memory
Preparation required to use this function (for the administrator)
Enable to save files on a USB memory.
A file storage on a USB memory is disabled by default in order to prevent a data theft.
For system settings for USB memory operation, refer to Here.
Operation flow
Load the original.
Insert a USB memory device into the USB port of the machine.
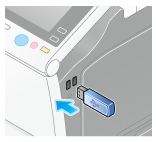

When this machine is starting up, do not insert or remove the USB memory device to/from the USB port.
Tap [Save a document to External Memory.].
You can also save files by selecting the User Box operation mode and by tapping [System] - [External Memory] - [Save].

Set file save options if necessary.
For detailed optional settings, refer to Here.
Press the Start key.
The file is saved.

When the operation is complete, remove the USB memory device from the port of this machine.
When you use files stored on the USB memory on the PC, just insert the USB memory device into a USB port of the PC.