Q8. Can I send scanned data with page numbers and a time stamp?
Operation procedure
Load the original.
Tap [Scan/Fax] and select a destination.
To add the date and time, tap [Application] and select [Date/Time].
Tap [ON], set values for [Date Format], [Time Format] and [Pages], then tap [OK].

To add page numbers, tap [Application] and select [Page Number].
Configure [Page Number Type] and [Starting Page Number], then tap [OK].
 If you have selected [Chapter Page] for [Page Number Type], specify the chapter number to start printing in [Starting Chapter Number]. For details, refer to [Adding a Stamp/Page Number (Application Settings)] .
To add a stamp, tap [Application] and select [Stamp].
Tap [ON], set values for [Stamp Imprint] and [Pages], then tap [OK].
When the date and time, page numbers or stamp cannot be easily read with the initial settings, tap [Text Details] in each of the [Date/Time], [Page Number] and [Stamp] setting screens to set the text size and font as well as the text color.If the date and time, page numbers or stamp are overlapped with the text of the original, tap [Print Position] in each of the [Date/Time], [Page Number] and [Stamp] setting screens to set the printing positions.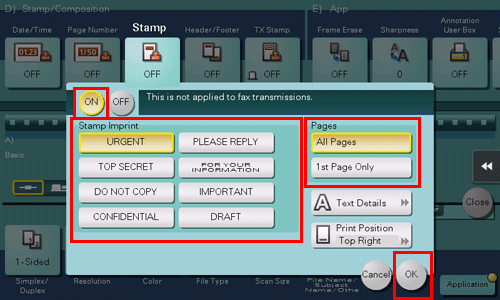
Press the Start key to start scanning of the original.