User Box
Q1. Can I rename a file saved in a User Box?
A1. Yes, you can.
Operation procedure
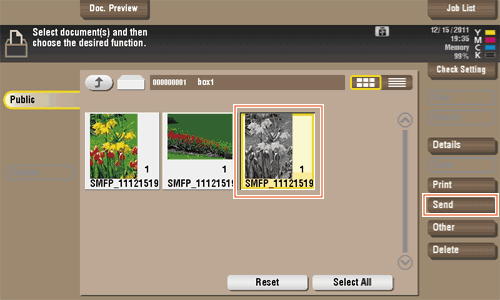
- Tap [Box], select the target User Box, and tap [Open].
- Select a file to rename, tap [Other], then tap [Edit Name].
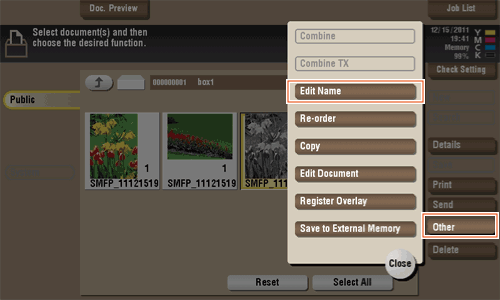
- Enter the name, then tap [OK].
- The name of the file saved in the User Box is used as the file name in file transmission. When renaming a file, it is recommended to do so with considerations to the conditions of the destination server.
Q2. Can I use a file saved in a User Box by changing the settings from those used when saving it?
A2. Yes. You can print a file in a User Box in a different color mode or send it by changing the initial resolution.
Settings you can change vary depending on the operation.
Operation procedure
- Tap [Box], select the target User Box, and tap [Open].
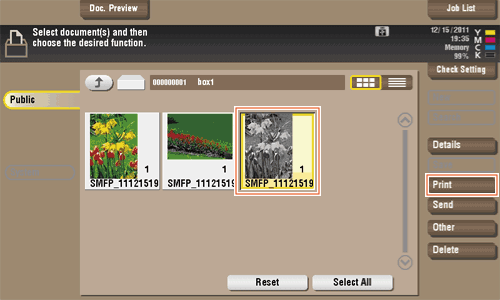
- To print a file, select a file to print and tap [Print].
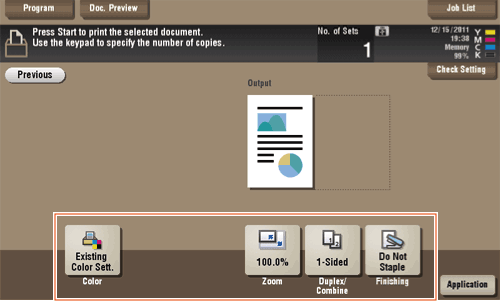
- Change print settings.
- You can change the settings for [Color], [Zoom], [Duplex/Combine] and [Finishing].
- You can change the settings for [Color], [Zoom], [Duplex/Combine] and [Finishing].
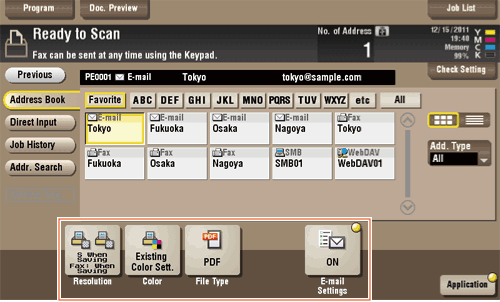
- To send a file, select a file to send, then tap [Send].
- Set the destination and change the settings for the Fax/Scan functions.
- You can change the settings for [Resolution], [Color], [File Type] and [E-mail Settings].
- You can change the settings for [Resolution], [Color], [File Type] and [E-mail Settings].
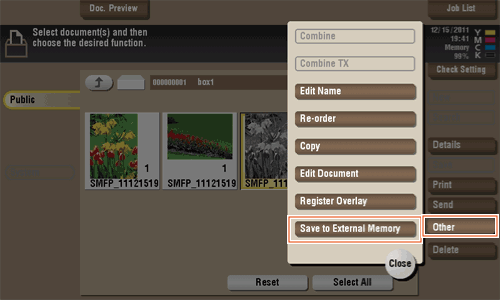
- To save a file in an external memory device, select a file to save, tap [Other], then tap [Save to External Memory].
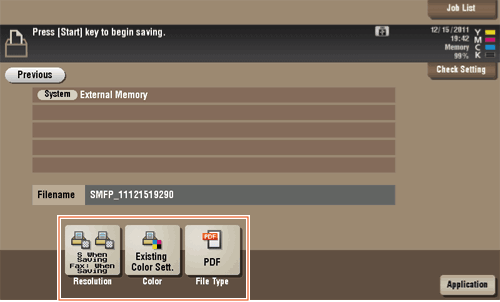
- Change the settings for saving a file.
- You can change the settings for [Resolution], [Color] and [File Type].
- You can change the settings for [Resolution], [Color] and [File Type].
- Press Start to start printing/sending/saving the file.
Q3. Can I save a 2-sided document in a User Box?
A3. Yes, you can. Select [2-Sided] for scanning the document.
Operation procedure
- Load the 2-sided original.
- Tap [Box], select the User Box to save data to, then tap [Save].
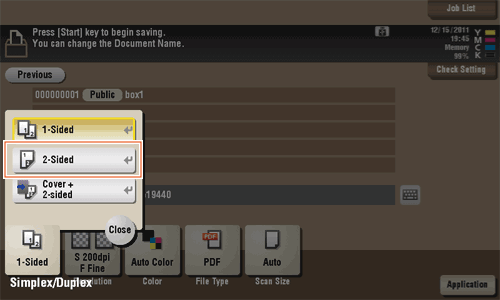
- Tap [Simplex/Duplex], then tap [2-Sided].
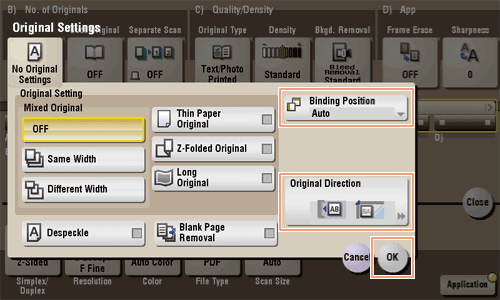
- Tap [Application], then select [Original Settings].
- Set [Binding Position] and [Original Direction] according to the loaded 2-sided original, then tap [OK].
- Press Start to save the data of the original in the User Box.
- Perform 2-sided printing for the data of the 2-sided original saved in the User Box to output a printed matter just like the original.
Q4. Can a file in a User Box be deleted automatically?
A4. Yes. You can set the file retention period for each User Box. After the retention period has elapsed, files are automatically deleted.
Tips
- You can also set the file retention period for a User Box when registering the User Box.
How to set
- Tap [Utility], then select [One-Touch/User Box Reg.].
- Select [Create User Box] - [Public/Personal User Box].
- Select a User Box subject to the setting of the file retention period, then tap [New].
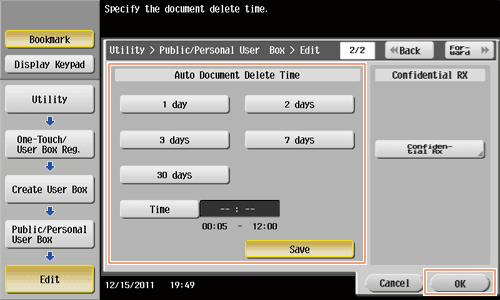
- Tap [Forward], select or set the period, and tap [OK].
Q5. Can I select multiple files from a User Box and print or send them at a time?
A5. You can combine multiple files and print or send them as a job.
Operation procedure
- Tap [Box], select a User Box, then tap [Open].
- Select multiple files to print or send.
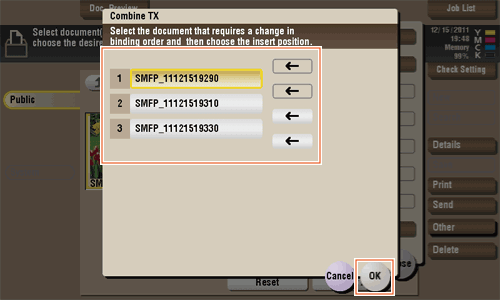
- To print, tap [Other] and then [Combine]. To send, tap [Other] and then [Combine TX].
- Change the order of files to print or send as necessary, then tap [OK].
- When printing multiple files in a User Box, you cannot change the settings for finishing.
- When printing multiple files in a User Box, you cannot change the settings for finishing.
- Set print settings or the destination, then press Start.
- When sending multiple files saved in a User Box, fax, Internet fax or IP address fax is not available.
Q6. Can I print a saved file by changing its finishing?
A6. Yes, you can change the finishing upon printing.
Different finishing types are available for different options installed on this machine.
Staple
Stapling is enabled to bind at a corner or at two positions. This method is useful for printing handout material among other things.

Tips
- The Finisher is required to use the Staple function.
Punch
Punching is enabled for filing holes.

Tips
- To use the Punch function:
- The Finisher FS-534 and Punch Kit PK-520 or the Finisher FS-533 and Punch Kit PK-519 are required.
- The Finisher FS-535 and Punch Kit PK-521 or the Z Folding Unit ZU-606 are required (only for bizhub C554).
Center Staple & Fold
Center stapling is enabled for booklet-like finish.
Tips
- To use the Center Staple & Fold function:
- The Finisher FS-534 and Saddle Stitcher SD-511 are required.
- The Finisher FS-535 and Saddle Stitcher SD-512 are required (only for bizhub C554).
Fold
Half-folding, tri-folding, or Z-folding is enabled. This function is useful for direct mail and information notes.

Tips
- To use the Half-Fold or Tri-Fold function:
- The Finisher FS-534 and Saddle Stitcher SD-511 are required.
- The Finisher FS-535 and Saddle Stitcher SD-512 are required (only for bizhub C554).
- To use the Z-Fold function:
- The Finisher FS-535 and Z Folding Unit ZU-606 are required (only for bizhub C554).
Operation procedure
- Tap [Box], select a User Box, then tap [Open].
- Select a file to print, then tap [Print].
- When more than one file is selected, you cannot change the finishing.
- Tap [Finishing] and configure the respective items for finishing.
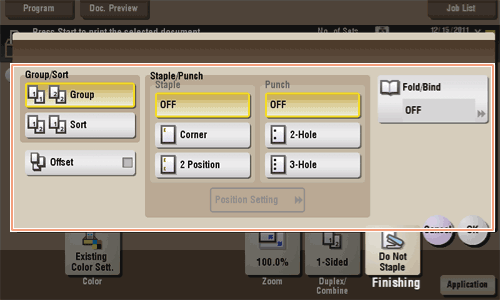
Settings Description [Group/Sort][Group]Enables outputs of more than one copy for each page.[Sort]Enables outputs of more than one copy for each set.[Offset]When the check box is selected, this setting ejects paper by offsetting each lot of printouts for obvious isolation.[Staple/Punch][Staple]Specify how to staple[Punch]Specify whether or not to create punch holes.The number of punched holes varies depending on the country you are in.[Position Setting]Select a desired staple or hole-punch position.Specify [Auto], and the staple and punch positions are automatically set according to the loading direction of the original.[Fold/Bind]Configure settings for folding or center-binding of paper. - Tap [OK].
- Press Start to start printing the files.
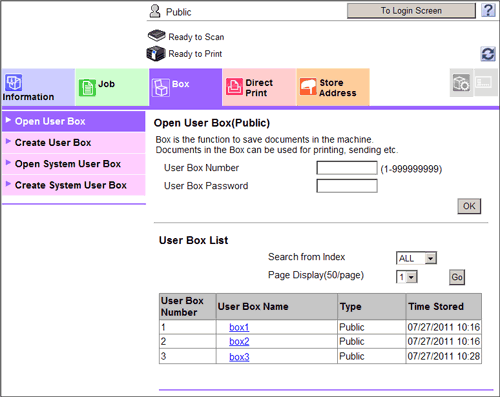
Q7. Can I operate the User Box functions from my computer?
A7. Yes. Use Web Connection to enable operation of files in a User Box without leaving your desk.
Operation procedure
- Start the Web browser.
- Enter the IP address of the machine in the URL field, and then press [Enter].
- You can check the IP address from [Utility] - [Device Information].
- When user authentication or account tracking is enabled, fill in the [User Name] and [Password], then click [Login].
- Click the [Box] tab.
- Complete the following steps:
- Create/edit/delete a User Box.
- Print/send a file in a User Box.
- Download a file in a User Box to your computer.
- Copy/move/delete a file in a User Box.