User's Guide

Transmission Flow
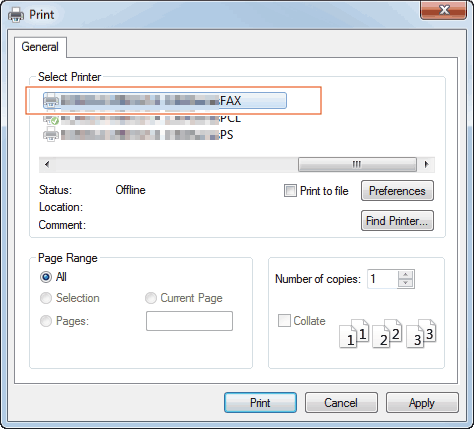
- Open document data using the application software. From the [File] menu, select [Print].
- Check that the fax driver of this machine is selected in [Printer Name] (or [Select Printer]).
- The [Print] dialog box differs depending on the application.
- The [Print] dialog box differs depending on the application.
- Set a range of pages to send.
- Click the [Properties] (or [Preferences]) and change the print settings of fax driver if necessary.
- For details on the print settings, refer to Here.
- The print settings you have changed here return to the default values when you exit the application software. For details how to change the default print settings, refer to Here.
- The fax driver provides Favorite Setting to enable quick selection of frequently used print settings. For details, refer to Here.
- Click [Print].
The [FAX Transmission Popup] screen opens.
- Set the recipient name and fax number.
- When you select a recipient from the Address Book of this machine, click [Add from Address Book...]. For details, refer to Here.
- When you select a recipient from the Phone Book of the PC, click [Add From Phone Book...]. Refer to Here.
- Set the fax transmission function and add a cover page to the fax if necessary. For details, refer to Here.
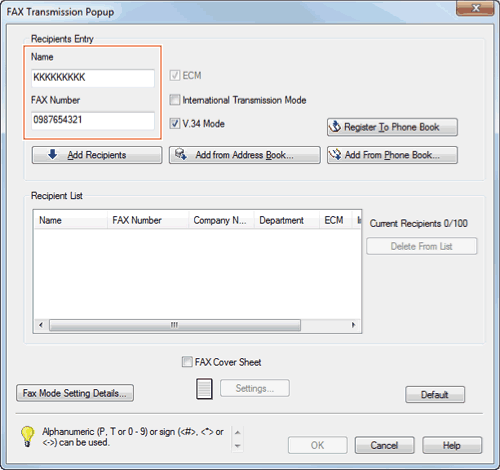
- Click [Add Recipients].
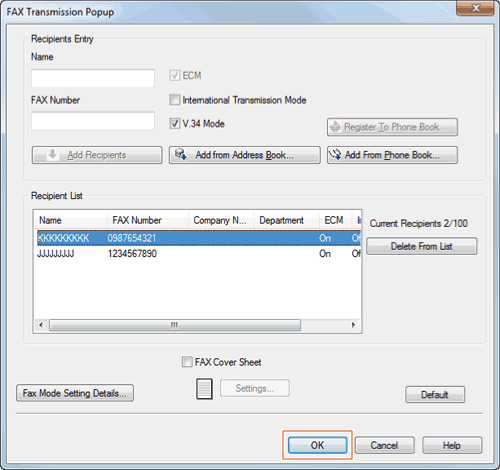
- When you send a fax to multiple destinations, repeat Steps 6 and 7. You can register up to 100 recipients.
- To cancel a recipient, select it, then click [Delete From List].
- Click [OK].
The document data are faxed via the machine.