
Scanner: Using Scan to FTP on Mac OS X 10.7 FTP Server
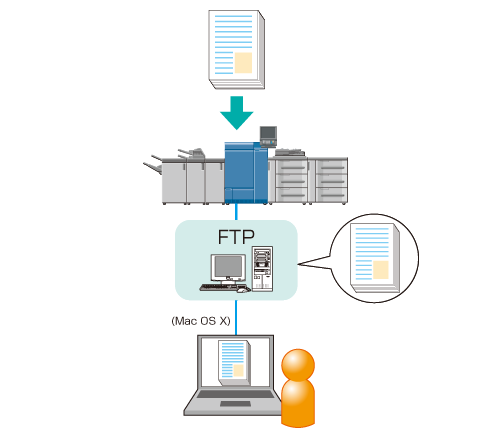
Send data scanned from the machine's ADF or the original glass (scan data) to the FTP server (Macintosh).
From a computer connected to the network/Internet, you can access the FTP server and download a large volume of scan data even if you are in a remote location from the machine.
A large volume of scan data (more than 10 MB) can be sent more securely than by E-mail.
• Examples Introduced in This Section
Using the Scan to FTP function, send the scan data (PDF) from the machine to the Macintosh computer registered as a FTP server.
•Intended Environment
Network | The machine and the FTP server (Macintosh) are connected to the network. |
FTP server OS | Mac OS X 10.7 Lion or later |
Image Controller | Image Controller IC-602 |
* The sample screen may be different from the actual display depending on your system environment and application version/revision.
•Work Flow
STEP 1: Checking the FTP server setting
STEP 2: Registering the FTP server to the machine
•Register the destination information on the touch panel of the main body.
STEP 3: Sending the scan data to the FTP server
•Precautions
The FTP server setting differs depending on your configuration and environment.
Checking the FTP server setting
The following information is necessary to register the destination FTP server to the machine.
Ask the network administrator and write down the information.
Item | Description |
|---|---|
[Host Address] | Name or IP address of the FTP server |
[File Path] | Directory in the FTP server |
[Login Name] | FTP server login name |
[Password] | Corresponding password to the FTP login name |
Registering the FTP server to the machine
Register the destination FTP server to the machine on the touch panel of the main body.
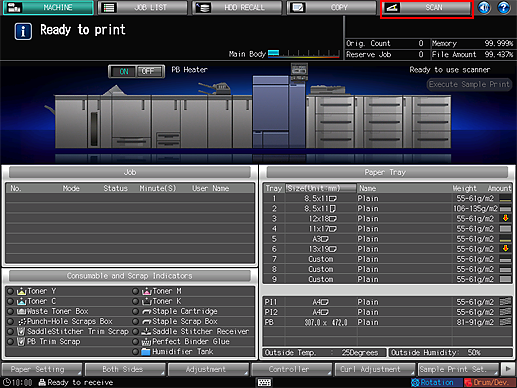
On the touch panel of the main body, press [SCAN].
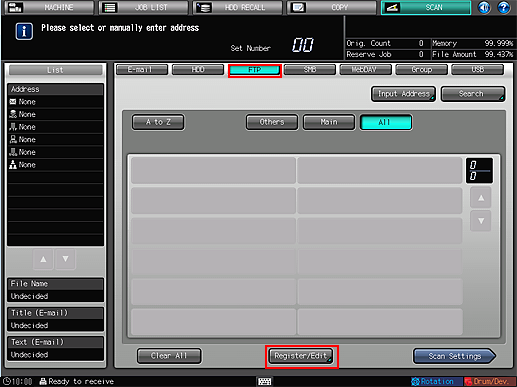
Press [FTP] and press [Register/Edit].
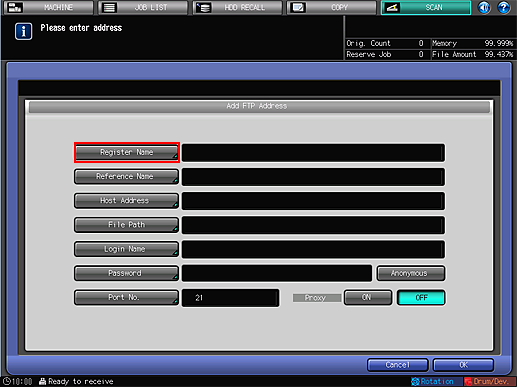
Press [Add].
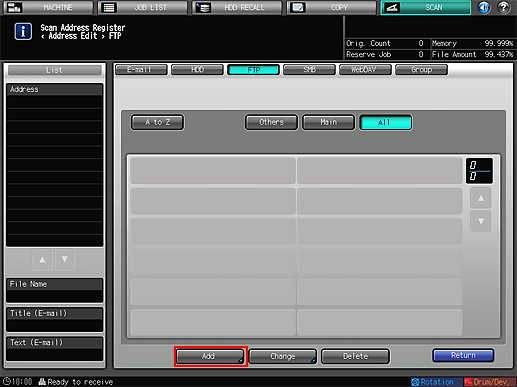
The [Add FTP Address] screen is displayed.
Press [Register Name].
Enter the registration name and press [OK].
For details about how to enter, refer to Inputting Characters.
Example: "sample-ftp" is entered as the registration name.
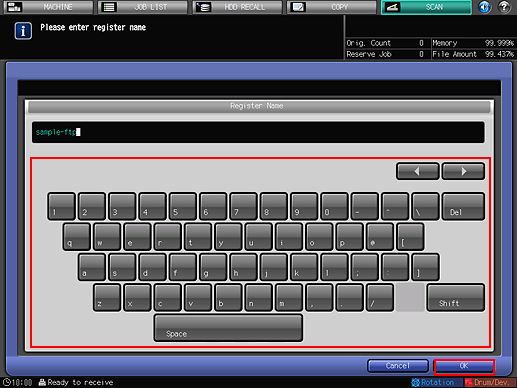
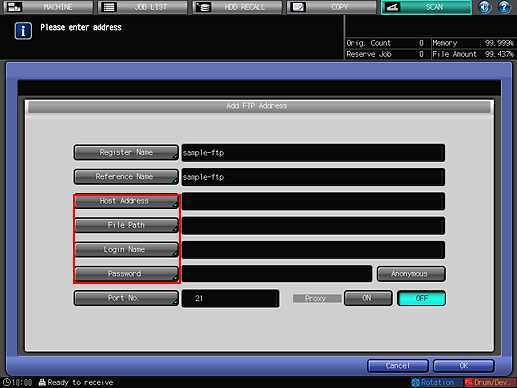
[Register Name] and [Reference Name] are entered.
Press the [Host Address], [File Path], [Login Name] and [Password] items and enter the settings in the same manner.
Enter the information that you wrote down in "Checking the FTP server setting."
The items must be entered.
The port number is normally 21. Do not change it if it is not changed on the FTP server.
To use a proxy server when sending to the FTP server, set [Proxy] to [ON]. In this case, make the Proxy server settings on [Utility Menu] beforehand. [Network Setting] - [Administrator Setting] - [Network Setting] - [NIC Setting] - FTP Setting) For details about [Network Setting], refer to NIC Setting: Setting the Machine Network Information.
To send the scan data to Anonymous FTP (FTP that enables unspecified multiple users to share files), press [Anonymous]. This sets the login name to [anonymous].
After entering the items, press [OK].
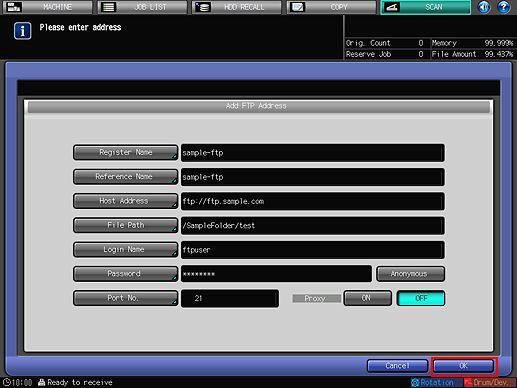
Check that the FTP server has been registered.
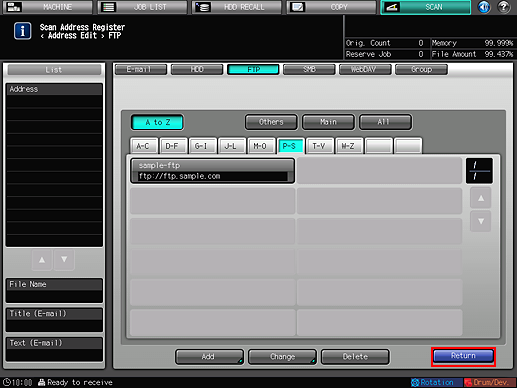
Press [Return].
Sending the scan data to the FTP server
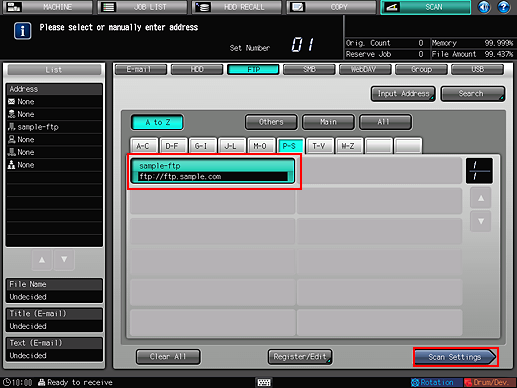
Send the scan data to the FTP server from the machine.
Select the FTP address you registered and press [Scan Settings].
After pressing [SCAN], press [FTP] to display this screen.
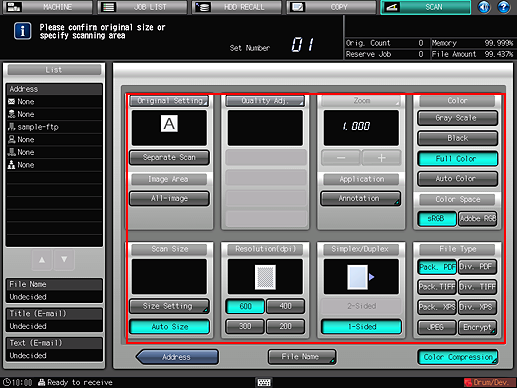
Set the image quality, resolution and other items.
For details about each item on the screen, refer to Scan Settings Screen.
Set the original and press Start on the control panel.
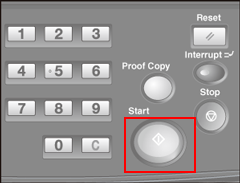
The original is scanned and sent to the FTP server.