Organize Files in a User Box
Operation flow
Tap [User Box].

Select the desired User Box, then tap [Open].
 This example uses the Public User Box for explanatory purposes. To use a Personal User Box or a Group User Box, tap [Personal] or [Group] and select the desired box.If the box is password protected, tap [Open] and enter the password.You can also open the desired User Box by tapping it twice.
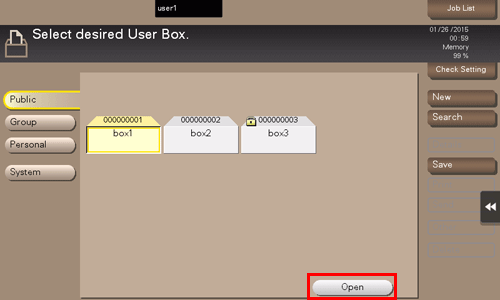
Select a file and set the desired operation.
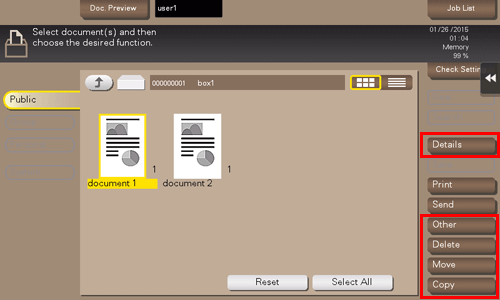 Long-tap the file to display the menu icon that is controllable, and the drag and drop operation becomes possible.
Delete a file
Select a file, then tap [Delete]. The file is deleted. You can also long-tap the target file to display the menu icon, then drag and drop it to  to get the same result.
You can select multiple files and delete them simultaneously. Check the file details, then tap [Yes].

Rename a file
Select a file, then tap [Other] - [Edit Name]. Now you can rename the file. Enter a new name from the Touch Panel.
 Tips
Tips Before renaming a file, check the destination server conditions and others.
- You can also rename a file while it is being transmitted.
Move file to another User Box
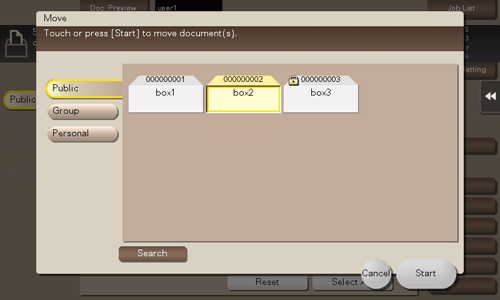
Select a file, then tap [Move]. Now you can move the file to another User Box. The destination can be a Public User Box, a Personal User Box, or a Group User Box. Select a destination User Box, then tap [Start] or press the Start key.
 Tips
Tips- You do not need to enter the password even if it is specified for the destination User Box.
Copy file to another User Box
Select a file, then tap [Copy]. Now you can copy the file to another User Box. Select the destination Public, Personal or Group User Box. Select a destination User Box, then tap [Start] or press the Start key.
 Tips
Tips- You do not need to enter the password even if it is specified for the destination User Box.
Edit a page
Select a file, then tap [Other] - [Edit Document]. Now you can select page of the file to delete or rotate.
You can also long-tap the target file to display the menu icon, then drag and drop it to  to get the same result.
Select a page, and set the edit options.

Function
Description
[Odd Page]
Selects odd-numbered pages only.
[Even Page]
Selects even-numbered pages only.
[All Pages]
Selects all pages.
[Delete Page]
Deletes a selected page or pages. For example, you can delete blank pages to reduce the amount of data.
You can also long-tap the target page to display the menu icon, then drag and drop it to
to get the same result.[Page Extraction]
Extracts a selected page. When there are too many pages to be deleted, selecting the page only you need to reserve eliminates the need for deleting after selecting many pages.
You can also long-tap the target page to display the menu icon, then drag and drop it to
 to get the same result.
[Rotate Page]
Rotates a selected page 90 degrees or 180 degrees.
When a 2-sided original is scanned, the top and bottom may be reversed page by page or the orientation may be different from the original. In this case, you can rotate and correct the orientation of each page.
You can also long-tap the selected page to display the menu icon, then drag and drop it to
 to get the same result.
[Move Page]
Reorders pages by moving some of them.
Only one page can be moved at a time. Repeat this operation to move two or more pages.
You can also drag and drop the target page to the desired place to sort pages.
- [Preview/Specify by Input]: If a large number of pages are stored, use this option to set the destination to move pages by entering numeric values. Enter a destination page number, and specify to insert the page immediately before or after the destination.
[Preview/Set Range]
Sets a range of pages and displays them as preview image. You can also change the display size.
Tap [Start].
To save your changes, tap [Yes].
Your settings are saved.
Save file in a USB memory
Insert a USB memory device into the USB port of this machine, select a file, then tap [Other] - [Save to External Memory]. Now you can save the file on the USB memory.
 A file storage on a USB memory must first be enabled with the administrator privileges. For details, refer to [Save Document] .
Files of some USB memory devices may not be recognized correctly. For support of USB memory devices, refer to [Supported USB Memory Devices] .
Select a file to save on the USB memory device, then tap [Other] - [Save to External Memory].
You can also long-tap the target file to display the menu icon, then drag and drop it to  to get the same result.
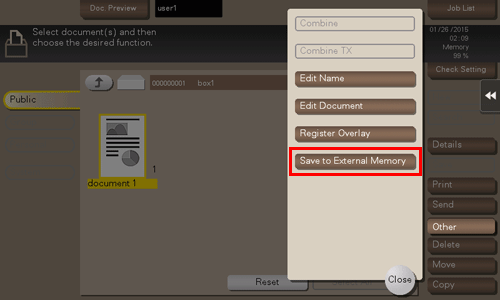
Set file save options if necessary.
Options
Reference
Resolution
[Specifying the resolution to scan the original (Resolution)]
Color
File Type
[Specifying the file type used to save the scanned original data (File Type)]
Press the Start key.
The file is saved on the USB memory device.

When the operation is complete, remove the USB memory device from the port of this machine.
Store file as an overlay image
Select a file, then tap [Other] - [Register Overlay]. Now you can store a file as an overlay image.
Once registered, you can compose an overlay image on the original during copy or printing from the PC. Also, you can compose an overlay image onto a User Box file during file printing.
You can register up to 100 overlay images.
To use this function, the optional Extension Memory is required. bizhub C658/C558/C458 provides Extension Memory as standard.
To register an overlay image, select an unregistered key and tap [New].
To register an overlay image by overwriting an existing one, select the registered key and tap [Overwrite].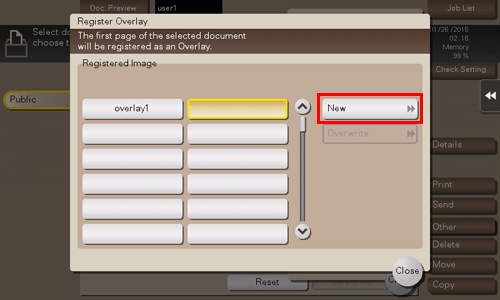
Enter a registration name, then tap [OK].
If necessary, change image settings, then tap [Start].
Tips- If a file consists of multiple pages, the first page is registered as an overlay image.
- Once registered, you can compose an overlay image on the original and copy it by selecting [Application] in Copy mode and [Registered Overlay]. Also, when you print a file from a User Box, you can compose an overlay image to the file and print it by selecting [Application] - [Registered Overlay].
Re-create a file in an SMB sharing
This function is available when files in the Public User Box are shared on the network using the Share SMB File function.
Select a file, then tap [Other] - [Save Document to MFP Shared Folder]. Now you can register files saved in the Public User Box in an SMB sharing folder.
Use this function to convert a document saved in a User Box using the scan function or User Box function into a general format, or to re-register a file deleted from a shared folder via a computer to the shared folder.
Check the file information
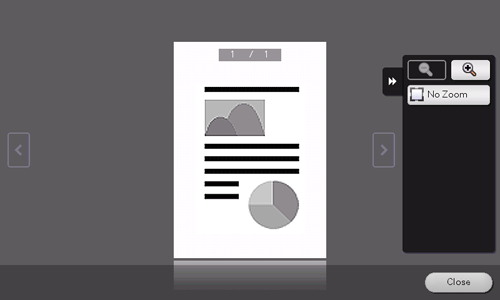
Select a file, then tap [Details] to check the detailed file information.
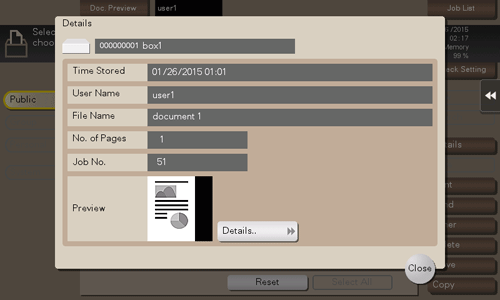
You can tap [Details..] or a thumbnail image to preview the file image.
If you tap the tab key on the right of the screen, you can display or hide the Setting Key. The Setting Key allows you to enlarge or reduce a preview image.