Print File in a User Box
Print (basic operation flow)
Tap [User Box].

Select the desired User Box, then tap [Open].
 This example uses the Public User Box for explanatory purposes. To use a Personal User Box or a Group User Box, tap [Personal] or [Group] and select the desired box.If the box is password protected, tap [Open] and enter the password.You can also open the desired User Box by tapping it twice.
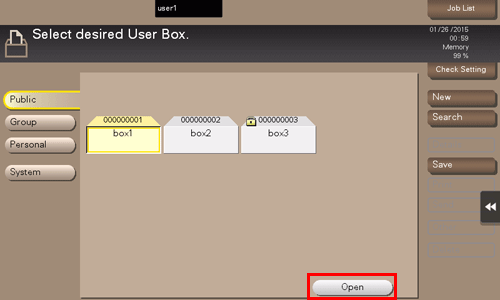
Select a file to print, then tap [Print].
You can also long-tap the target file to display the menu icon, then drag and drop it to  to get the same result.
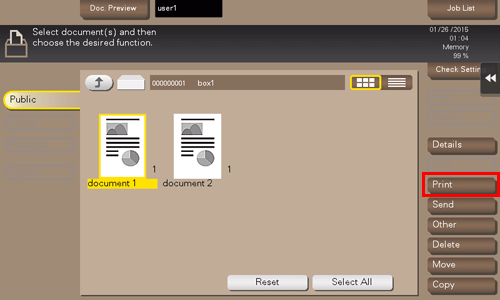
Set print options if necessary.
If an output image cannot be displayed, [Preview on Screen] appears. To check an output image, tap [Preview on Screen], then confirm the target output image on the preview window.For details on option settings, refer to [Optional Settings before Printing] .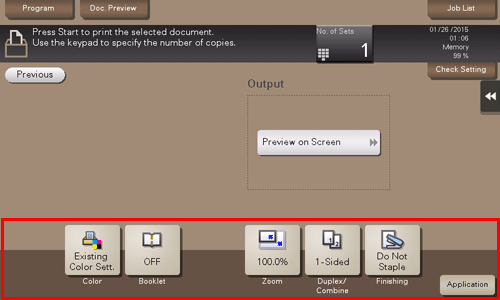
If necessary, enter the number of copies using the Keypad.
Tapping [No. of Sets] displays the Keypad.Pressing the 10 Keypad key (default: Register key 3) displays the Keypad on the Touch Panel, enabling you to enter numeric values.To change the number of copies, tap [C] (Clear).Press the Start key.
Printing starts.

 Related setting (for the administrator)
 You can specify to hold or clear a file from the box after file printing or sending (Default: [Yes]). Also, you can prompt the user to hold or not hold a file in the box after it has been printed or sent in the delete confirmation screen. For details, refer to [Document Hold Setting] .
Print multiple files at the same time (Combine)
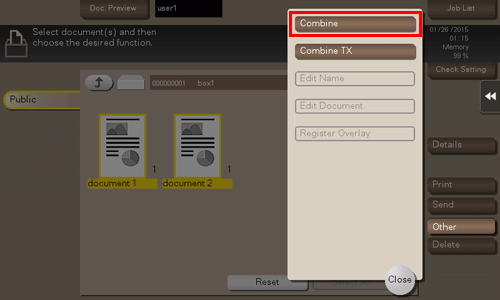
When printing multiple files at the same time, you can combine those files and handle them as a single job. This is called the Combine printing.
Using this function, you can reduce the print time and improve the efficiency as you can skip to repeat printing files one by one. You can collectively print up to 10 files.
Tap [User Box].
Select the desired User Box, then tap [Open].
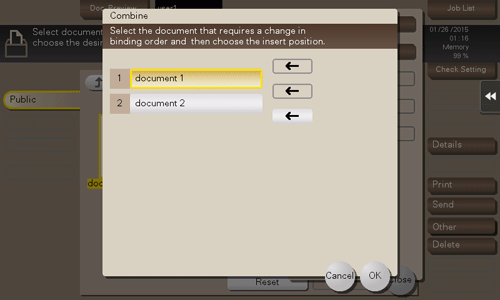
This example uses the Public User Box for explanatory purposes. To use a Personal User Box or a Group User Box, tap [Personal] or [Group] and select the desired box.If the box is password protected, tap [Open] and enter the password.You can also open the desired User Box by tapping it twice.Select files for Combine printing, then tap [Other] - [Combine].
Change the order of printing files (Combine sequence) if necessary, then tap [OK].
 If you print a file containing a watermark first, the watermark will also be printed on the second and subsequent files.
Set print options if necessary.
If an output image cannot be displayed, [Preview on Screen] appears. To check an output image, tap [Preview on Screen], then confirm the target output image on the preview window.For detailed optional settings, refer to [Optional Settings before Printing] .If necessary, enter the number of copies using the Keypad.
Tapping [No. of Sets] displays the Keypad.Pressing the 10 Keypad key (default: Register key 3) displays the Keypad on the Touch Panel, enabling you to enter numeric values.To change the number of copies, tap [C] (Clear).Press the Start key.
Printing starts.
Related setting (for the administrator)- You can specify to hold or clear a file from the box after file printing or sending (Default: [Yes]). Also, you can prompt the user to hold or not hold a file in the box after it has been printed or sent in the delete confirmation screen. For details, refer to [Document Hold Setting] .