
Printing on the Tabs of Index Paper
This section describes how to print text only on the tabs of five sheets of A4 (8-1/2 e 11) index paper.
After configuring the print settings on your computer, load the index paper into the machine and start printing.

1
Prepare five blank pages of original data.
2
Open the file in the application, and click [File]. Then click [Print] from the menu.
3
Select this machine from the printer list, and click [Printer properties].
4
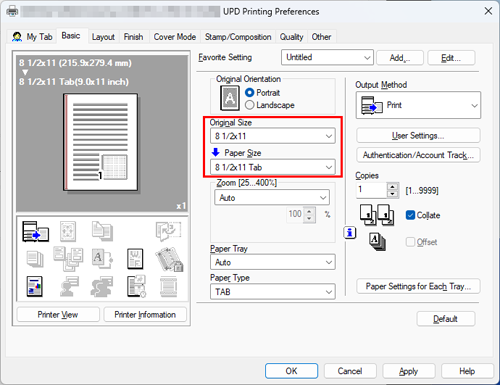
From [Original Size] in the [Basic] tab, select [A4] ([8 1/2x11]), then select [A4 Tab] ([8 1/2x11 Tab]) from [Paper Size].
5
A setting change confirmation screen is displayed, so click [Yes].
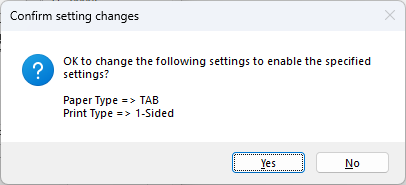
[Paper Type] is changed to [TAB].
[Print Type] is changed to [1-Sided].
6
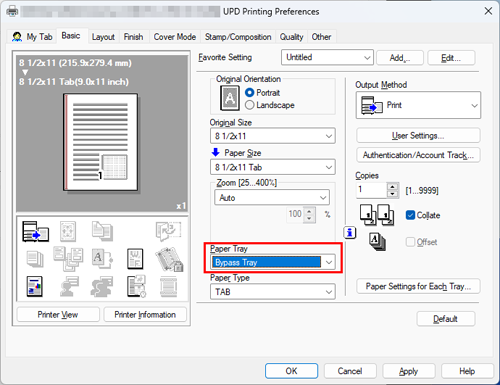
Select [Bypass Tray] from [Paper Tray].
7
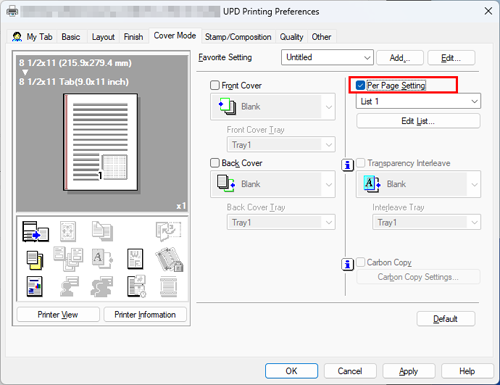
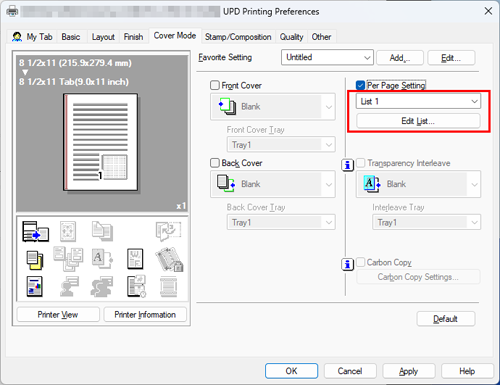
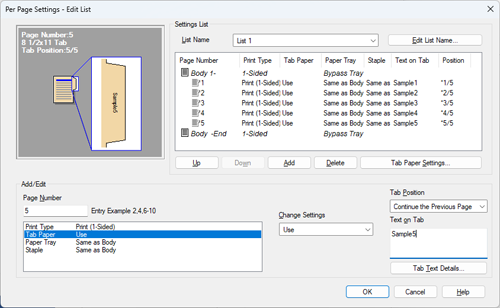
Select the [Per Page Setting] check box in the [Cover Mode] tab.
8
Select a list number and click [Edit List...].
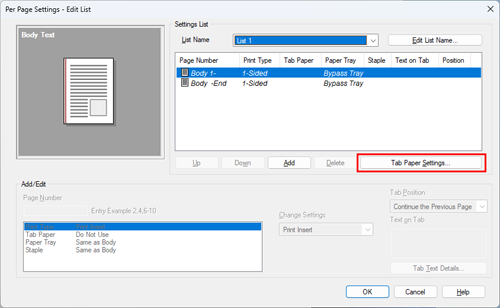
9
Click [Tab Paper Settings...].
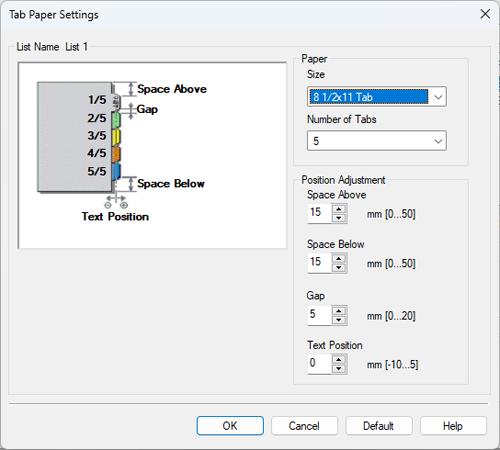
10
Change the numbers to match the size of index paper you want to use, then click [OK].
11
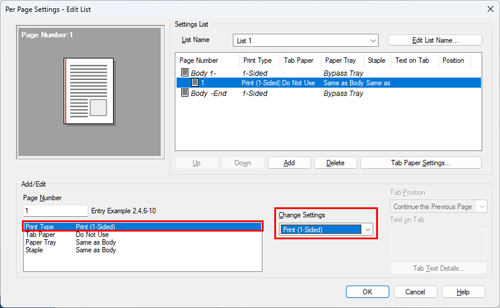
Click [Add], and enter [1] in [Page Number].
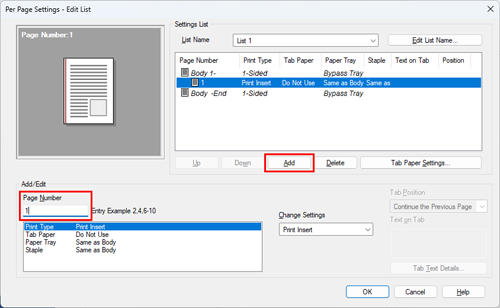
For page 2, enter [2]. Enter the number to match the page you want to add to the list.
12
Select [Print Type], and also select [Print (1-Sided)] from [Change Settings].
13
Select [Tab Paper], and also select [Use] from [Change Settings].
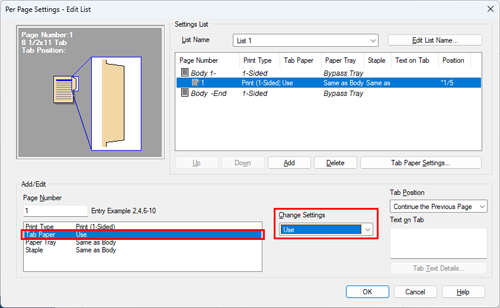
Check that [Tab Position] is set to [Continue the Previous Page].
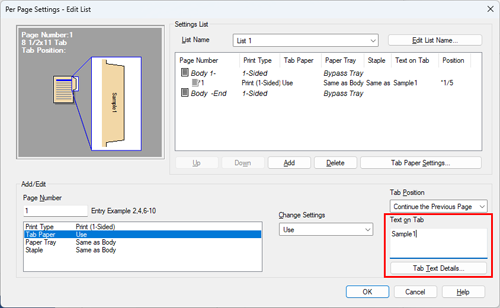
14
Enter the text you want to print in [Text on Tab], and click [Tab Text Details...].
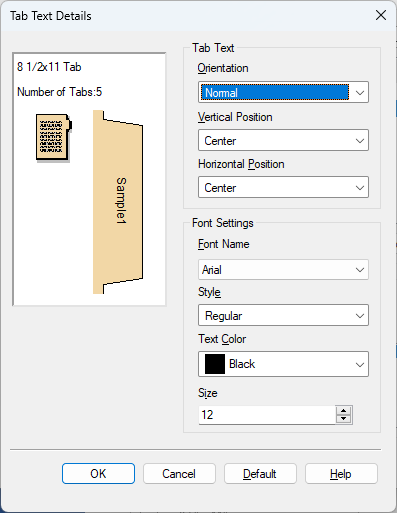
15
Change the text orientation, size, etc. as necessary, and click [OK].
16
Repeat steps 10 to 14 until you have set up page 5, and click [OK].
17
Click [OK].
18
Execute printing.
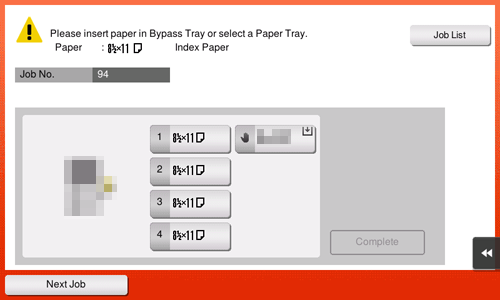
Perform the following operations on this machine. The following screen is displayed on Control Panel of this machine.
19
Load the index paper into the Bypass Tray.
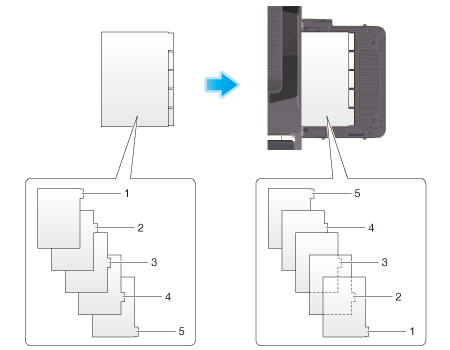
With the print side facing down, align the tab side to the opposite side of this machine.
Check that the index paper is loaded in the correct order from the top.
20
Tapping [Complete] starts printing.
If you cannot tap [Complete], check whether the paper setting of the printer driver matches that of the main unit. In addition, remove index paper loaded in the Bypass Tray, then reload it.
 in the upper-right of a page, it turns into
  and is registered as a bookmark.